| REQUIRED USER ROLE Administrator |
| Connect Learning Available in eLearning format in Connect Learning |
Direct your callers to the right Agent through your IVR. You can create a new IVR from scratch, start with a template like the Basic IVR, modify an existing IVR, and add/remove nodes.
Before you start #
- Plan your IVR. Think about what you want your Customers to experience while in the IVR or the options you want them to hear to get them to the right Agent. The Basic IVR template is a good starting point.
- Get to know the IVR interface.
- Get to know the different types of nodes and related fields.
- Decide if you’re building an Initial IVR and/or Queue IVR experience.
- You can use templates to save you time building specific IVR flows.
- Some nodes can’t be added from the UI (e.g., Data Dips, Variable Match, Customer Phone Number Matchers). Contact Gladly Support if you need a node not listed in the UI. Adding these nodes may be expensive as they require Professional Services assistance.
Start from a blank IVR tree #
Create an IVR tree from scratch or get a head start using the Basic IVR template.
- Click
on the top left corner of the screen.
- Click Settings.
- Under the Channels category, click IVR.
- Click Create New IVR.
- Enter a name for your new IVR (the name must be unique), then click Create.
- Until you link a phone number, the IVR is saved under the Inactive tab.
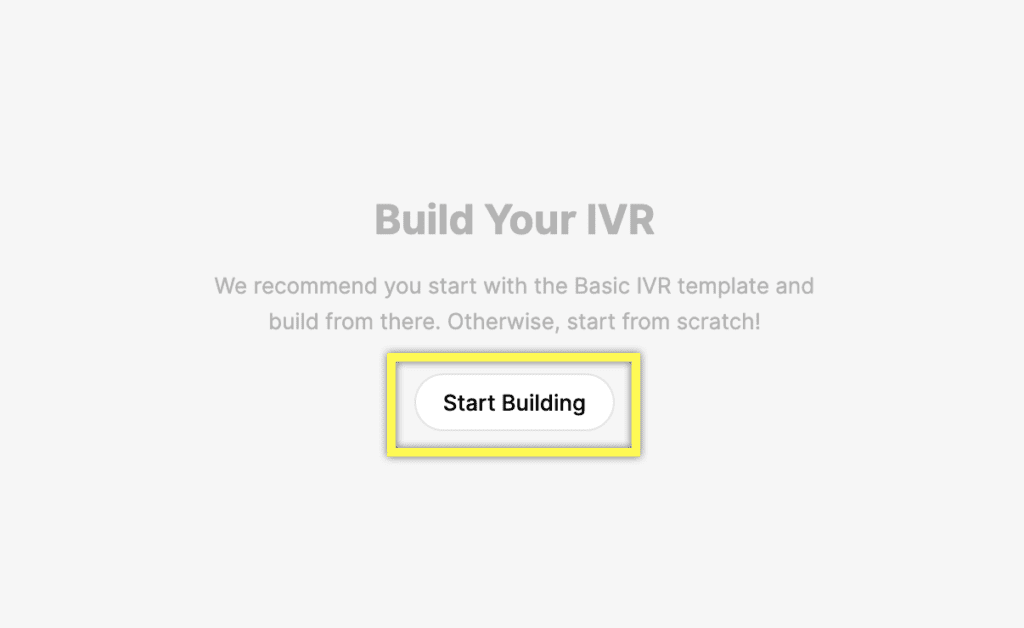
- From the blank IVR page, click Start Building.
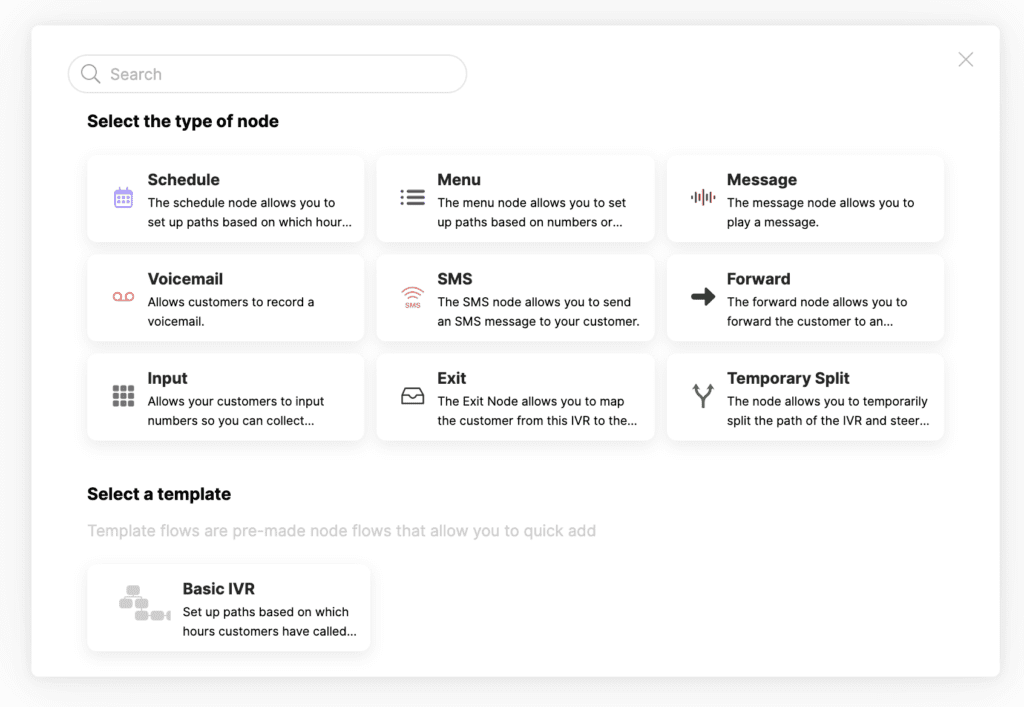
7. You have two options to add nodes to a blank IVR:
- Add specific nodes – Build your own IVR tree by adding specific nodes.
- Start from a template – Use an out-of-the-box template like the Basic IVR that’s pre-configured with nodes to create an IVR experience.
Add a specific node #
The type of node you add depends on how you planned the structure of your IVR.
- Click a node to add from the Select the node type section. For example, if you want the IVR to check your business hours first before passing a call through to another node, then you’ll add a Schedule node.
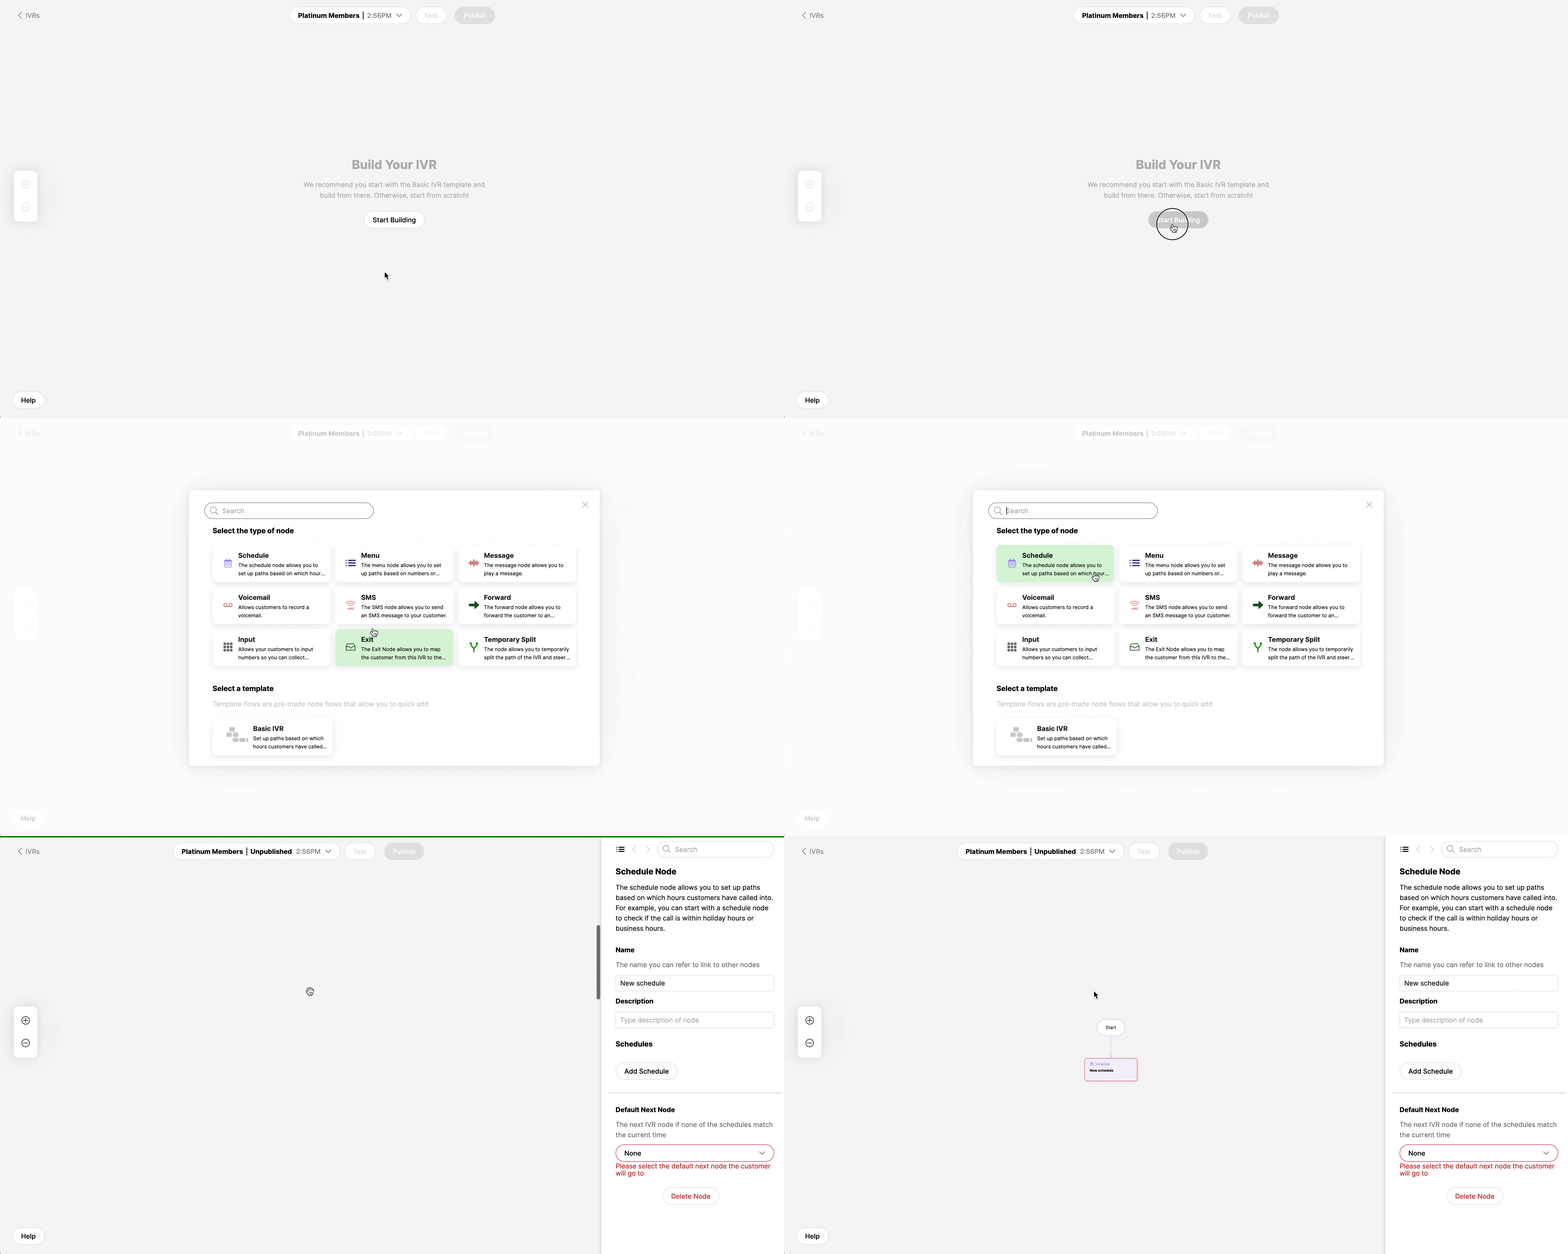
2. Once added, the node appears in the IVR tree, along with the Start node.
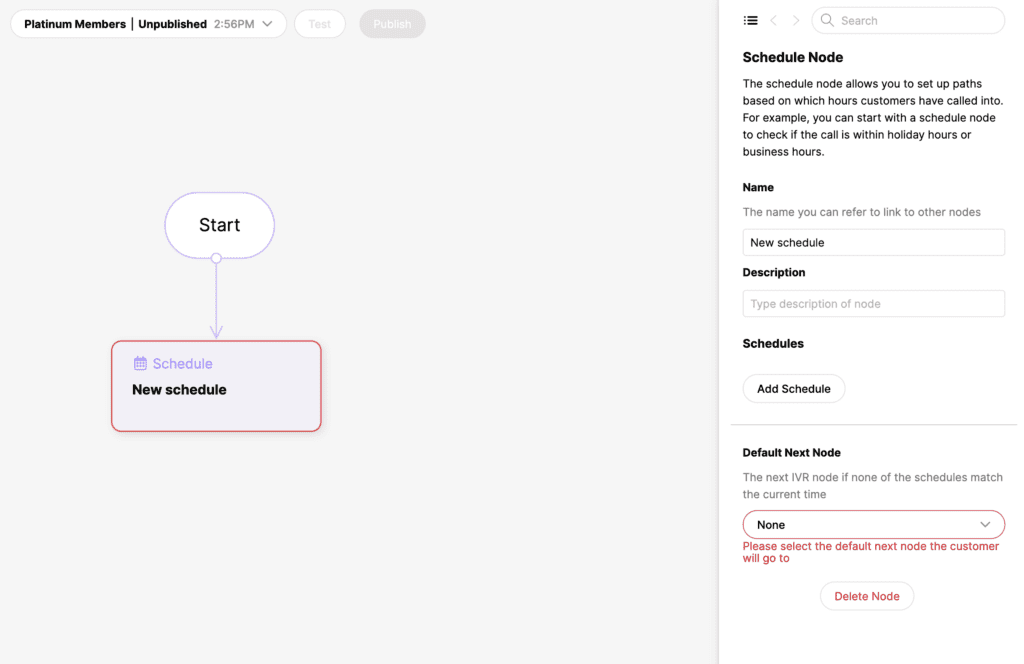
- Node-specific settings appear on the right side. Configure the node to match your requirements.
- Required fields are highlighted in red.
- Review What are Nodes for more information about each node.
3. To add the next node, click the drop-down menu under the Default Next Node section of the selected node, then click Create New Node. From the node selection screen, click the next node you want to add. It’s automatically added to the IVR tree and linked to the first node.
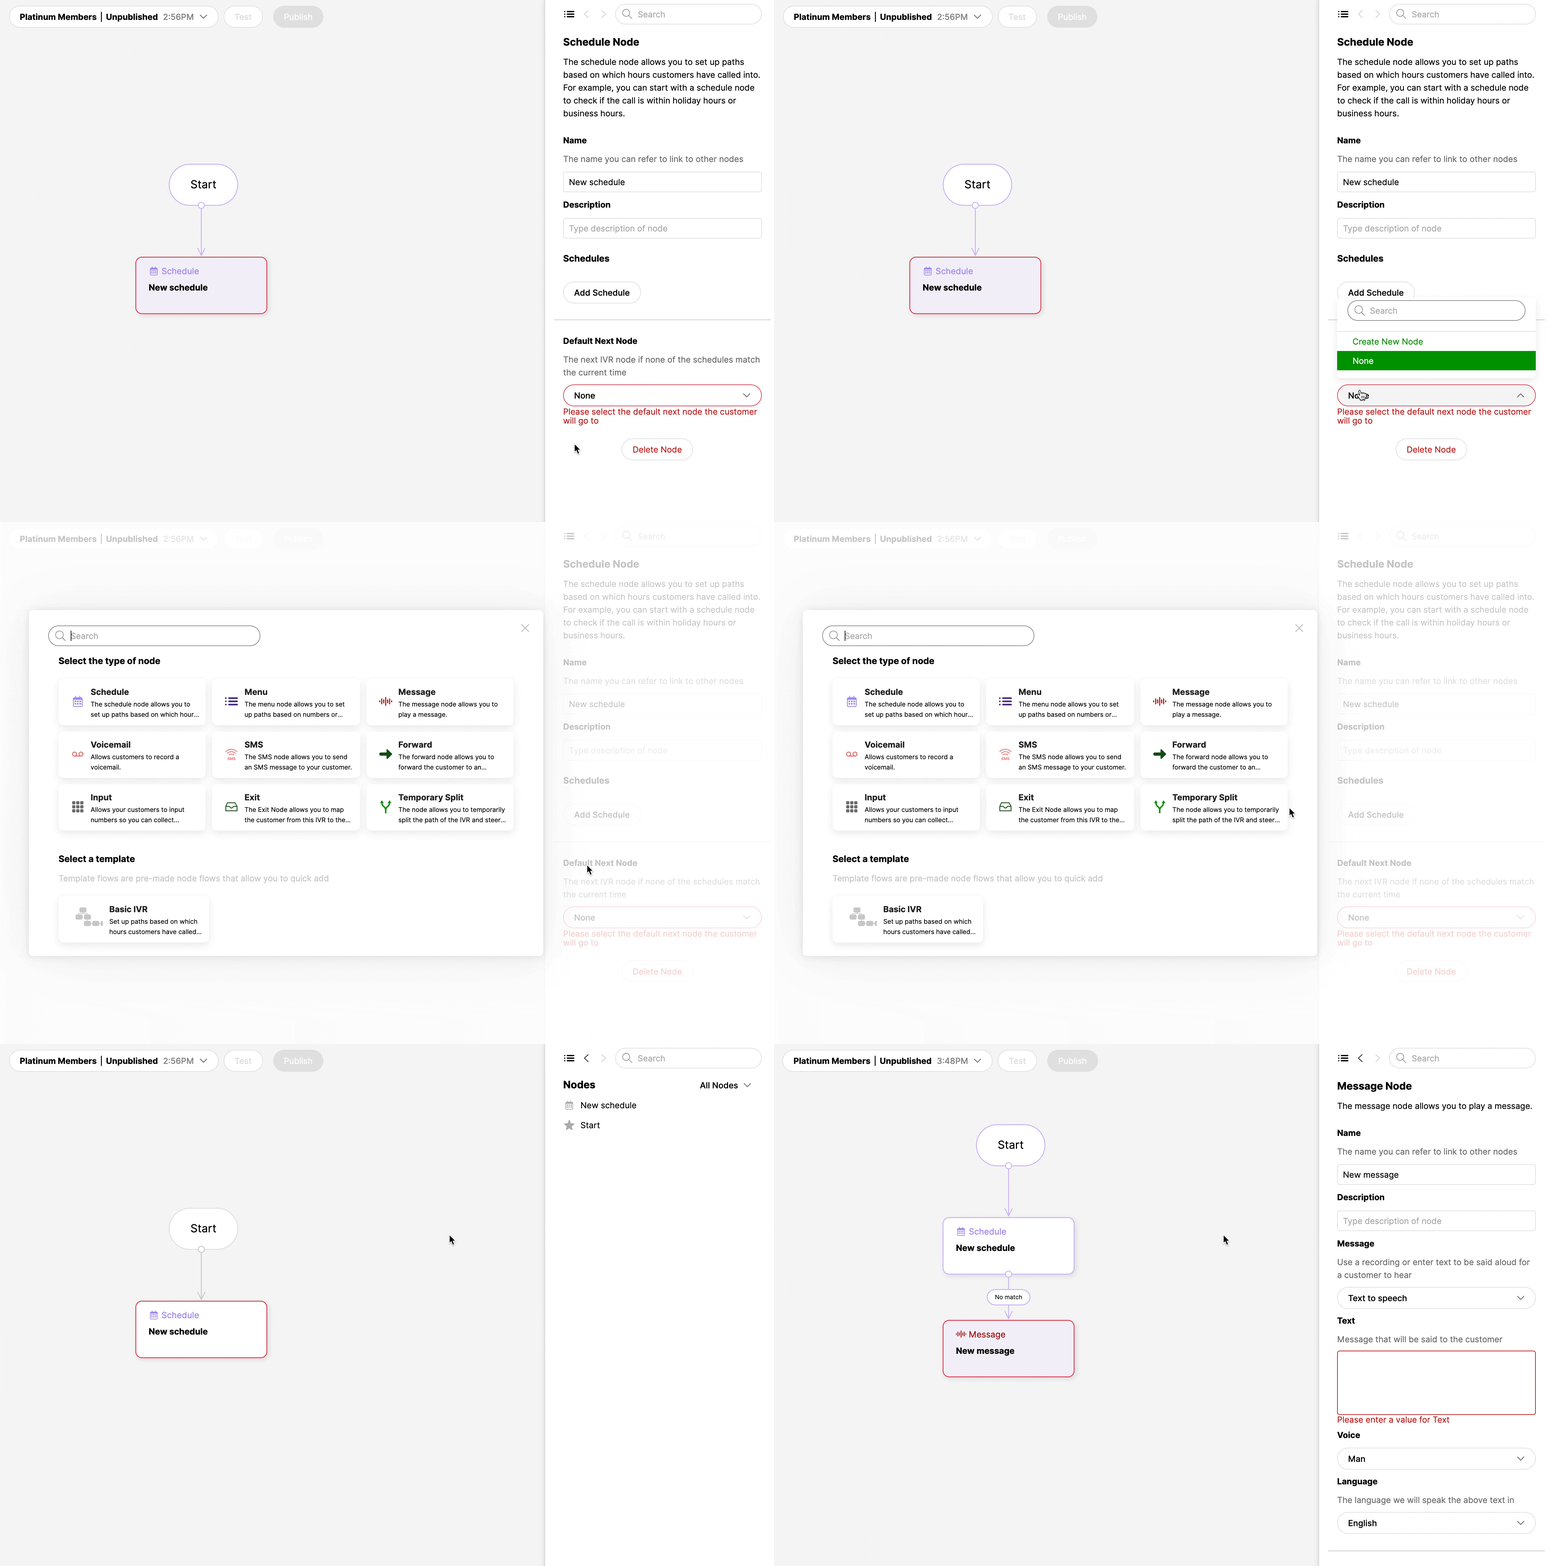
- Some nodes include an Error Node option. If an error is encountered, this required node is the next node to which a call is moved.
4. Repeat the process above for every node you need to add and fill in the node fields on the right side of the screen.
- Add the Exit node for sections of the IVR where calls need to be routed to a particular Inbox.
Start from an existing IVR template #
Use a pre-configured IVR template (like the Basic IVR) to create a simple IVR experience. You can still add/remove nodes from the template as needed.
- From the blank IVR page, click Start Building.

2. Click a template from the Select a template section. For example, if you click Basic IVR, the pre-configured IVR tree will appear.
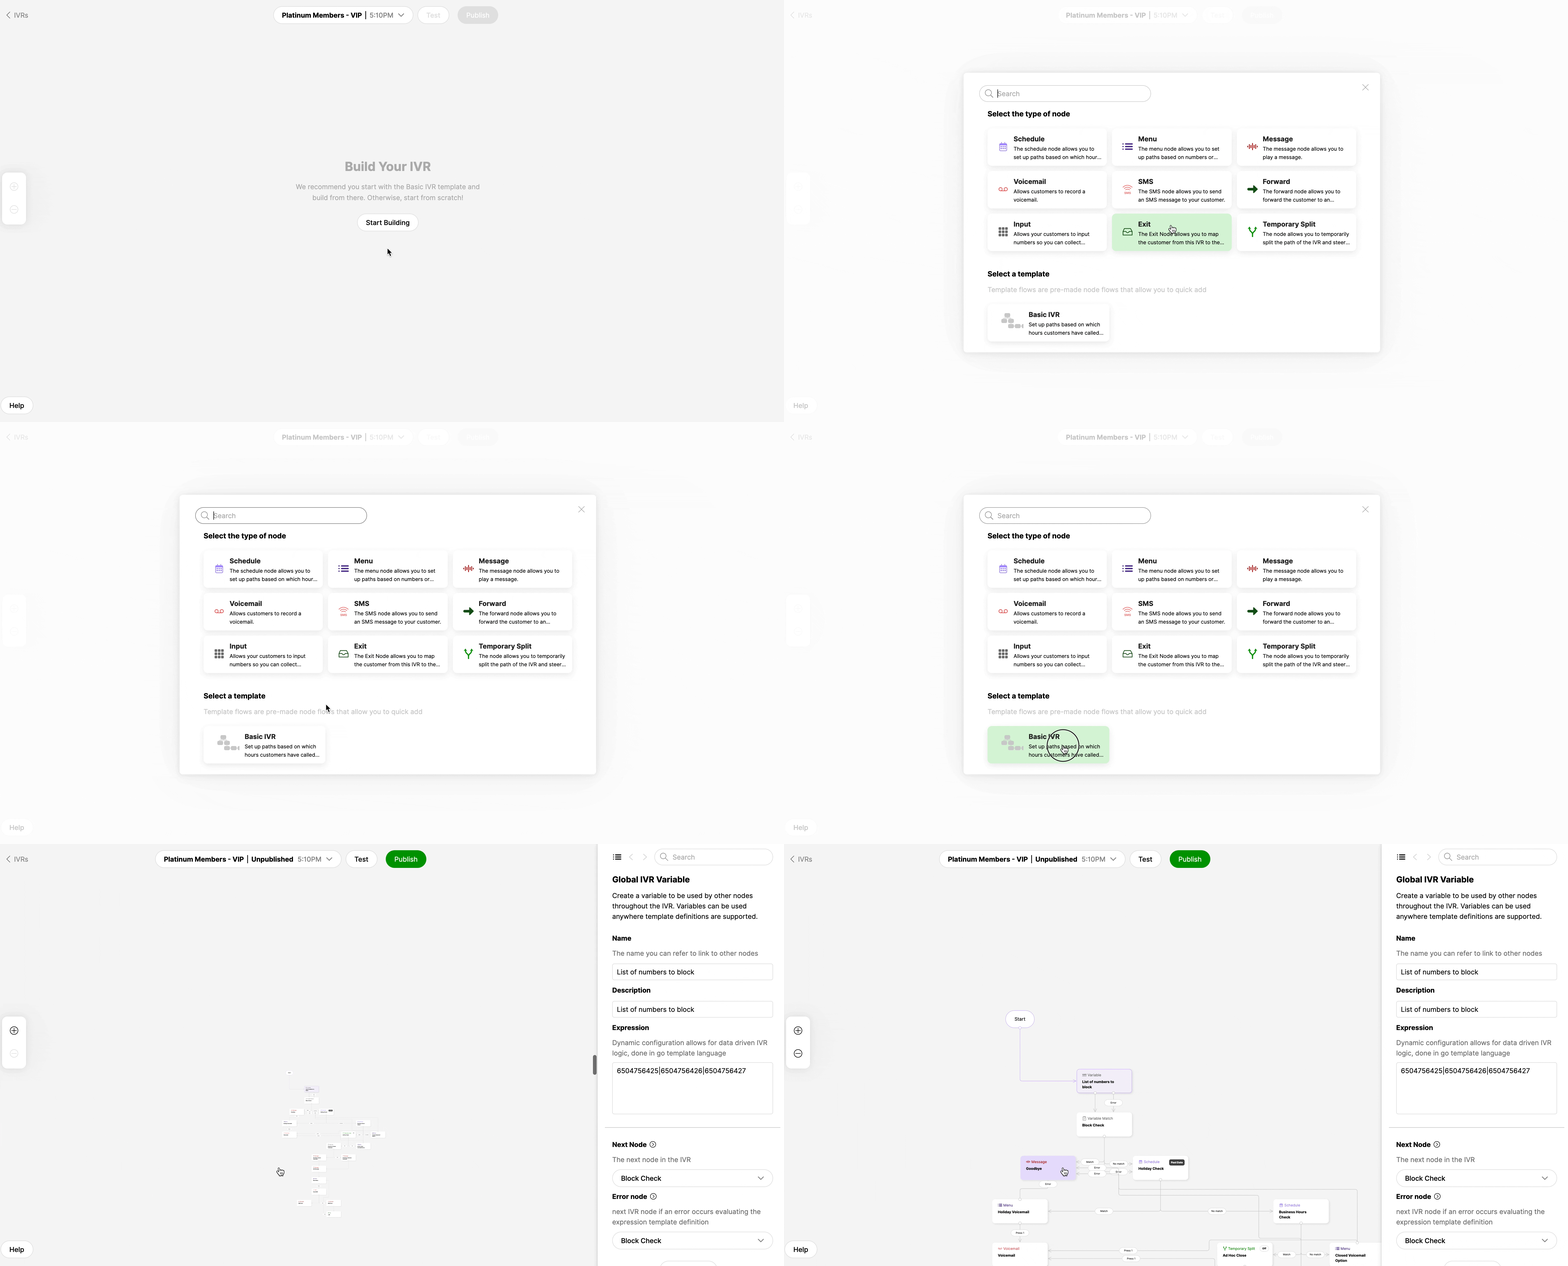
3. To add a different node after a particular node, click the node that you want the node after. Under the Default Next Node section, click the drop-down menu, then click Create New Node, which opens the node selection screen where you can pick a node to add.
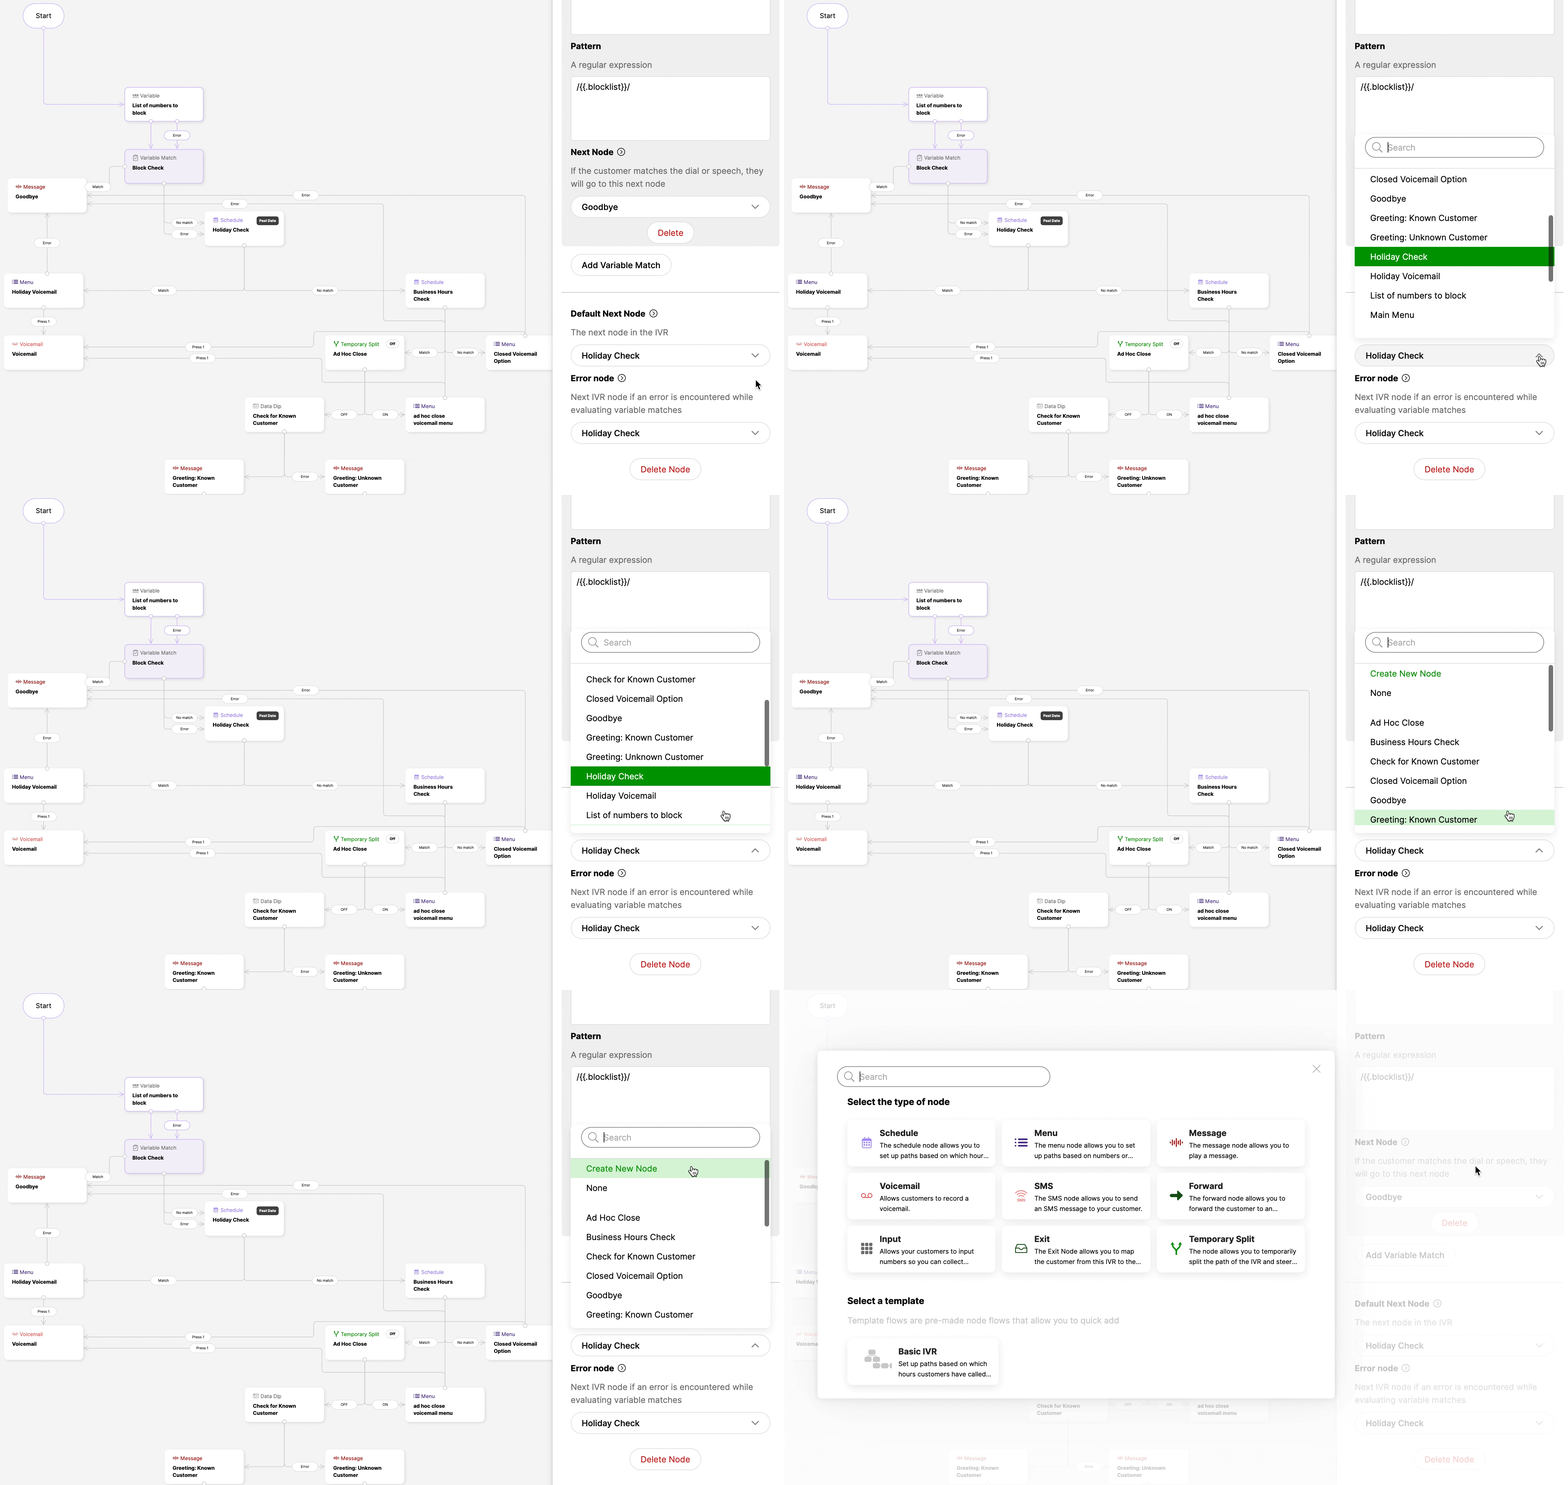
- This list contains a list of nodes already in the IVR template.
- Some nodes include an Error Node option. If an error is encountered, this required node is the next node to which a call is moved.
- Add the Exit node for sections of the IVR where calls need to be routed to a particular Inbox.
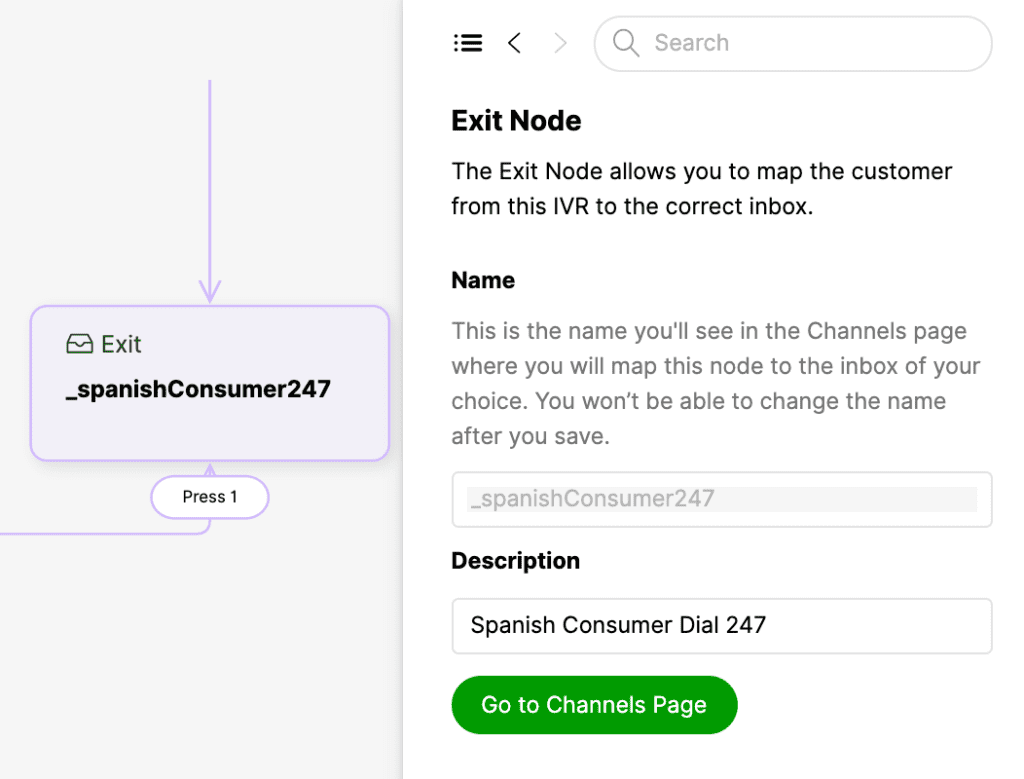
4. If a section of the IVR needs the call to move to an Inbox, add an Exit node. This will allow you to update the Entry Points settings page to point this Exit node to a specific Inbox.
- Name – Enter a name to help identify the Exit node from the Entry Points settings page. The name can’t be changed once it’s saved.
- Description – Enter a short description of how the node is used.
5. Click OK.
To make sure the IVR is set to your liking, test the IVR.
Test the IVR #
Recently created or updated (unpublished) IVRs can be tested before they go live. You can run a simulation of the IVR experience by having the system call you and interact with the IVR you built or updated.
- Click Test located on the top area of the IVR tree.
- +1 (USA) is selected by default. Click the flag to choose a different country code. You can also enter the e.164 format number.
- e1.64 format looks like this:

3. Click OK. After a few seconds, you’ll receive a call. When you answer the call, you’ll hear your IVR just as a Customer would.
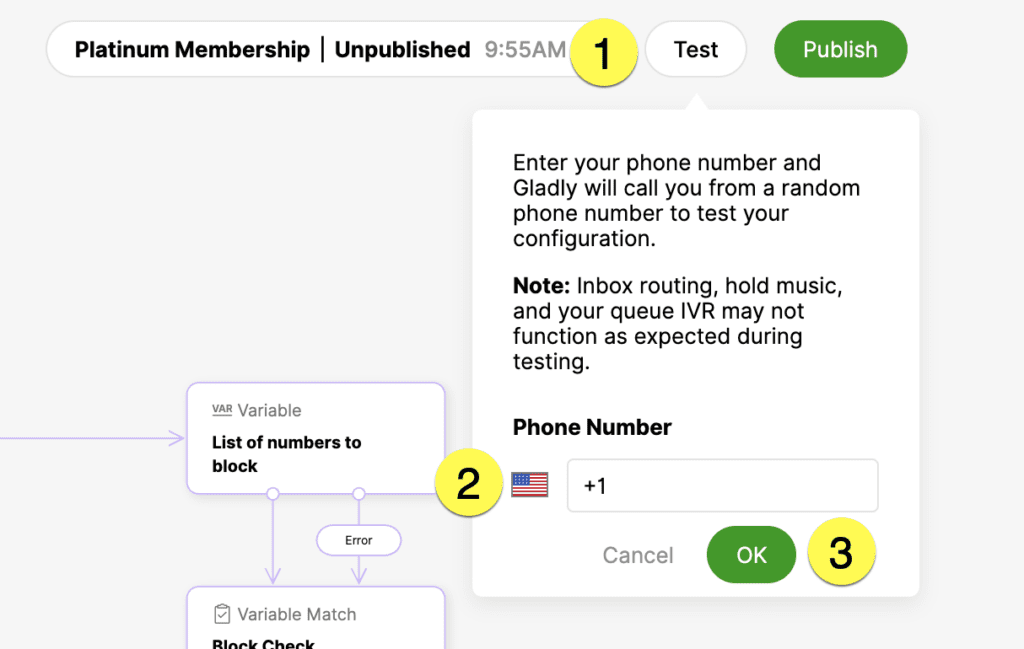
- Test calls may come from a random phone number in your organization.
- Connecting to Agents or voicemail may not work as expected while testing.
4. Follow the call’s flow in your IVR tree as you interact with it to help you spot nodes you may need to fix.
Once you’ve confirmed that the IVR is configured to your liking, it’s time to publish the IVR.
Publish the IVR #
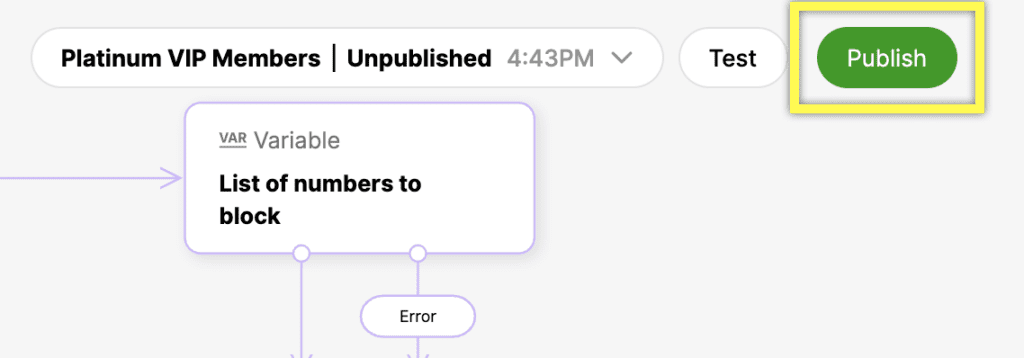
You must publish the IVR to save a new IVR or to save recent changes. The Publish button will remain unavailable if you are missing any required fields. Required fields will appear with a red error message.
- Click Publish on top of the IVR tree.
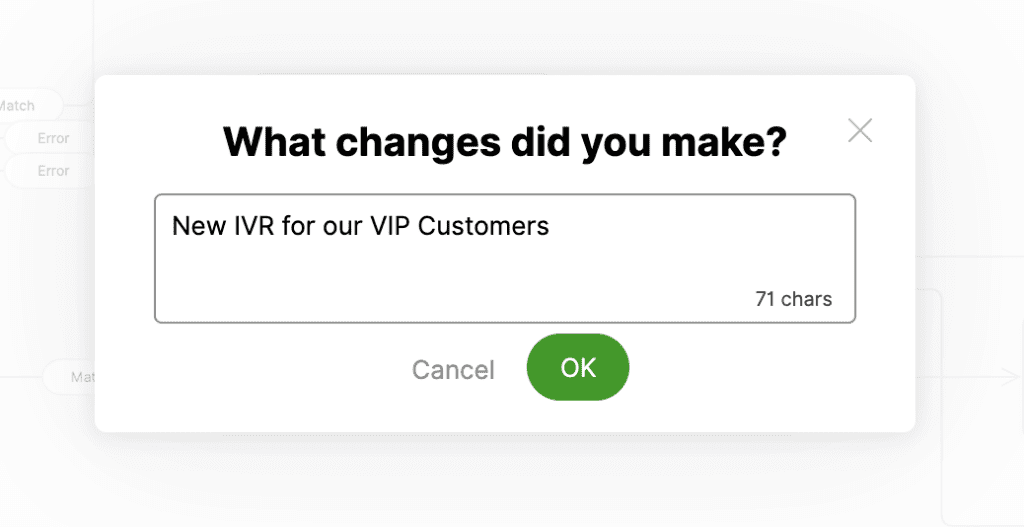
2. Provide a short description of your changes, then click OK.
At this point, the new IVR will still be in the Inactive tab, but only until you link a phone number.
Link IVR to a phone number #
When Customers call this number, the linked IVR is what they’ll experience and interact with.
Use the Voice settings page to select which IVRs (Initial and/or Queue) you want each number to use. Once a new IVR is linked to a phone number, it is removed from the Inactive tab and placed in the Active tab.
Finally, you must link your IVR’s Exit nodes to an Inbox.
Link Exit nodes to an Inbox #
Exit nodes allow calls to move from the IVR and be queued in an Inbox to wait for an Agent. Newly added Entry Points automatically use the Voice Channel’s default Inbox settings on the Entry Points settings page, unless exceptions are created.
You can skip the steps below if the Exit node will use the voice Channels’ default Inbox.
- From the Settings page, under the Orchestration category, click Entry Points.
- Scroll down to the Voice section.
- If you don’t want the Exit node to link to the Voice Channel’s default Inbox, click + Add exception. Otherwise, there are no additional actions needed and you can skip this step.
- Note – If there’s an existing exception already linked to an Inbox and/or using the correct SLA that the new Exit node can link to, add the Exit node to the exception.
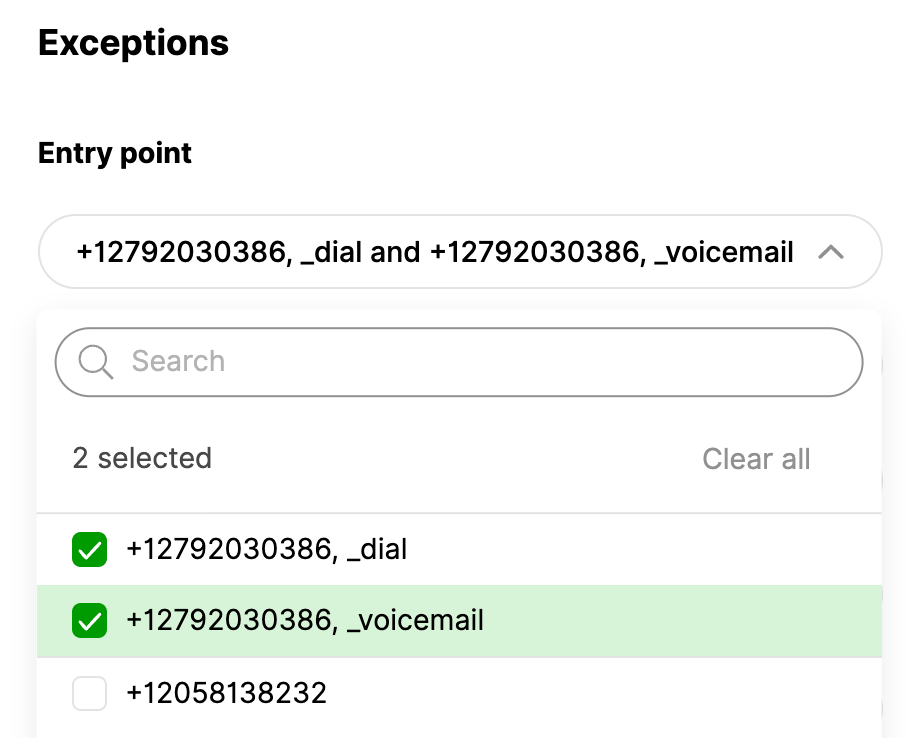
- Tip – The list displays the name used for an Exit node. IVR Exit node names like “_dial” and “_voicemail,” are separated from the phone number by a comma. A phone number with multiple Exit nodes could appear multiple times on the list.
4. Click Save.
See Configure Voice Entry Points to learn more.
Once the IVR is live #
Below are some points to be aware of when your IVR is live:
- You can have multiple phone numbers pointed to the same IVR phone tree or you could have just one.
- Multiple Exit nodes can point to the same Inbox.
- You can edit, add, and remove nodes in an IVR. To save any changes, you must click Publish.


