| REQUIRED USER ROLE Administrator |
Add and delete nodes as needed from an existing IVR.
Add a node #
Note – Some nodes can’t be added through the UI
Although most nodes can be added through the UI, Some node types (e.g., Data Dips, Customer Phone Number Match) can’t be added through the UI. Contact Gladly Support if you need to add these nodes.
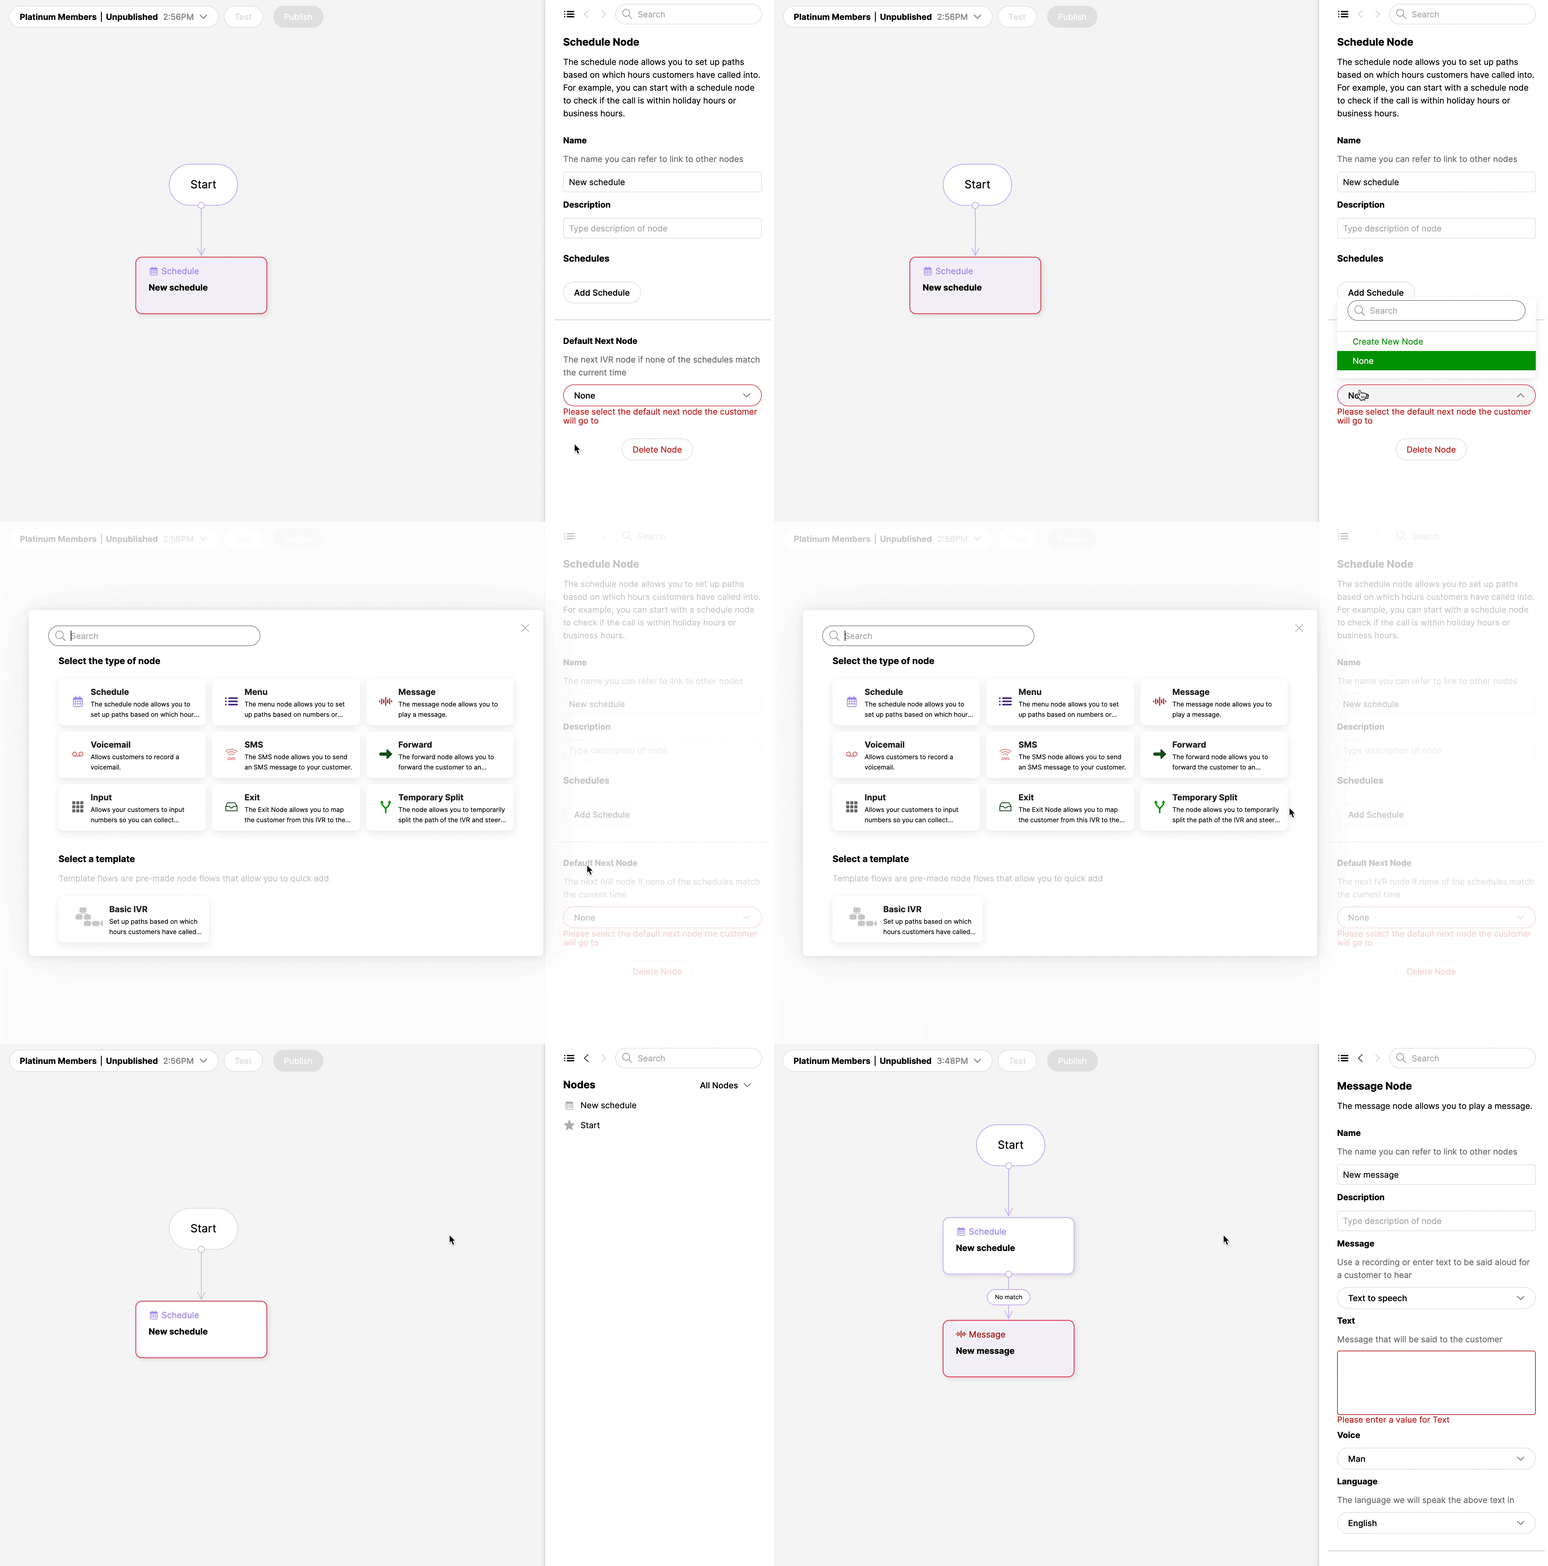
- Click the existing node you want to add a new node after. Under the Default Next Node section of the selected node, click the drop-down menu, then click Create New Node. From the node selection screen, click the next node you want to add. It’s automatically added to the IVR tree and linked to the node.

- Some nodes include an Error Node option. If an error is encountered, this required node is the next node to which a call is moved.
2. Repeat the process above for every node you need to add and fill in the node fields on the right side of the screen.
Delete a node #
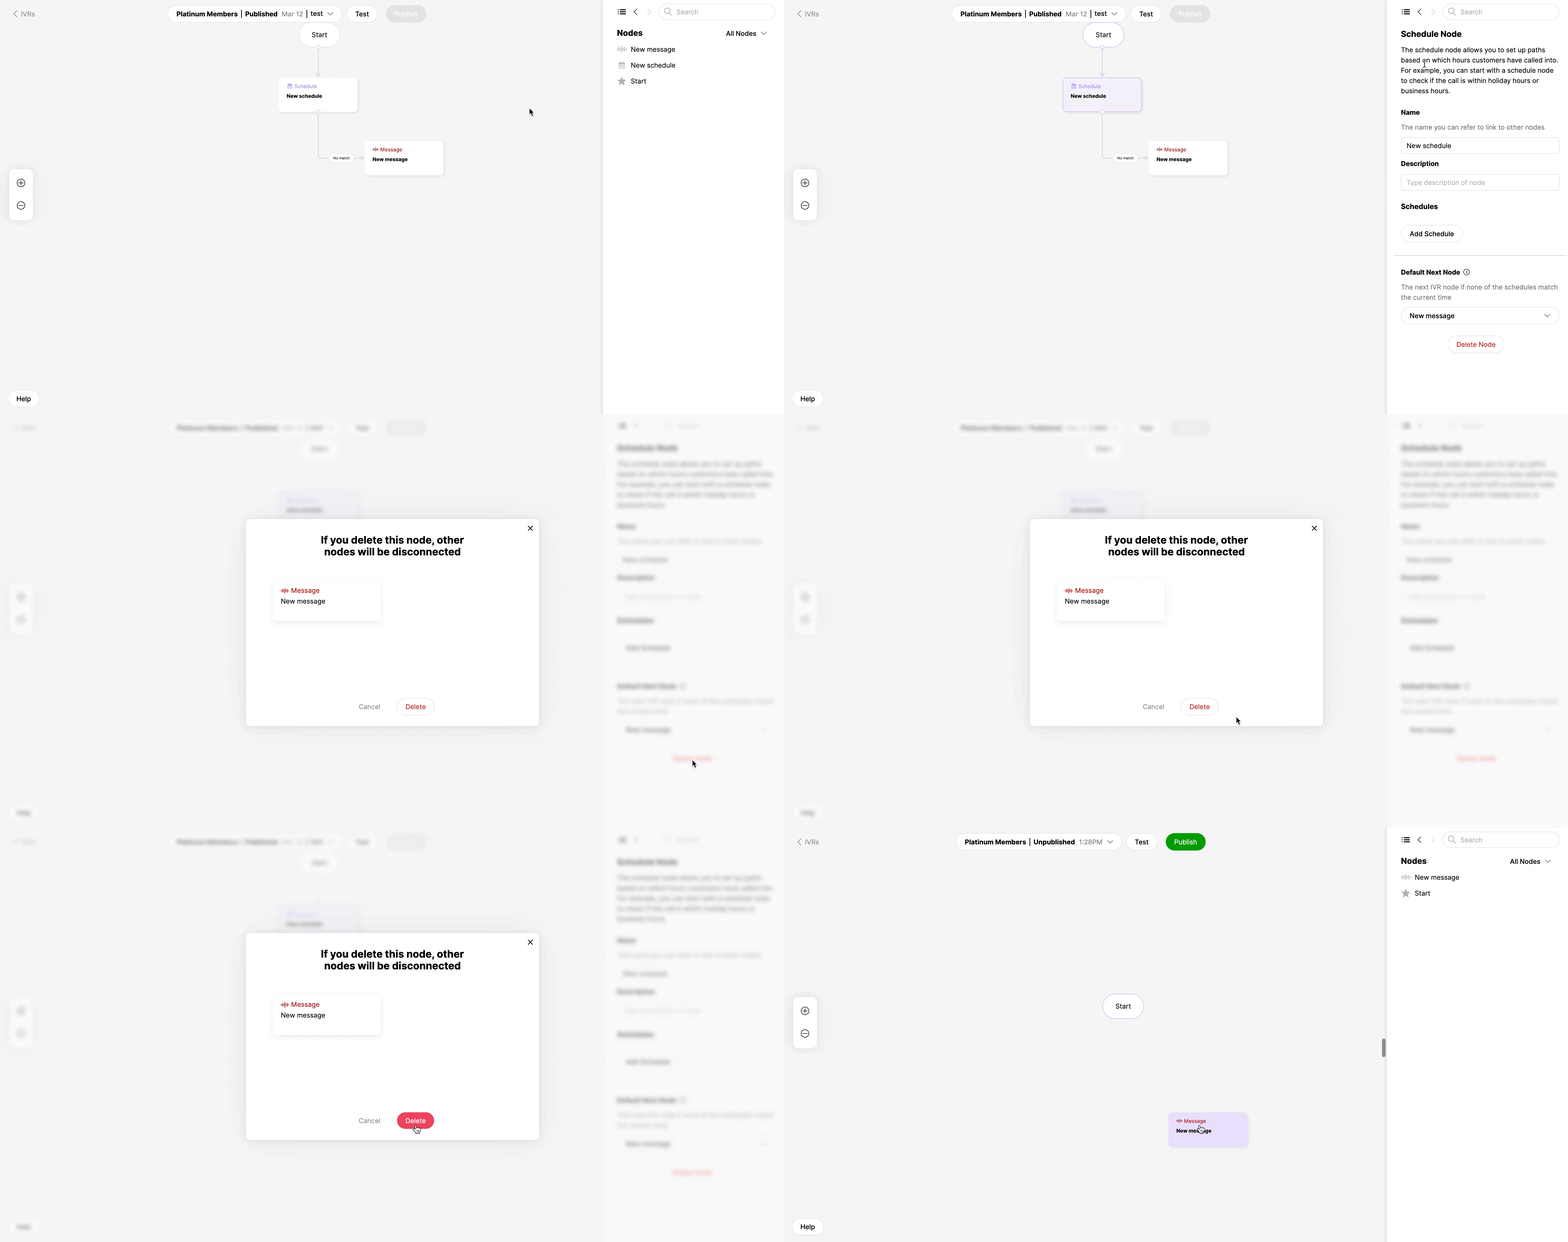
- Click the node you want to delete.
- Under the Default Next Node section of the selected node, click Delete Node.

3. If the node is currently linked to another node, you’ll see which node(s) it’s currently linked to. If you want to delete the node, Click Delete to confirm your request.
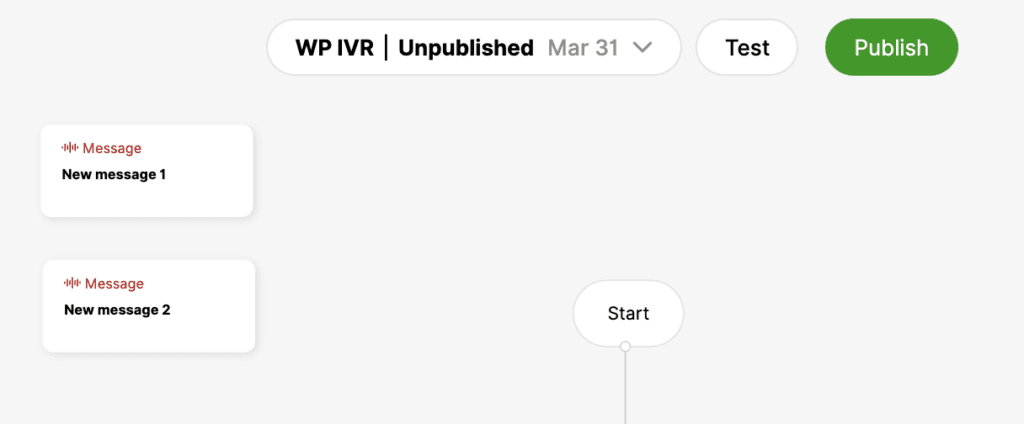
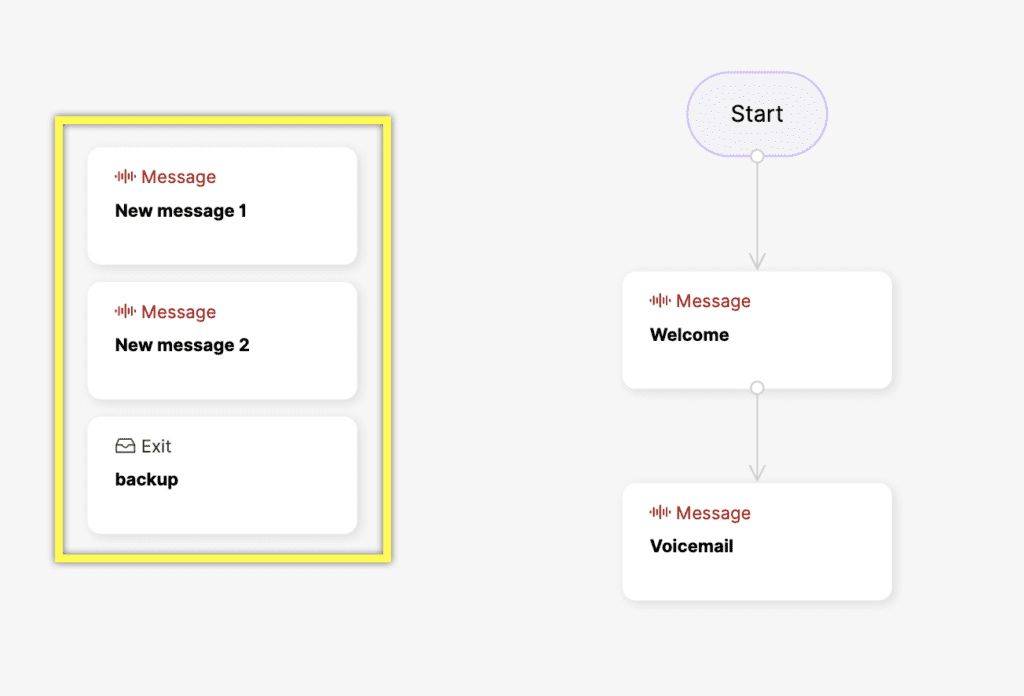
- If an existing node is disconnected from the main IVR tree, you’ll see the node floating on the left side of the IVR. The node can be deleted or linked to a different node as needed.

Unlink a node #
Nodes are unlinked when not connected to a node in the IVR tree as a Default Next Node, Next Node, or Error Node. Unlinked nodes appear disconnected (no flow lines) from the main IVR tree and float on the left side of the IVR screen.

These nodes remain available and searchable as a Default Next Node, Next Node, or Error Node. They can also be deleted if needed.


