The Customer Profile is a record of everything your company knows about a Customer, which includes a Customer’s:
- Contact details (address, email, phone number, social media handles, etc.)
- Historical Conversations
- Preferences
- Relationships
- Details (special notes about the Customer like allergies, preferred color, etc.)
Customer data can also come from external sources like an OMS (e.g., Shopify).
You can get to a Customer’s Profile in one of three ways:
- When a Message (i.e., email, voicemail, SMS, Facebook Message) is routed to you, you’ll automatically be taken to that Customer’s Profile.
- When you accept a voice call or chat request, you’ll automatically be taken to that Customer’s Profile.
- By clicking on a Customer from the My Customers list or a Task.
In Gladly, a full view of the Customer is consolidated in the Customer’s Profile.
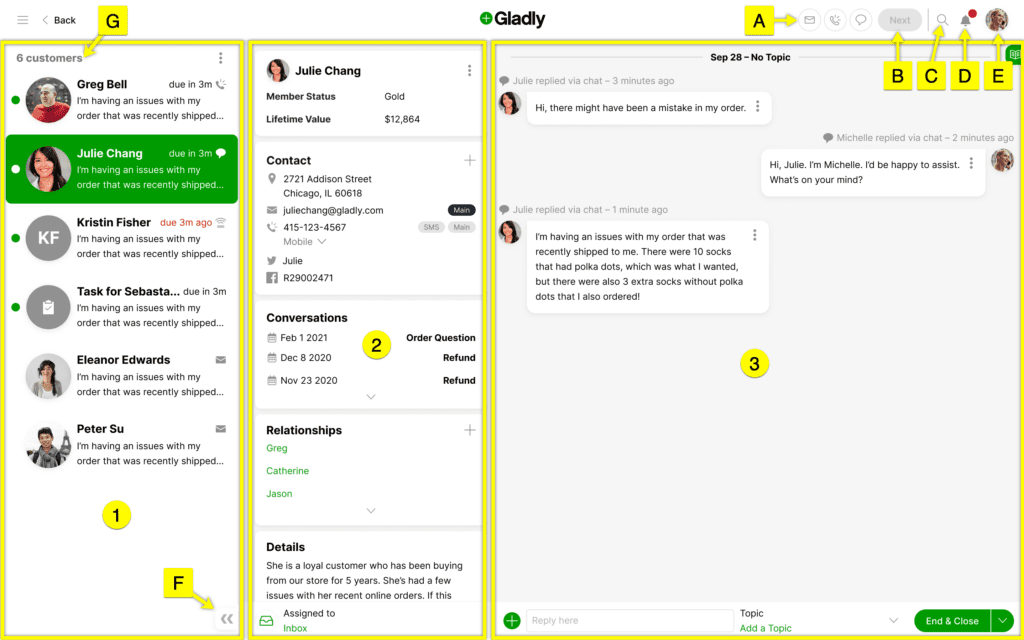
- 1] – My Customers
- [2] – Customer Details
- [3] – Conversation Timeline
- [A] – Availability Controls
- [B] – Next Button
- [C] – Search
- [D] – Notifications Center
- [E] – My Profile
- [F] – Collapse/Expand My Customers list
- [G] – Number of Conversations and Tasks
1 – My Customers #
A list of Customers and Tasks currently assigned to you. Click on a Customer to view their Customer Profile or a Task that needs to be completed for the Customer.
2 – Customer Details #
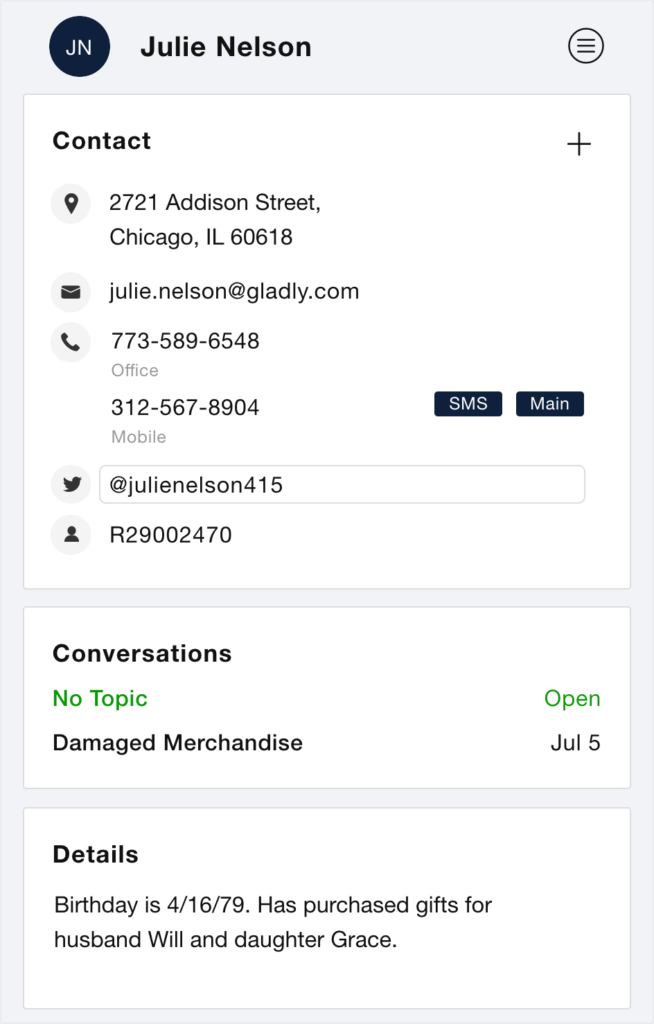
The Customer Details panel is on the left of the Customer Profile. These are basic contact information about the Customer.
Contact card #
The Contact card is where you’ll see, add, and edit the contact information your company has for a Customer.
Conversation card #
In the Conversations card, you’ll find a list of every Conversation — Open and Closed — a Customer has had with your company. So when a Customer reaches out with a question about a particular Conversation, you can simply click the relevant Conversation and be taken to the start of that interaction.
Details card #
The Details card is where you can find, add, and edit any additional details you learn about the Customer. Details like their preferred color, favorite product, if they’re allergic to something, and other “good to know” details about them.
3 – Conversation Timeline #
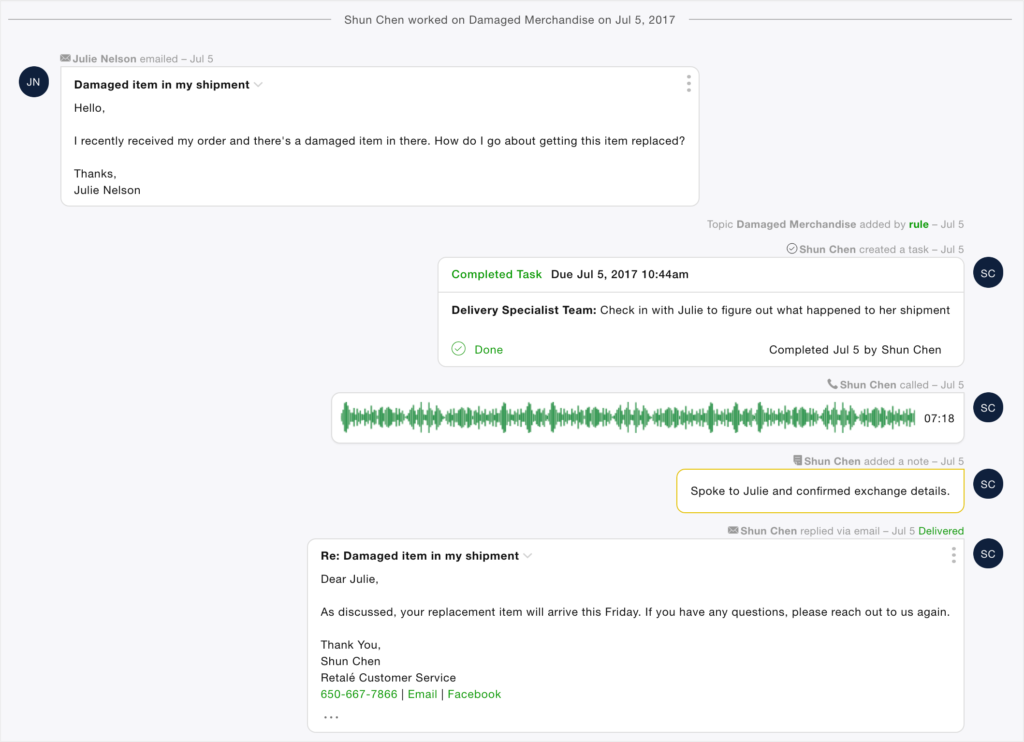
To the right of the Customer Profile, you’ll find the Conversation Timeline. This is also where you’ll find previous and current Conversations with the Customer.
In it, you’ll find a running record of every interaction a Customer has had with your company, compiled into a single timeline. This means you can see the entire history of a Customer’s relationship with your brand, from start to present.
Navigate between Conversations #
A Conversation Timeline can consist of several Conversations, which depends on the number of times the Customer has reached out to your company for help.
If a Customer reaches back out about an issue in a previous Conversation, you won’t need to scroll through an entire history of interactions. Instead, you can go straight to that Conversation via the Customer Details panel by selecting the correct date and Topic.
To view Conversation by Topic:
- Go to the Conversations section of the Customer Details panel. You’ll see a list of all the Conversations that the Customer has had with you by Topic.
- Click on the Conversation the Customer is referring to. You’ll be taken straight to the start of that Conversation to start reading.
A – Availability Controls #
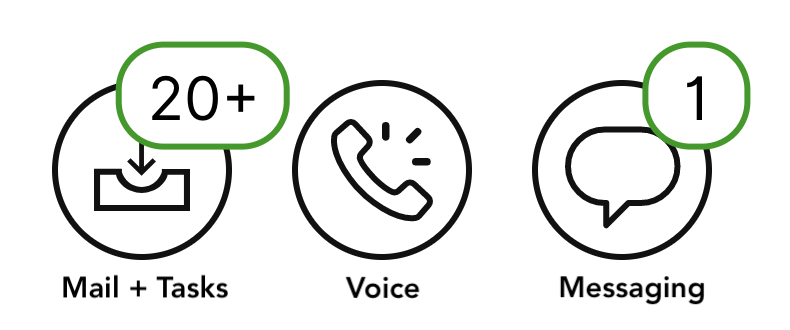
On the top right of your screen, you’ll find Availability Controls. Here’s where you can set your Availability for the types of Conversations you’re ready for. The icon turns green if you click on it, signifying that you are available for work on that Channel.
Starting from left to right, you’ll be able to use these buttons to indicate if you’re:
- Ready to handle Email, Task, Voicemail (i.e., email, voicemail, and Tasks)
- Ready to handle Voice calls
- Ready to handle Messages (this includes chat, SMS, and social messaging)
B – Next Button #
Allows you to be routed new Customer requests from Inboxes you belong to. It can be a new email, Task, or even a chat. Click the Next button if:
- You want to work on a new Customer without closing the Conversation with the current one.
- You want to switch to another Conversation without closing the Conversation with the current one.
C – Search #
Maybe you need to find a Customer fast. Or see how other Agents handled the same issue in the past. Whatever the reason, Search lets you sift effortlessly through past Conversations, even Customer Profiles you recently viewed.
D – Notifications Center #
Notifications Center notifies you of activities such as Task or Note updates. A red dot appears here whenever a new notification is available.
E – My Profile #
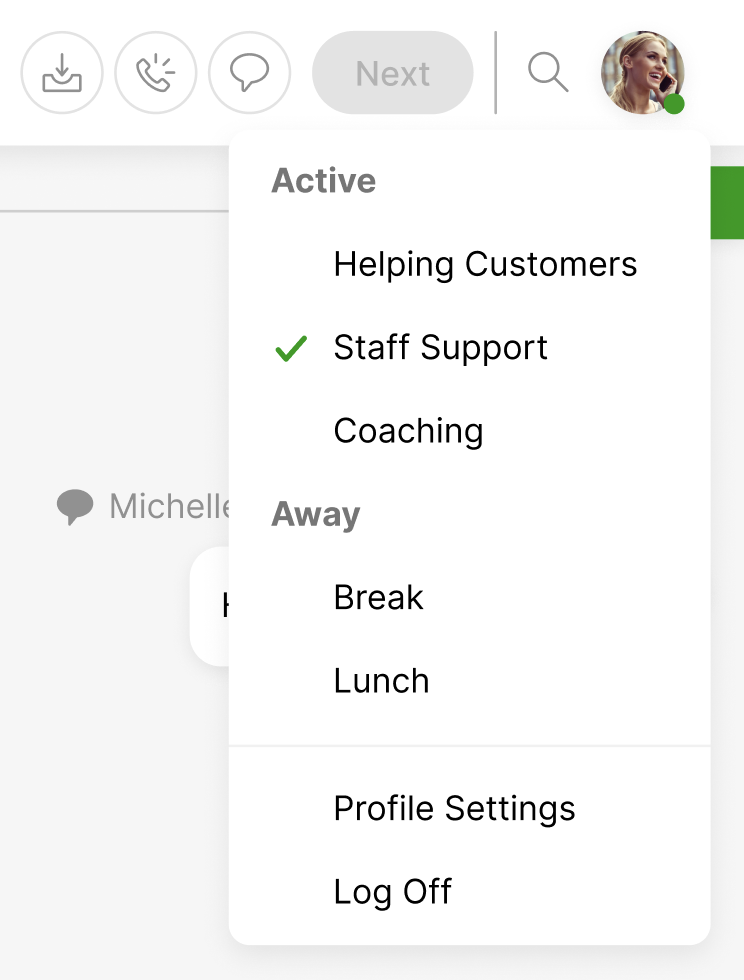
On the top right of your screen, you’ll see the circular My Profile button with your initials on it. Clicking on the My Profile button gives you the choice of going to your Profile page, set your Away and Active status, or lets you log out of Gladly.
F – Collapse/Expand My Customers list #
Towards the bottom of the My Customers list is the expand/collapse icon. Click this to expand or collapse the list.
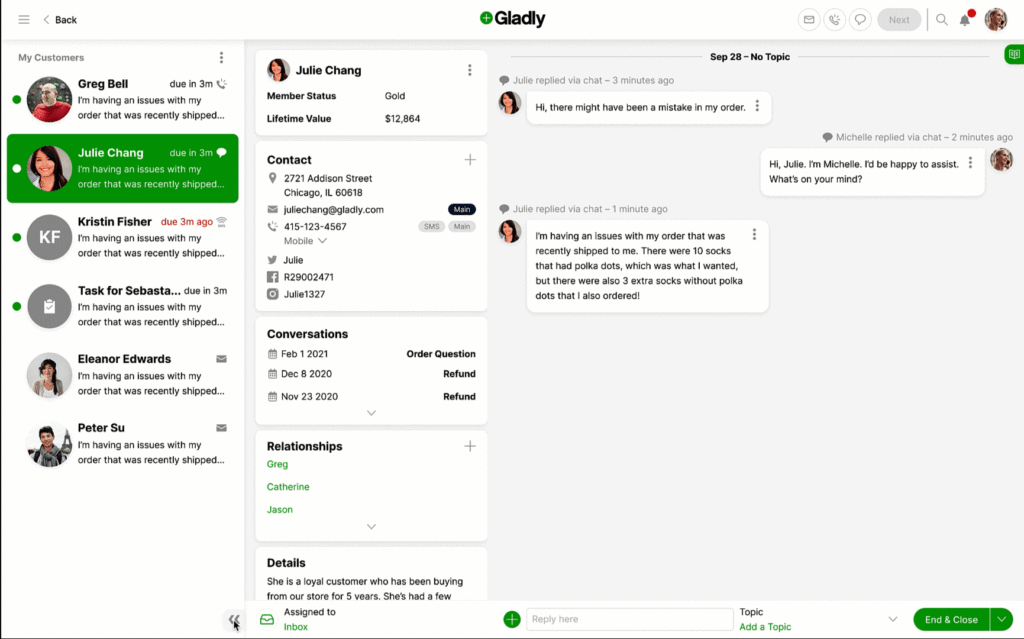
- By default, the My Customers list is expanded for viewports 1366px and larger.
- Viewports less than 1366px but greater than 1280px default to collapsed view but can be expanded manually.
- Viewports 1280px or smaller default to a collapsed view and cannot be expanded.
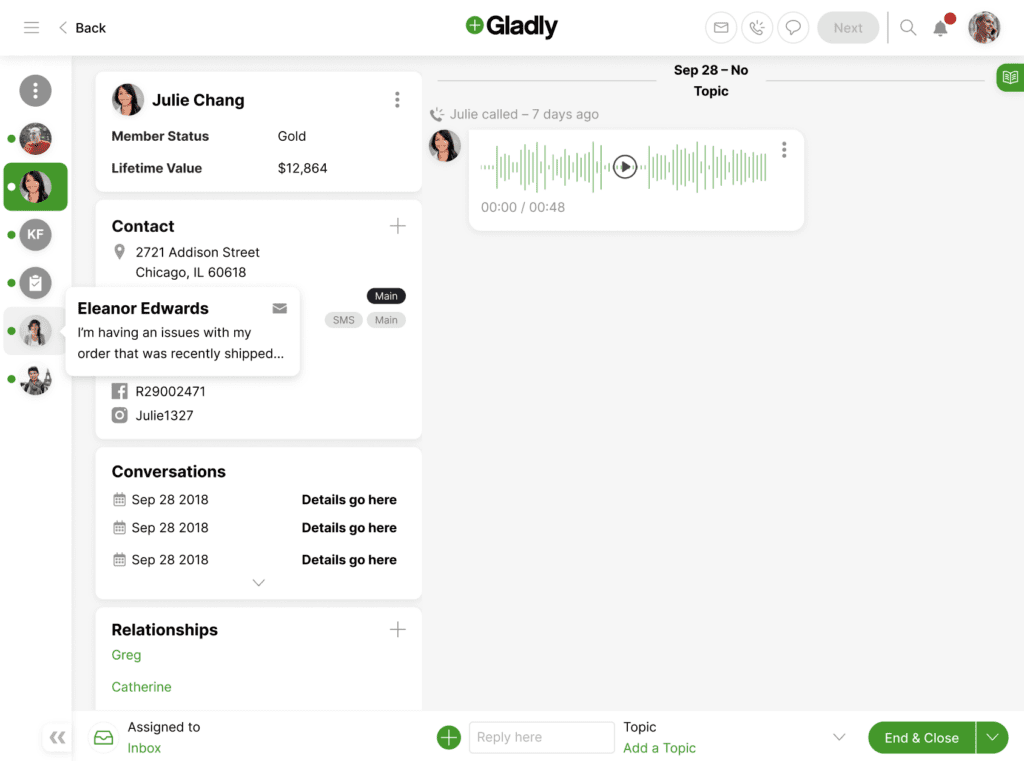
- In collapsed view, a hover over the Customer avatar shows a preview of the most recent message, which could be from the Customer or an Agent.
- On tablets, a single tap on the Customer avatar opens the preview. A double-tap opens the Customer Profile.
G – Number of Conversations and Tasks #
The total number of Conversations and Tasks assigned to an Agent.


