| REQUIRED USER ROLE Administrator |
Voice Entry Points (e.g., phone numbers) appear on the Entry Points settings page. Calls made to these phone numbers queue in the default Inbox configured for Voice on the Entry Points settings page. Voice Entry Points are automatically created from Exit nodes and for phone numbers purchased through Gladly, including numbers ported to Gladly.
See Set Up Channels and Entry Points for a general overview of setting up Channel Entry Points.
Watch Out – We recommend not adding an Entry Point(s) until you’re ready to receive incoming requests.
Upon adding a new Entry Point, incoming requests from that Entry Point automatically route to the corresponding Channel’s primary Inbox. For example, upon adding Instagram Messaging as an Entry Point, direct messages from your Instagram account will automatically create a Conversation in Instagram Channel’s default inbox.
- Voice/SMS – Phone numbers can be purchased and held onto until you’re ready to complete the setup by connecting them as Entry Points.
- Chat (Glad App) – Upon configuring Glad App, it’s available to receive incoming chat requests as soon as it’s embedded on your website. Chats are routed to the Chat Channel’s default Inbox.
- Social Channels – Upon adding a social Channel Entry Point (e.g., , Instagram, or WhatsApp), messages automatically route to the social Channel’s default Inbox.
- Email – Once an email address is added, it’s ready to receive inbound emails in the email Channels’ default Inbox as long as email forwarding is activated.
Use Exceptions to link an Entry Point to a different Inbox if you don’t want to use the Channel’s default Inbox.
Configure and edit Voice Entry Points #
- Click
 on the top left corner of the screen.
 - Click Settings.
- Under the Orchestration category, click Entry Points. This page contains Entry Points for all Channels available in Gladly.
- Hover over Voice and click to open the Voice Channel’s Entry Point settings.
- Confirm if you want the Entry Point to use the Voice Channel’s default Inbox and SLA. If so, you can stop here. If not, you’ll need to add an exception.
- Note – Newly added phone numbers automatically use the Voice Channel’s default Inbox unless exceptions are added.
- Click + Add exception if the Voice Entry Point won’t use the Voice Channel’s default Inbox or Entry Point SLA.
- Tip – Exceptions allow you to specify which Inbox calls from a particular voice Entry Point route to. For example, suppose you have a phone number reserved for Platinum Members. Use exceptions to configure calls from the Platinum Members’ phone number to route to the VIP Inbox instead of going to the Voice Channel’s default Inbox.
- Select the following details:
- Entry Point – Select the Entry Point(s) you want to exclude from using the Voice Channel’s default Inbox.
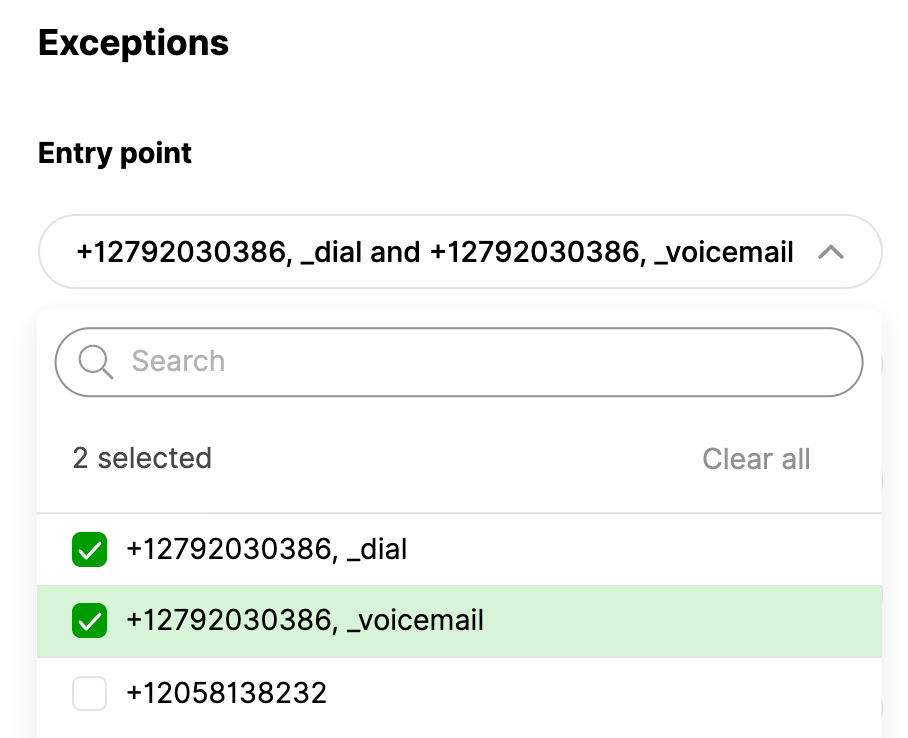
Tip – The list also displays the name used for an Exit node. IVR Exit node names like “_dial” and “_voicemail,” are separated from the phone number by a comma. A phone number linked to an IVR with multiple Exit nodes could appear multiple times on the list, allowing you to route those nodes to their respective Inbox if required.
- Inbox – Select the Inbox you want incoming Voice requests from the Entry Point to queue instead of using the Voice Channel’s default Inbox.
- SLA (minutes) – Leave this field blank to use the selected Inbox’s SLA. Otherwise, entering an SLA here trumps the Inbox SLA.
- You can use fractional minutes. For example, 0.66 is 40 seconds.
- You can’t enter “0” or use the “-” (minus) symbol.
8. Click Save.
Add or remove Voice ‘Internal Name’ #
This internal name appears next to a phone number on the Entry Points page to help users identify its use.
- Click on the top left corner of the screen.
- Click Settings.
- Under the Channels category, click Voice.
- Hover over the number you want to update, then click .
- Enter a nickname for the phone number on the Internal Name field
- To remove an existing nickname, highlight and delete the name from the field.
- Click Save.