| REQUIRED USER ROLE Administrator, Team Manager, Answer Administrator |
Create a Help Center to begin building your knowledge base. Each Help Center consists of Sections (sometimes known as topics or categories) where you assign Public Answers. Once the structure (including the Sections) is created and the embed code is generated, you can put the code on your hosted website to style and design the Help Center to match your brand.
Before you start #
Before you create a Help Center, we recommend you first review the following:
- You can create multiple Help Centers. If you support multiple brands through Gladly, you can create a separate Help Center experience for each brand and brand-specific Public Answers by utilizing Audiences.
- Help Center uses Public Answers to power Help Center content.
- Help Center inherits the CSS of your existing website once it’s embedded. Edit your host site’s CSS to style Help Centr as needed.
Create a Help Center #
This builds the structure (e.g., names, columns, headings, etc.) of the Help Center.
- Click
 on the top left corner of the screen.
 - Click Settings.
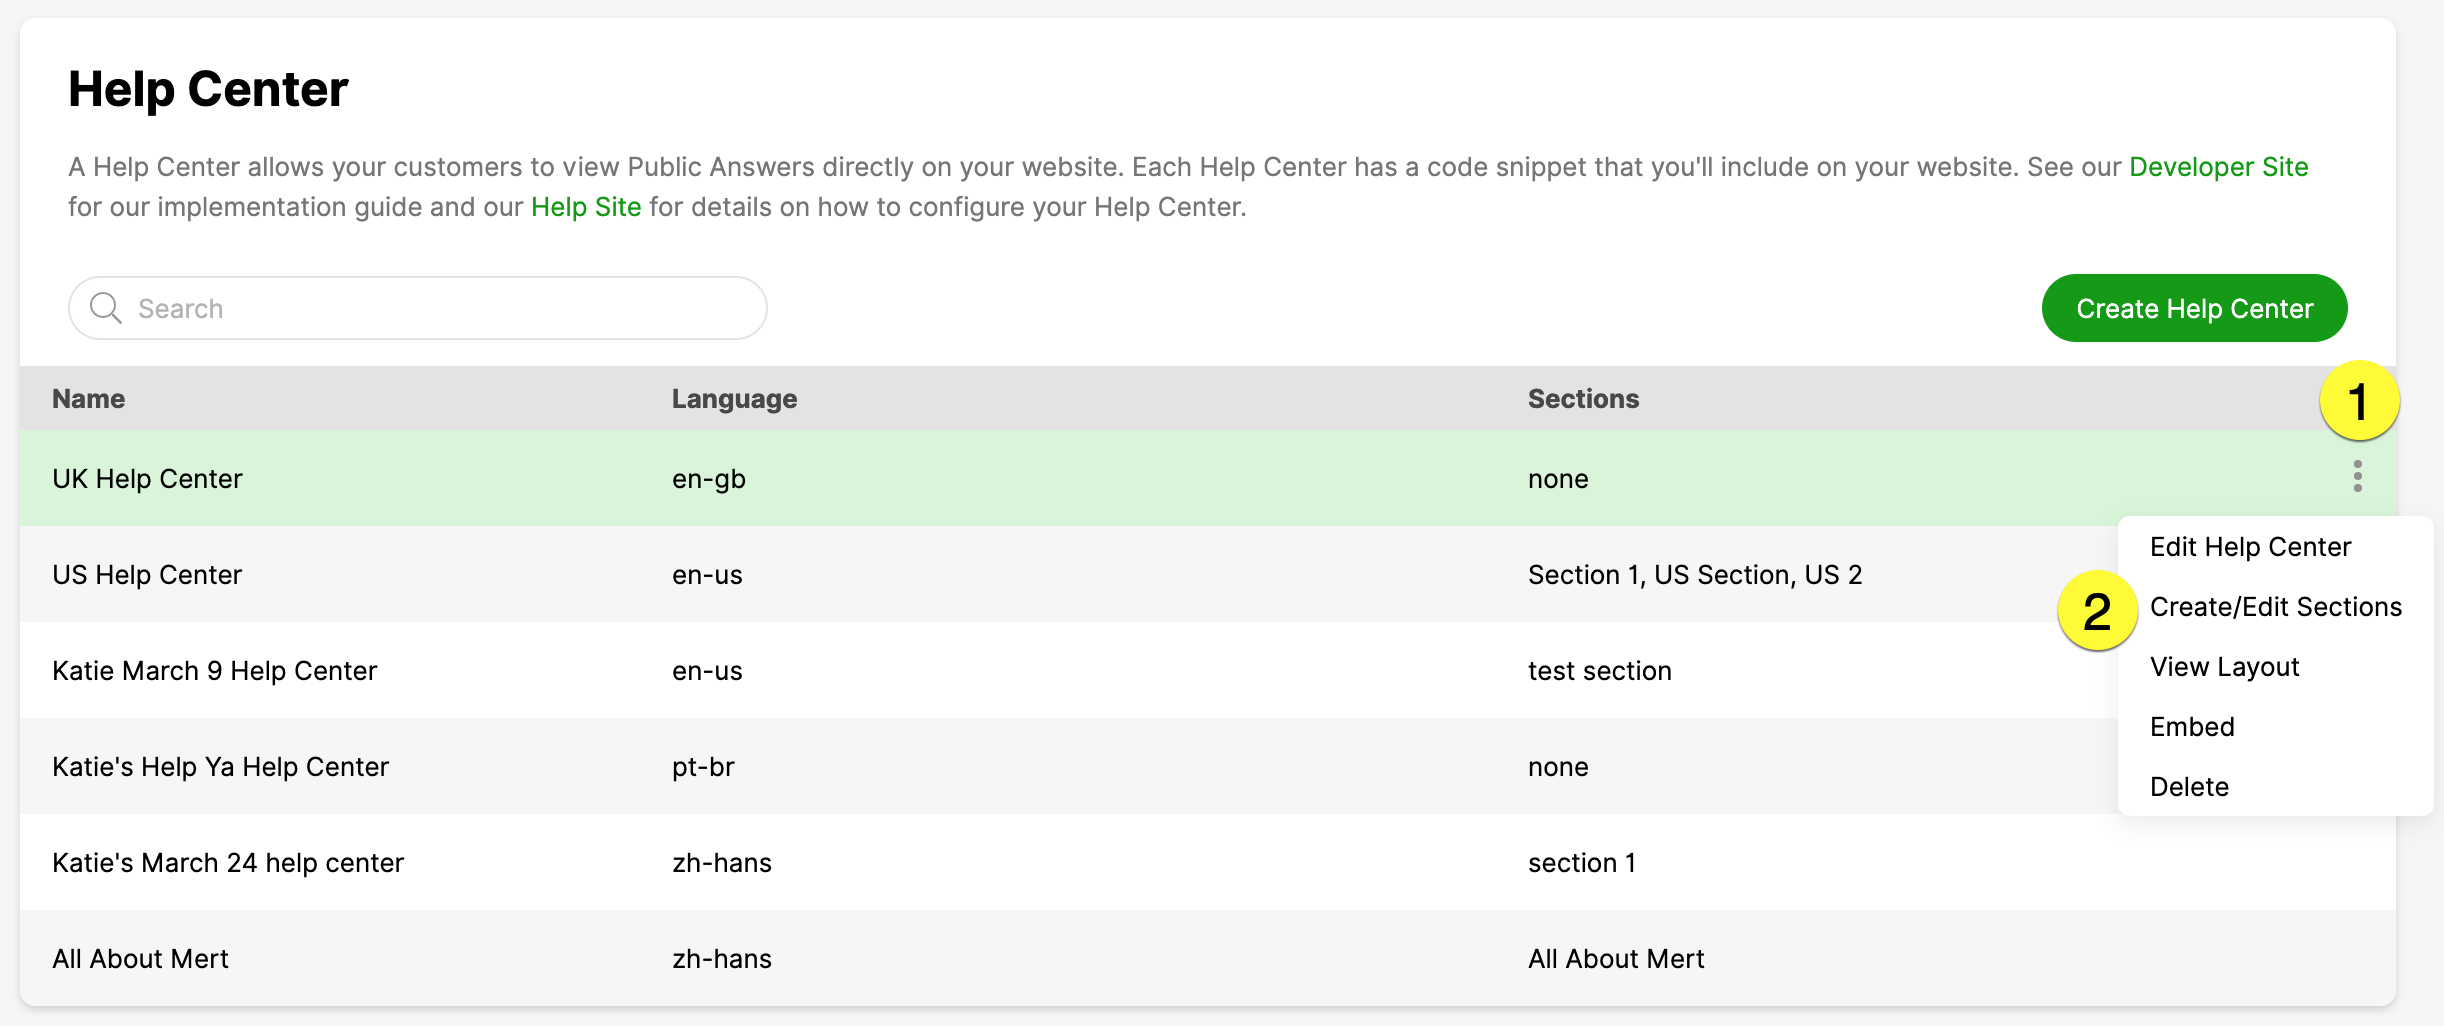
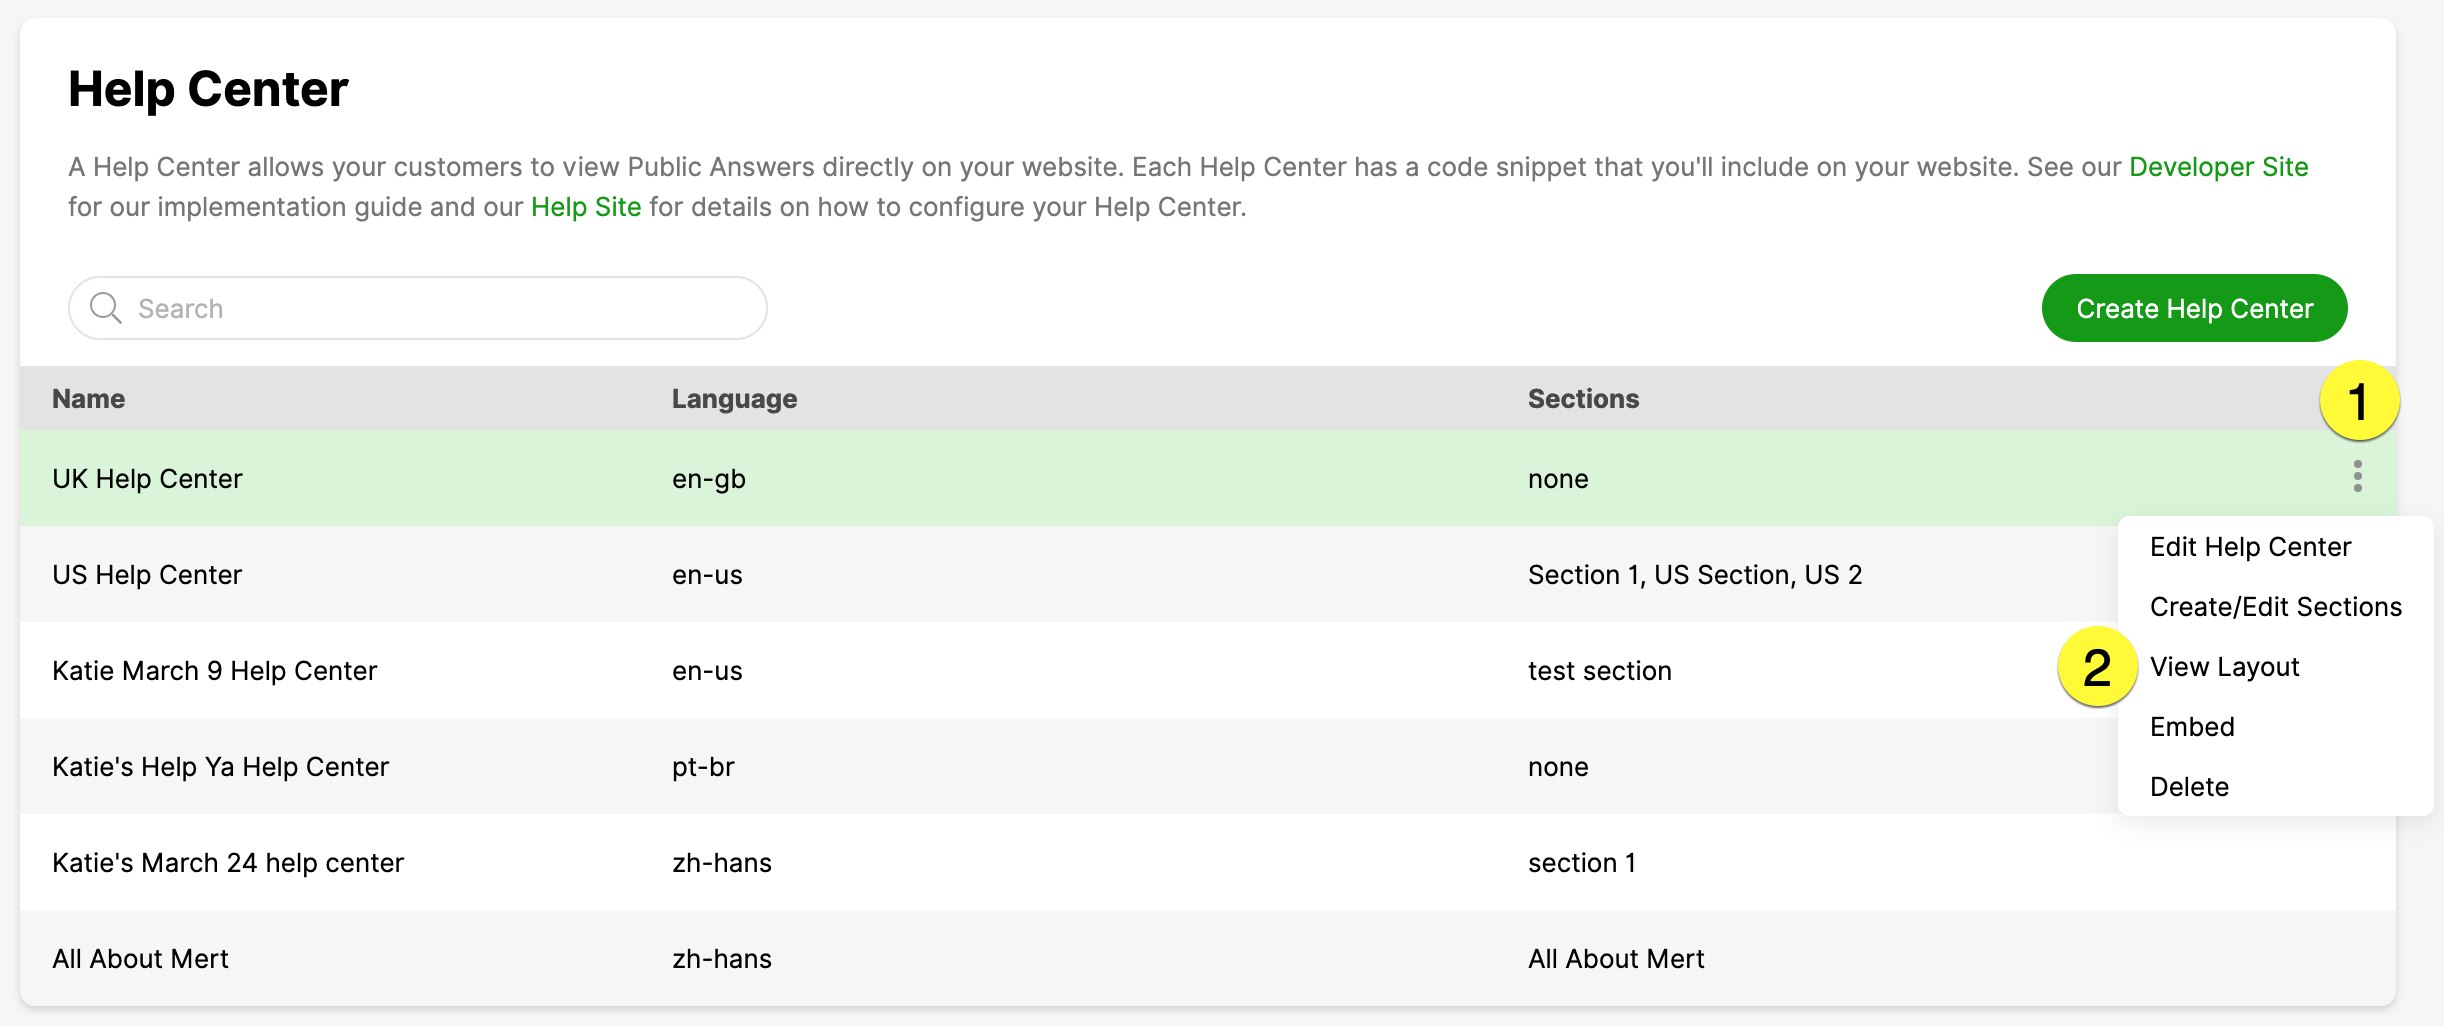
- Under the Answers category, click Help Center. The Help Center page will also show Help Center(s) you have previously (if any) configured.
- Click Create Help Center.
- In the Help Center configuration page, specify the following elements for the Help Center:
- Name – Enter a name that helps you identify the Help Center. The name will not be displayed on the Help Center itself. (e.g., US Help Center, AU Help Center, etc.)
- Page Title – Enter the name you want Customers to see on their browser tab when viewing your Help Center.
- Language – Select the language for the Help Center. This allows you to assign Public Answers using the same language.
- Note – Each Help Center supports one language.
- Audience – Select the Audience the Help Center will use to search Public Answers. Selecting “none” allows the searching and using all Public Answers not linked to an audience. Create an Audience if necessary, then select it here.
- # of Columns – Select the number of columns (3 max) to display your Public Answers.
- # of Preview Answers – Enter the number of Answers you want to appear in each Section of your Help Center. For example, if you have six Answers total, you can show the first four, then the Customer clicks “See More” to see all six Answers.
- Search Placeholder – Enter a placeholder help text for the search bar (e.g., How can we help?).
- Search Results Header – Enter the text to display above the search results on the results page. You can use the wildcard “%q” to display the specific search term entered by the Customer. For example, if you write here, “View %q results,” and a Customer enters “socks,” the Customer sees “View socks results.”
- Back Link Text – Customize the back link text to indicate how to return to a previous page when viewing an Answer. For example, “Go Back.”
- More Results Link Text – Customize the name of the link to the Answers index page that displays all of your Public Answers. If not entered, the default text is “See More Results.”
- Sections Heading – Enter the header name for a Section or a group of sections.
- See More Link Text – Customize the link text to view more Answers in a specific section if it exceeds the # of Preview Answers setting. For example, “View More.”
- Click Save when you’re done. You’ll be taken back to the Help Center page.
Now that the structure is created, the next step is to create Sections for the Help Center and link relevant Public Answers to each Section.
Create Help Center Sections #
Once you complete building your Help Center structure, the Help Center you created appears on the Help Center page. The next step is to create Sections (sometimes referred to as topics or categories) where you assign Public Answers (i.e., articles) for each Section.
- From the Help Center page, find the Help Center you just created, click, and select Create/Edit Sections.
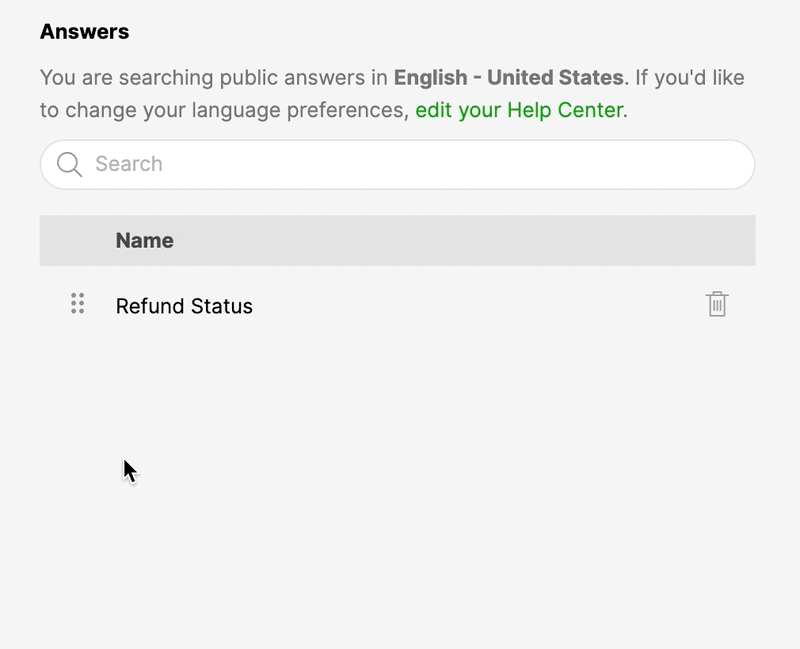
- The Sections page will be empty if this is a new Help Center and you have never added a Section. Click Create Section to continue.
- From the Create Section page, enter a name for the Section (e.g., Returns and Exchanges, Payments, Shipping, etc.).
- Below Answers, use the search bar to search and select the Public Answers you’d like to appear under the Section.
- Click to remove a Public Answer from the Section.
- The Availability of Public Answers depends on the Language and Audience options you have configured for the Help Center. For example, if “Refunds” Public Answer is available in English – United States and is linked to Audience Retale USA, but the Help Center Language is English – Australia with Retale Australia as the Audience, then “Refunds” won’t appear on the list.
- You can have up to 1,000 Public Answers per language or Audience or a combination of both per Help Center.
- Click
- Click Save.
Repeat the steps above to create more Sections. Once you’ve created all the Sections you need, ensure it’s organized the way you want.
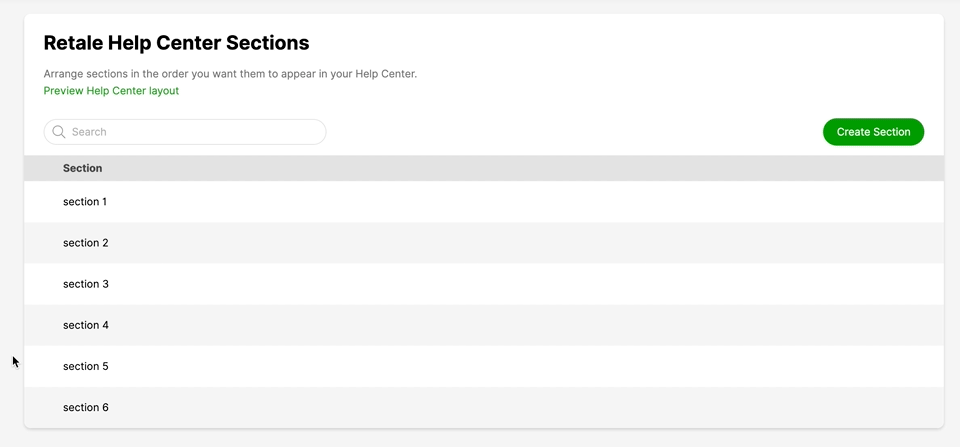
Sort Sections #
The number you selected for the # of Columns setting affects how Sections are organized in the Help Center. For example, if you choose 3 (max limit) and need six Sections, then Sections stack like the sample below, with Answers appearing below each Section.
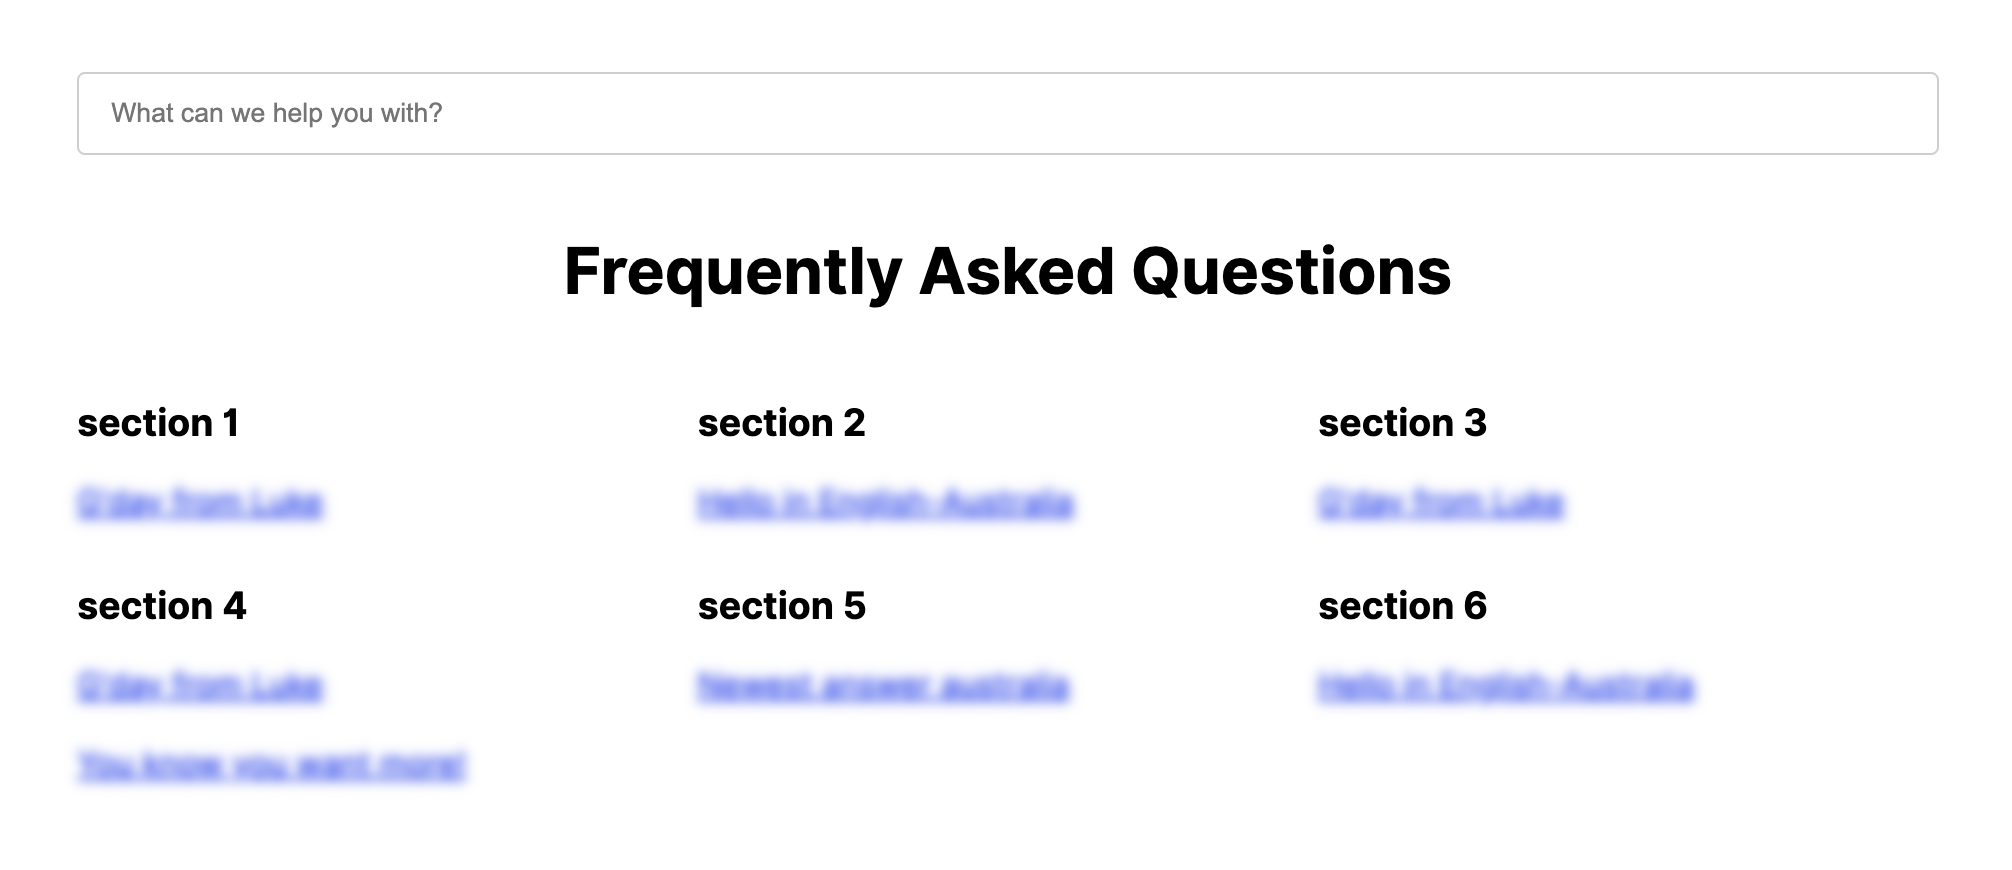
You can change the Sections’ sort order by dragging and dropping each Section on the list. Sections are sorted from left to right in the Help Center.
Once you have created all the Sections you want, you can preview the Help Center’s unstyled layout on the Help Center page.
Preview layout #
- From the Help Center page, click, and select View Layout.
- You’re shown an unstyled preview of the content and structure of your Help Center. When the Help Center is embedded into your website, it will use the same styling defined in your website’s CSS.
- It takes ~10 minutes for newly added Answers to appear in the preview.
When satisfied with the layout, embed the Help Center on your website.
Embed the Help Center code #
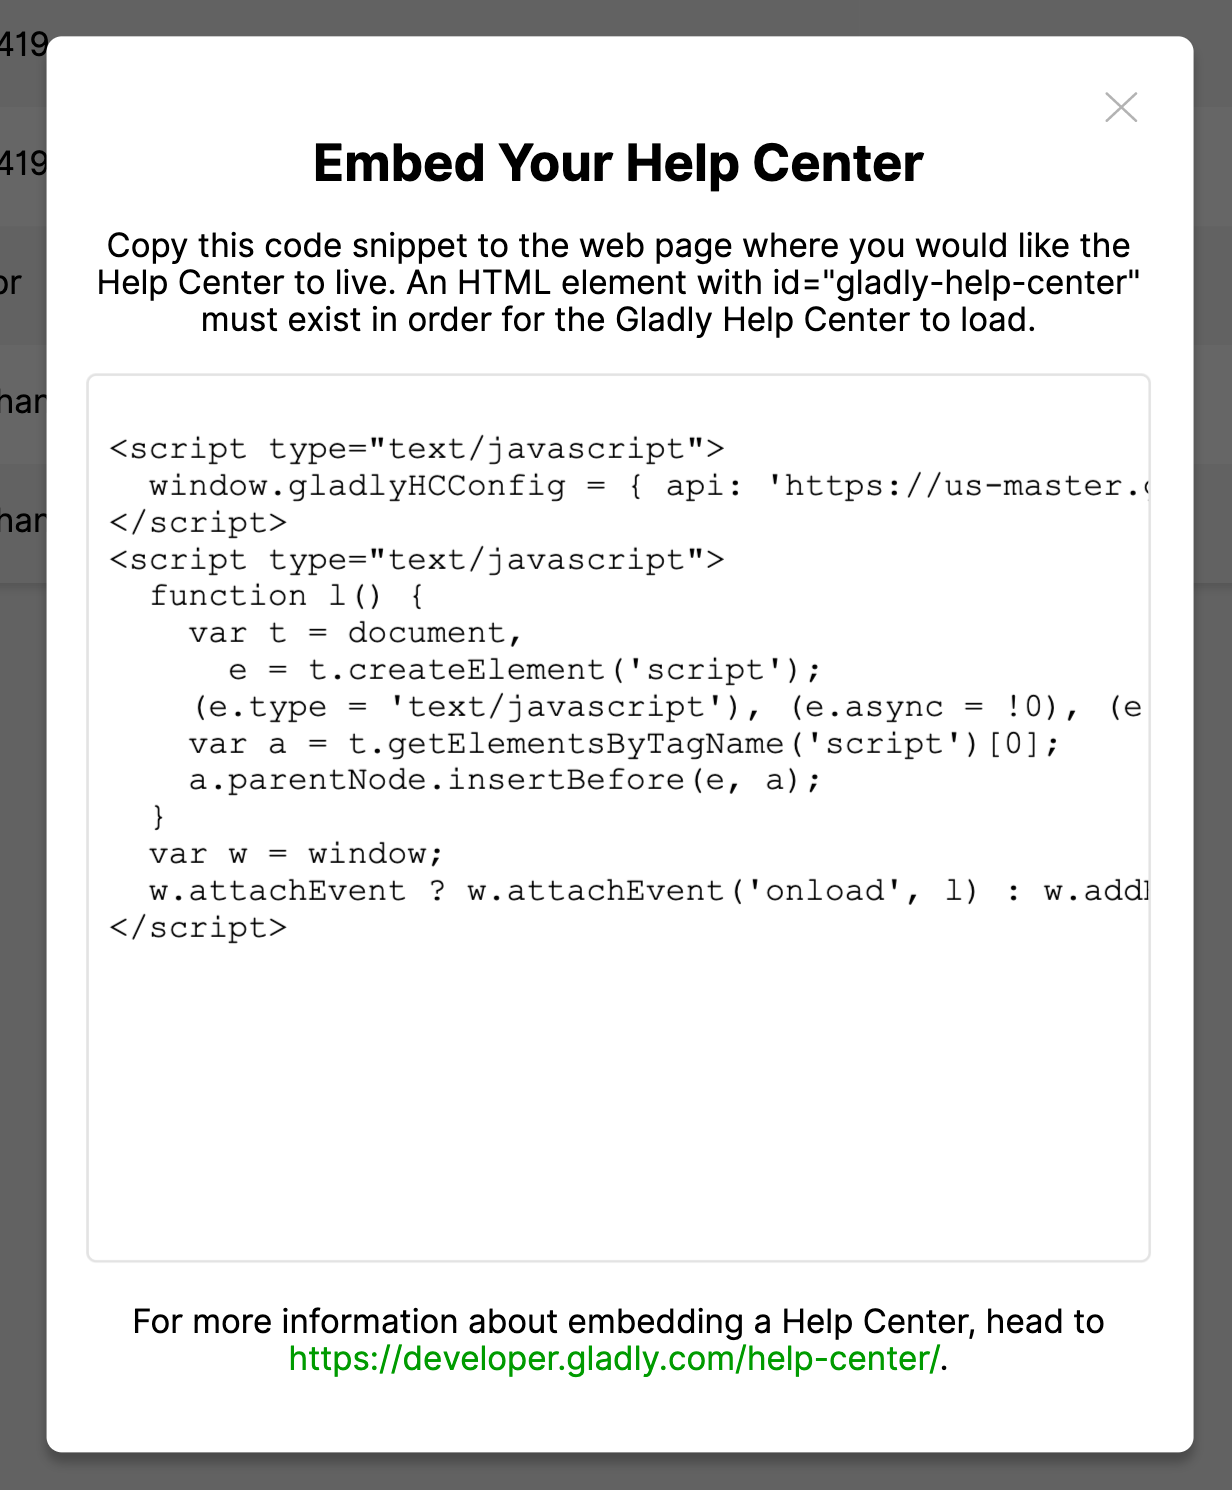
- Clickthe right side of the Help Center and select Embed.
- Copy and paste the snippet of code to your hosted website. Your website must have the HTML element id=”gladly-help-center” for the Gladly Help Center to load. The embed code includes the Sections you created for the particular Help Center. Style the website that will host the Help Center according to your brand principles, and the Help Center will inherit your website’s CSS.
Tip – Embed Help Center in platforms like Shopify
Embed Help Center on web pages you want to display your FAQs, like your website or platforms like Shopify. Watch this short video to learn how to embed Help Center in Shopify.