This page contains information on preparing for your first Proactive Email Campaign.
Standard workflow for creating a Proactive Email Campaign #
| Prepare | Create | Monitor |
| 1 .Confirm the email address you’ll use for the Email Campaign. 2 .Create the Email Answer to use for the Email Campaign | 1. Create and set up the Email Campaign details. 2. Upload your Email Campaign recipients and schedule the outreach. | 1. Check the “Progress” tab to see active outreach activity. 2. Completed outreach appears in the “Completed” tab. |
Use an existing email address to send a Proactive Email Campaign #
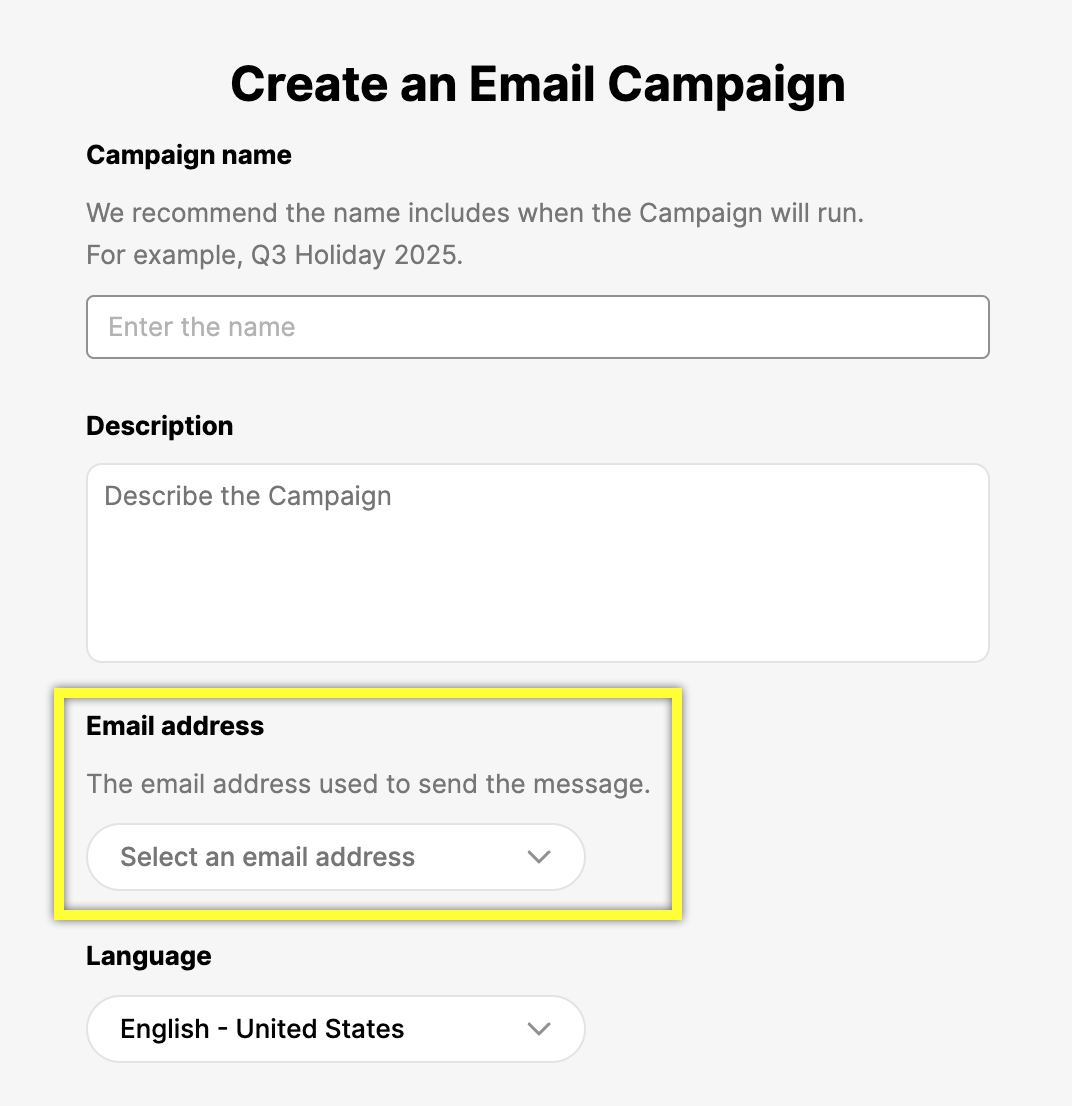
You’ll need an email address to use as the “From” address for your Proactive Email Campaign. You can choose to use an existing email address when setting up the Email Campaign, and replies to your Email Campaign appear on the Inboxed linked to the email address.

Add a new email address dedicated for use with Email Campaigns #
While not required, you can add a new email address to use for Proactive Email Campaigns. Having a dedicated email address for Proactive Email Campaign allows the flexibility to route Email Campaign responses — regardless of the reason for the Campaign — to an Inbox made specifically for Proactive Email Campaign replies. You’ll need to create a new Inbox and assign Agents trained to handle these replies.
With a new email address, you can also create an email address fitting for Email Campaign messages. For example, [email protected].
Create an Email Answer to host the message for the Email Campaign #
The Email Answer contains the message you’d like to email to your recipients. You must create your Email Answer before setting up the Proactive Email Campaign, and you’ll be able to select this Answer while configuring your Email Campaign.
Address the recipient by their first name #
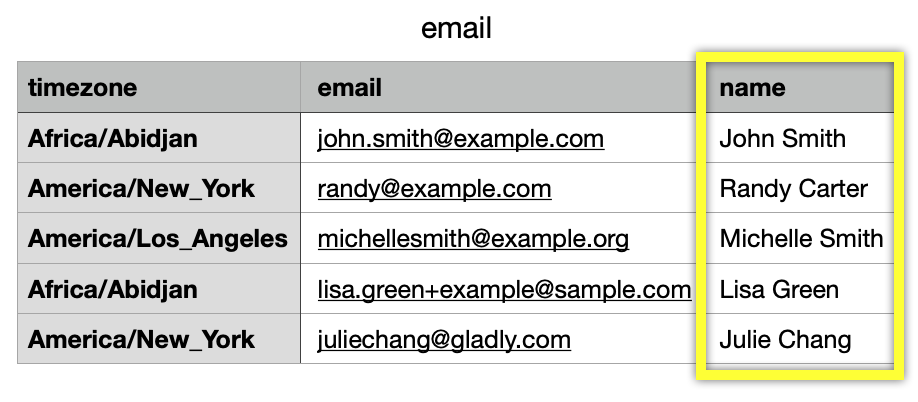
Address the recipient by their first name when they receive the message. Personalized greeting by name is possible if the CSV contains the recipient’s name and the Email Answers include the Customer’s Name variable.
- You can also use the Customer’s Full Name or Customer’s Last Name Answer variable if the name column on the CSV reflects the same information. You can use the Customer’s First Name variable even if you have the full name on the CSV, and the first name will be parsed.
- The CSV does not require names, but you must keep the name header.

When creating the Email Answer for your Email Campaign, insert the Customer’s First Name variable by typing “/” after the greeting in the Email Answer.

- Name is left blank on CSV – If the recipient name in the CSV is empty and they don’t have an existing Gladly Customer Profile, a new Customer Profile is created with the email address and no name.
- Name is entered – If the recipient name in the CSV is entered, but they don’t have a Gladly Customer Profile, a new Customer Profile is created with their name and email address.
Email contacts for your Email Campaign #
Gather contacts for your Email Campaign from places like your OMS system or CRM. Who you contact and where you get their contact information may depend on the reason for your Email Campaign.
See Proactive Email Best Practices for other tips and callouts to be aware of.


