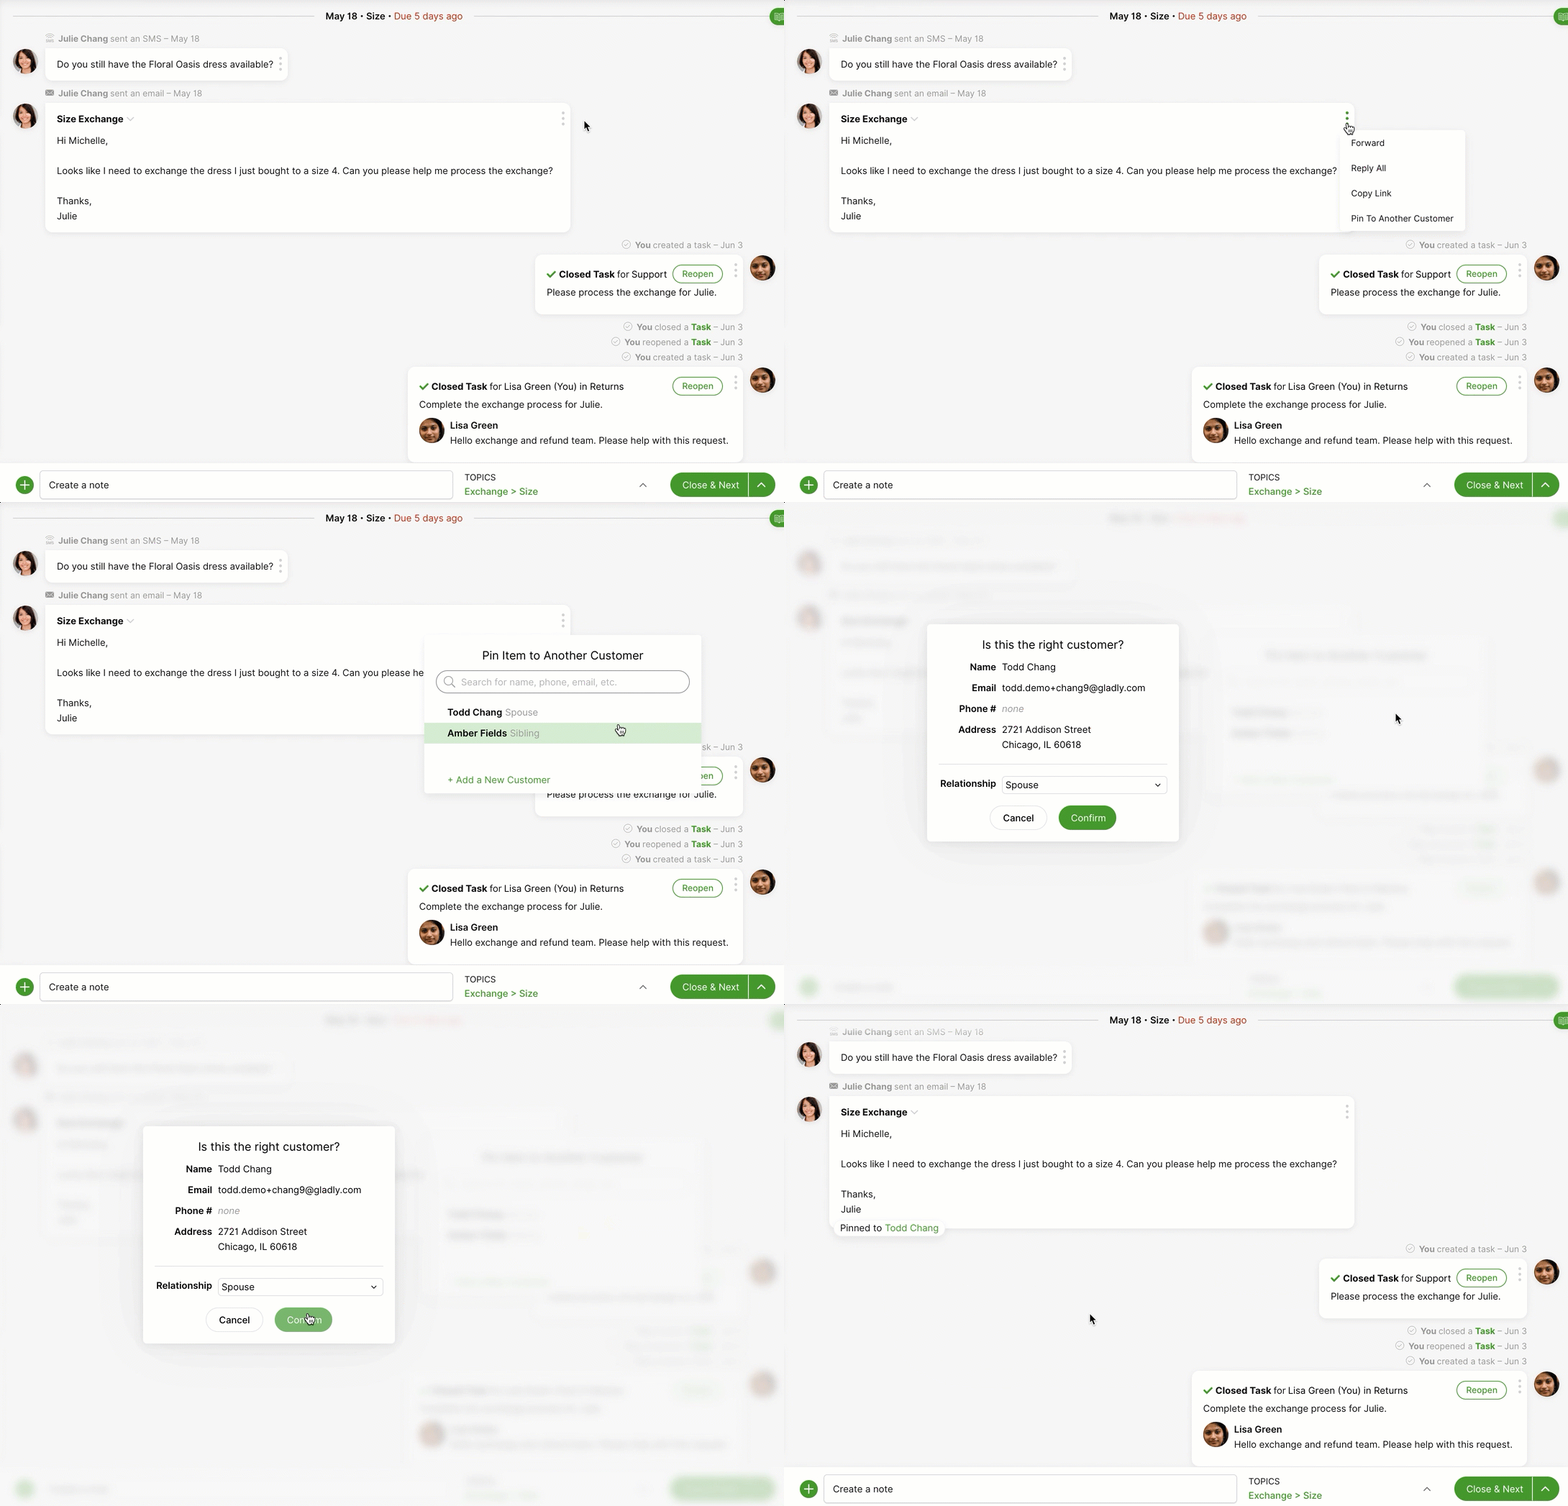
You can pin a specific interaction (or multiple interactions) from one Conversation Timeline to another. This is useful to create a link between two different Conversations or Customer Profiles. For instance, you can link a Conversation from a personal assistant by pinning a hotel reservation request to their manager’s Customer Profile.
Once an interaction is pinned, clicking on it from either Customer’s Profile will take you straight to the interaction’s location in the related Customer’s Conversation Timeline.
Pin an interaction #
- From a Conversation Timeline, find the interaction you want to pin, click
, then select Pin to Another Customer from the list.
- Search for the Customer whose Timeline you want to pin the interaction to by typing their name, email address, or another unique identifier into the search field.
- If the Customer has an existing Profile – Pick the Customer by selecting their name from the drop-down list or hitting Enter or Return, then click Confirm.
- If the Customer doesn’t have an existing Profile – Add a new Profile and fill in the fields with any details you know about the Customer, then click Add.
- You’ll see a label under the interaction indicating that it’s pinned and to whose Profile. The interaction will also appear on the other Conversation Timeline.
- You can pin an interaction to as many Profiles as you see fit. Repeat the steps above for each related Customer.
Unpin an interaction #
Unpinning an interaction is just as easy as pinning one in Gladly and can be initiated from the Profile it was pinned from and the Profile it was pinned to. 
- Go to the interaction you want to unpin. It can be from the Timeline of the Customer from which the interaction was pinned or from the Timeline to which it was pinned.
- Hover your mouse over the label, indicating that the interaction was pinned, then click
.
- That’s it! The interaction will no longer be pinned and removed from the Timeline of the Customer it was pinned to.


