Proactive Voice leverages the IVR to make outbound phone calls automatically. Depending on your reason for creating a Proactive Voice Campaign, a relevant message/recording is saved in your IVR via the Message and Menu node. The IVR is configured to detect if a person picks up the call and play your message and even give the option to speak to an Agent. If a voicemail picks up, it can leave a message as well.
This is accomplished simply by using the Proactive Voice IVR template.
Sample IVR for a Proactive Voice Campaign #
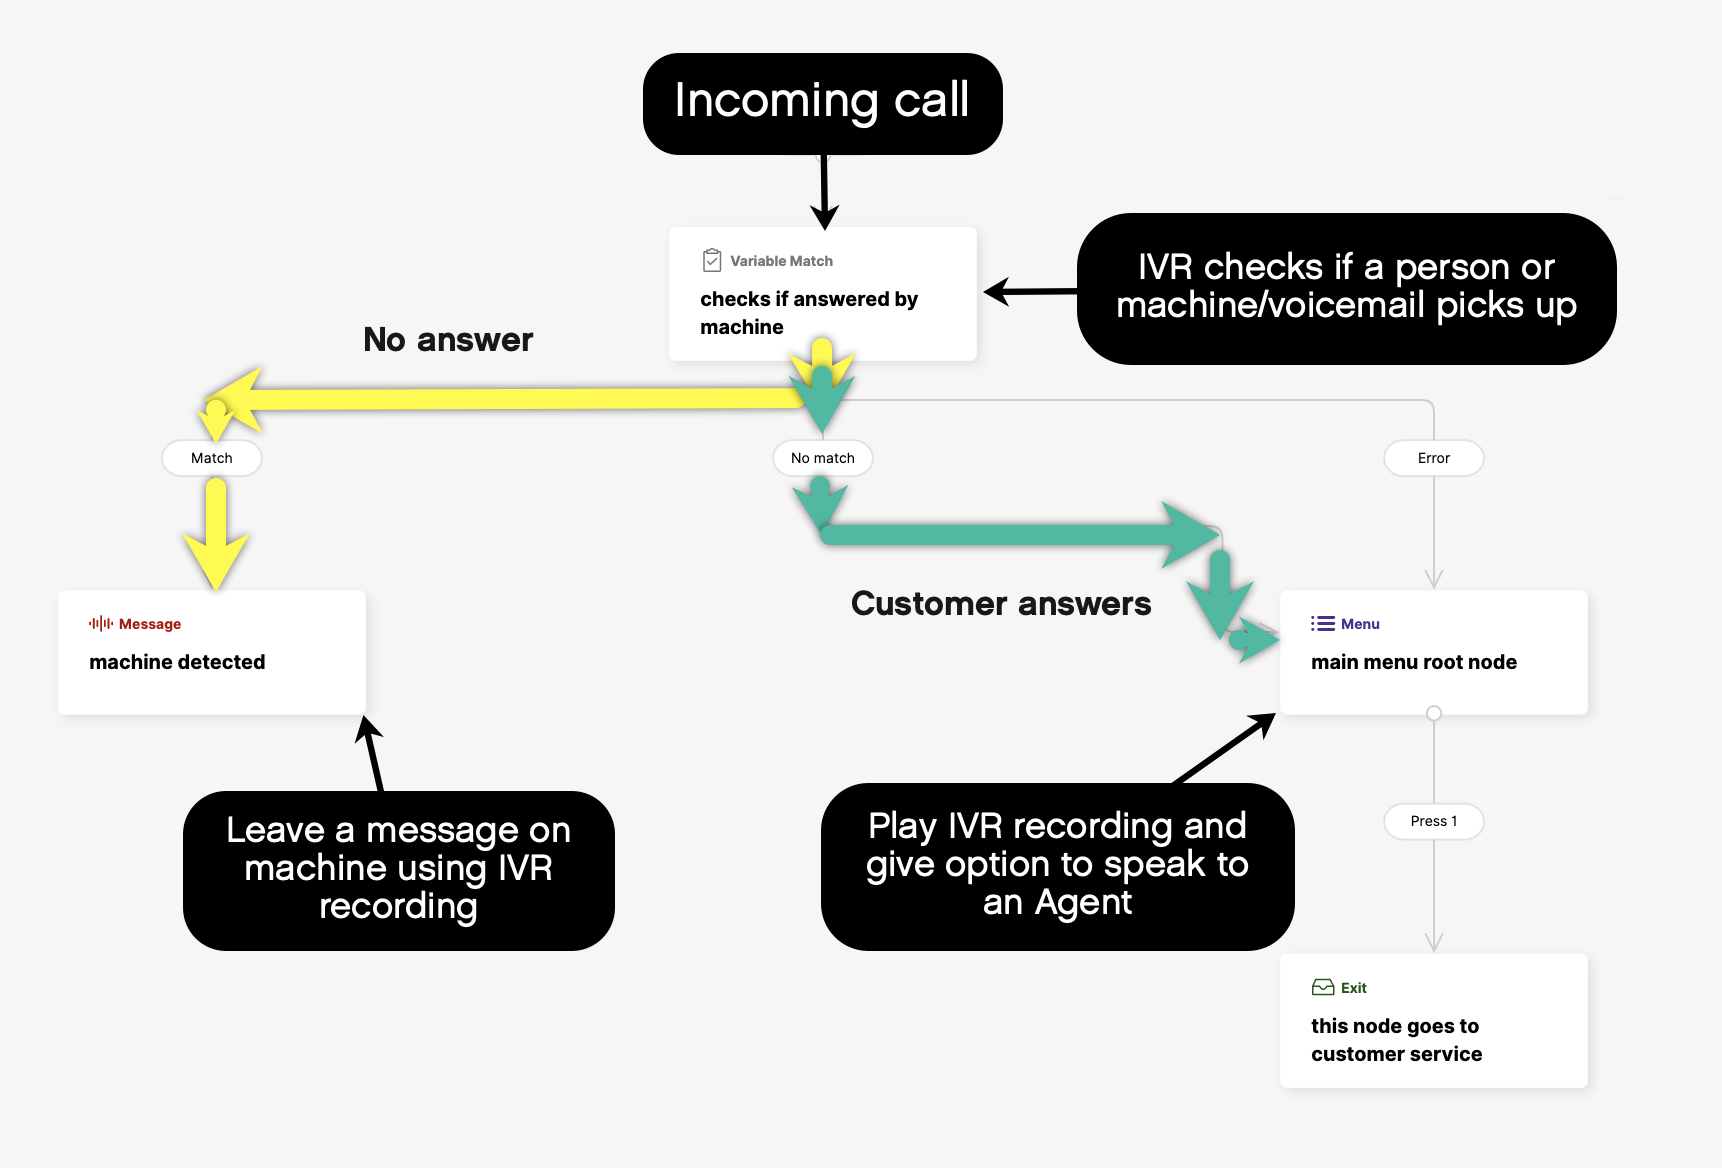
In the figure below, the following happens when a call is made to the Customer utilizing the Proactive Voice IVR template.
- IVR checks if a human or machine/voicemail picks up.
- Machine – If no answer is detected, but it detects (Match) that a machine/voicemail answers, the IVR will play the recorded message configured in the Message Node.
- Human – If the call is answered, the IVR is configured to play the recorded message to the Customer. It also gives the option to the Customer to press 1 to speak to an Agent.

Each Campaign serves a single purpose, and an IVR is explicitly created for each Proactive Voice Campaign.
IVR Exit node #
The Exit node dictates where calls are routed if the recipient chooses to speak with an Agent. If you build an IVR for your Proactive Voice Campaign with multiple Exit nodes, each Exit node must point to the Inbox you want calls routed to.
Standard workflow for creating a Proactive Voice Campaign #
| Create | Schedule and Send | Report and Manage |
| 1. Create a recording/message for the IVR specific to the Campaign. 2. Create the IVR to be used for the Campaign. 3. Create and set up a voice Campaign. 4. Upload a list of recipients for each Campaign. | 1. Schedule when outbound calls should begin for each Campaign. 2. Click Send to start the Campaign. | 1. Review report of Campaign progress. 2. Option to cancel calling a particular recipient list or delete an entire Campaign. |
Unique messages for a Proactive Voice Campaign #
It’s important to note that Campaigns can’t call Customers and provide unique or Customer-specific messages. For example, it can’t call and say the Customer’s name:
Hi {CUSTOMER_NAME} your order is due to be delivered on {DATE} between {TIMES}.”
When you add recipients to a Campaign, ensure that the recipients are specific to the Campaign. For instance, If the Campaign is about a delivery confirmation message between 8 AM and 1 PM, only add recipients/Customers with an 8 AM and 1 PM delivery window. You must create a separate Campaign and IVR for recipients/Customers with a delivery window of 2 PM to 6 PM, and so on.


