Data Dip is an API call made via the IVR to an external system of choice. For requirements on this API call, review the information below.
Before you start #
We recommend that you familiarize yourself with Variables before you configure data dips. The Data Dip node is one of the few nodes that can’t be added through the UI. Contact Gladly Support to add this node to an IVR.
Variables
Before we get started, it’s important to note what a variable is. A variable is a saved input (e.g., a DTMF or speech input in a menu) or a saved response from an API call.
Saved variables are accessible in the following nodes to access:
- Message: Available in the “text” or “recording” configuration to recite/play to a customer
- Data Dip: Available in the “URL” or “body” configuration to make an API call
- Variable Match: Available in the “expression” or “pattern” configuration to route to a subsequent node
- SMS: Available in the “text” configuration to send to a customer as a text
Variables are saved and accessible using this format in other nodes:
{{._customerNumber}}: The customer’s number in E.164 format (e.g., +1234567890){{._companyNumber}}: The Gladly phone number in E.164 format the customer is calling into (e.g., +16501234567){{.NODE_ID}}: NODE_ID equates to the node’s internal ID (NOT name). This corresponds to the menu option the customer chose in a menu (e.g., “1” or “one”), to another Variable node’s ID if you are saving a variable in a separate node or to an input node the customer entered{{.DATA_DIP_NODE_ID.VARIABLE_NAME}}: DATA_DIP_NODE_ID corresponds to the node’s internal ID (NOT name) responsible for making an API request. VARIABLE_NAME corresponds to the variable you saved the data dip response into (see “Making a Request to Your API” below)
You can also create your own variable node and save custom settings here. For example, you can create a variable node with ID orderPrepend and manually set it (like in the example below). The variable can then be accessible in other nodes using {{.orderPrepend}}: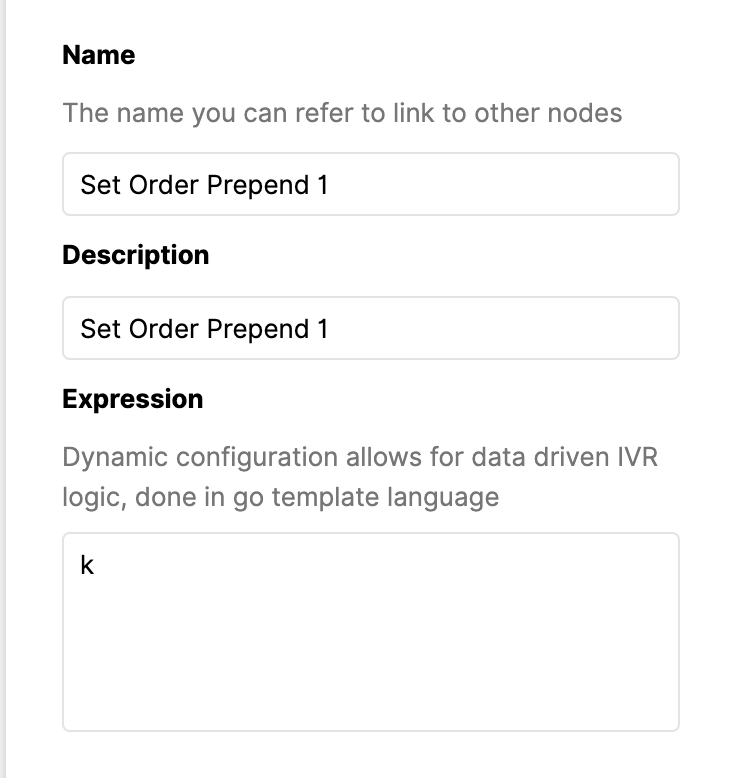
In addition to the above, you can also create a custom expression using the Sprig template language http://masterminds.github.io/sprig/ and set that as your expression. For example, in this example, if the setBronzeThreshold variable we configured is less than the pointBalance variable we saved from the ah_dipMemberPointsStatus data dip, then set the current expression to above. Otherwise, set it to none.
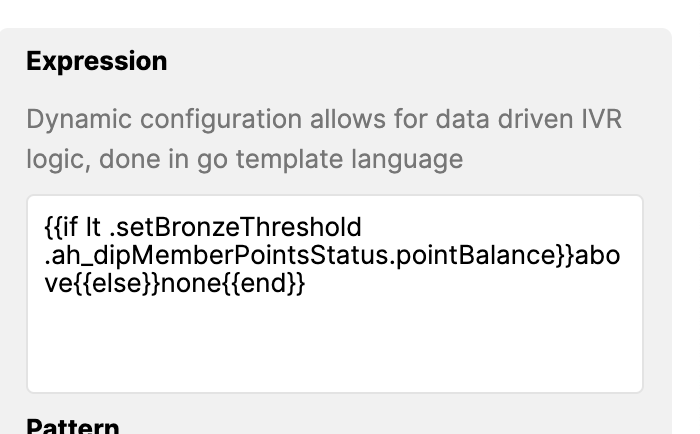
Doing something like the above will allow you to create custom experiences in your IVR for customers depending on what your data dips respond with.
Variable Matches
A variable match allows you to route to different sections of your IVR depending on the pattern you want to match.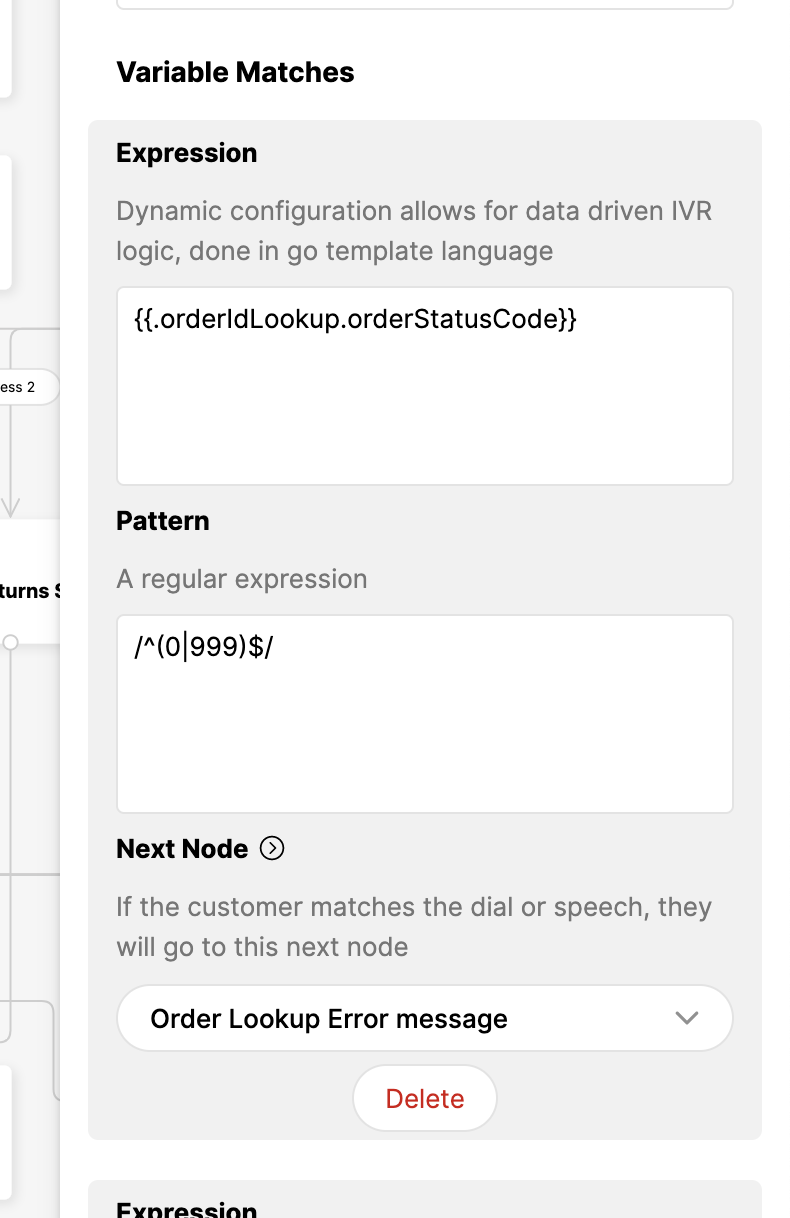
In the example above:
- If the orderStatusCode variable saved from the orderIdLookup data dip matches
/^(0|999)$/, then route to theOrder Lookup Error messagenode
Refer to the “Variables” section above to derive how we derived the {{.orderIdLookup.orderStatusCode}} from the expression
Piece it all together #
Making a Request to Your API
Data dips can be configured on Gladly using an “HTTP” node. When the IVR reaches the “HTTP” node, Gladly will trigger an API call to your system of choice.
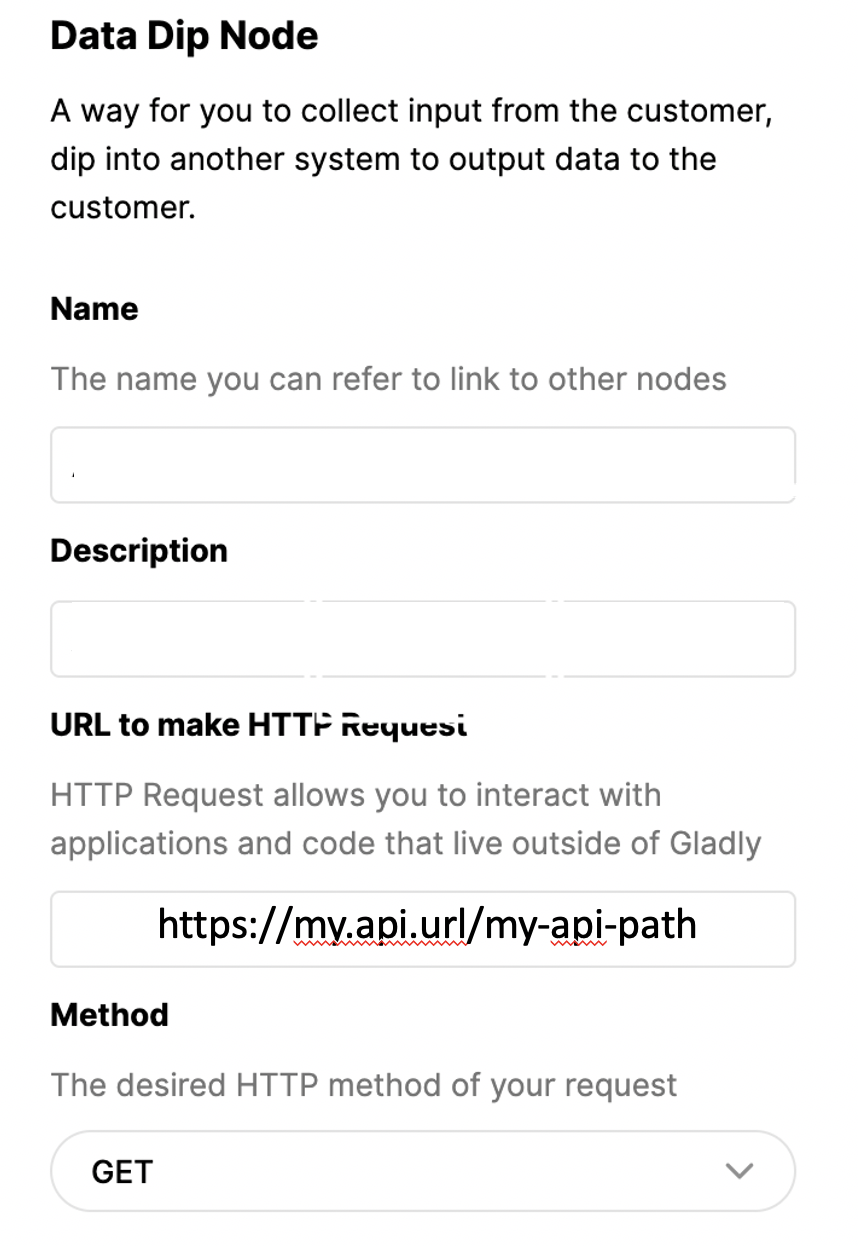
In the example above, we ask the IVR to make a GET request to the configured URL when it reaches the HTTP node.
For POST requests, an additional field called “Body” is available, where you can specify a request body.
Tip – Using Variables
In the example above, we ask the IVR to make a GET request to the configured URL when it reaches the HTTP node.
For POST requests, an additional field called “Body” is available, where you can specify a request body.
Authentication
Gladly currently only supports basic authentication. To configure your basic auth credentials, please contact the Gladly support team. The Gladly support team will then let you know the credential ID for you to use in this section of the Data Dip node: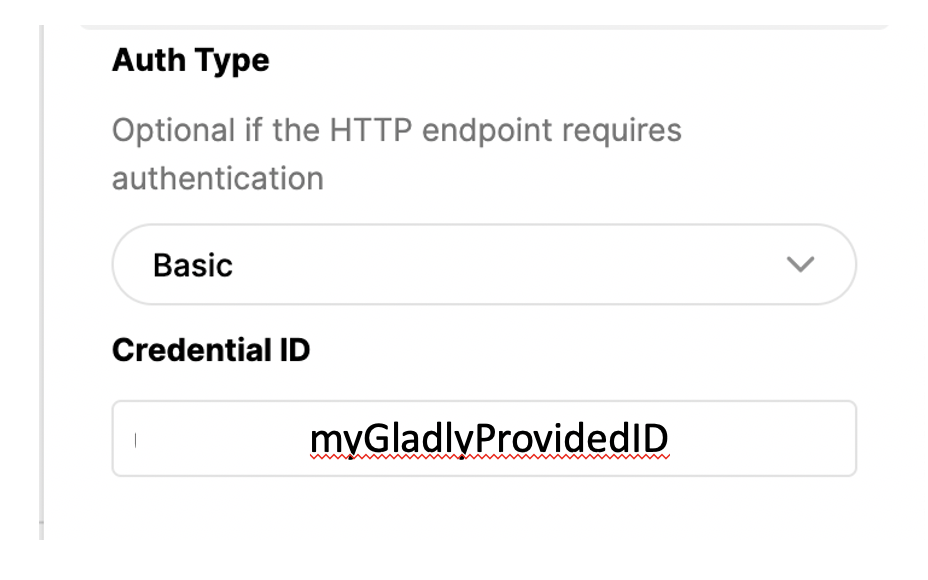
Parsing the Response from Your API
Once the service responds, you may save the response in variables provided that the service responds with JSON:
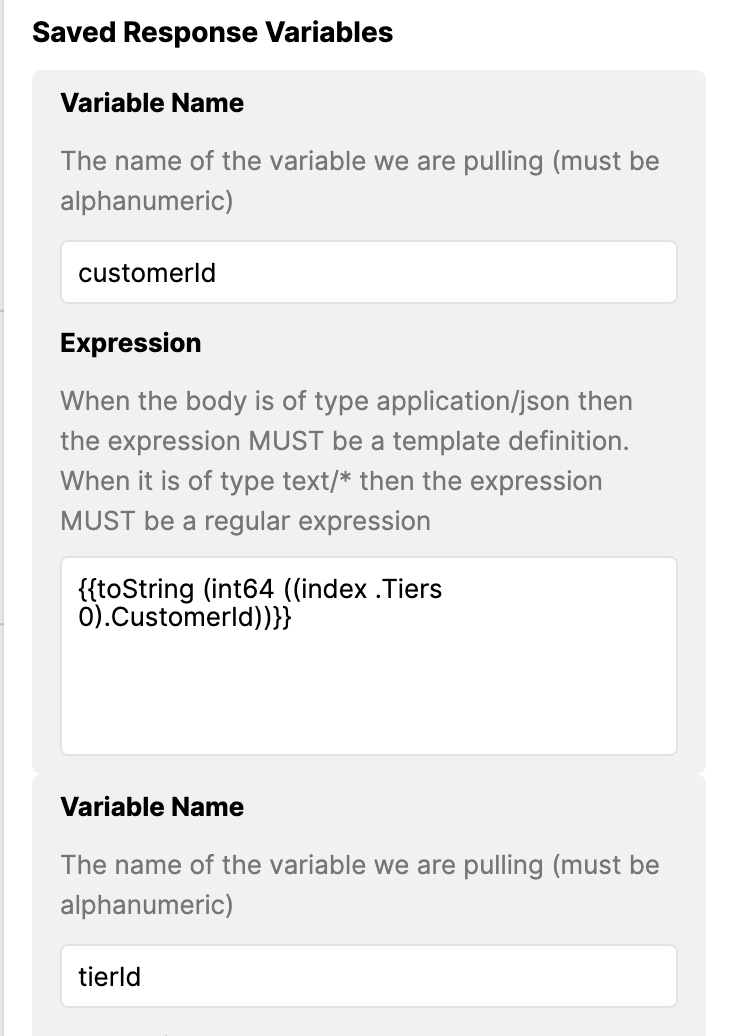
In the example above, we are retrieving the first object in the Tiers array of the response and saving the CustomerId key of that object to a variable called customerId. We are then casting it to an integer, and then casting it to a string.
The variable will then be accessible in other nodes using {{.DATA_DIP_NODE_ID.customerId}}
Directing your IVR to the Next Node
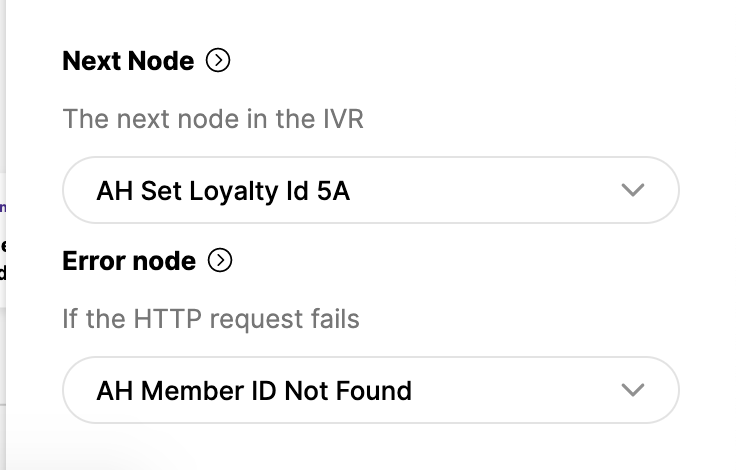
In the example above, if the API request was successful and there were no errors evaluating the saved variables, we direct the customer to the “AH Set Loyalty ID 5A” node. Otherwise, we direct them to the “AH Member ID Not Found” node and present an alternate fail experience.
Using the Variable Match Node
Typically, customers will connect the “next” node above (a successful API retrieval and parsing) to a variable match node. This will allow you to direct certain variables saved from the above data dip to different nodes/experiences. For example, if you could save a shipment date variable from your data dip, you can tell the IVR to direct the customer to an “order is shipping on ____” message.


