| REQUIRED USER ROLE Administrator |
Create and configure your operating hours to help you set expectations with Customers on when they can expect a response when they contact you.
Before you start #
Before you add your hours, we recommend that you first review the following:
- Read what Business Hours is used for.
- Get familiar with how to create a Rule.
- Learn about Email or Messaging Answers (especially if using Business Hours to automate replies via Rules).
- Keep in mind that Business Hours works for SMS & Email only.
Note – Business Hours can’t be used with IVR or Glad App
IVR messaging is controlled through the Schedule node, and Glad App is controlled via Display Rules.
Set up your Business Hours #
- Click
on the top left corner of the screen.
- Click Settings.
- Under the Orchestration category, click Business Hours. The Business Hours page will show you a list of Business Hours you currently have configured.
- Click Create Business Hours.
- Enter a name in the name field for the Business Hours. Use a name that helps you quickly identify how the hours are to be used.
- Pick the Timezone you want to follow (e.g., PST, EST, etc.) for your operating hours.
- The Create Business Hours page has two sections: Business Hours and Exceptions.
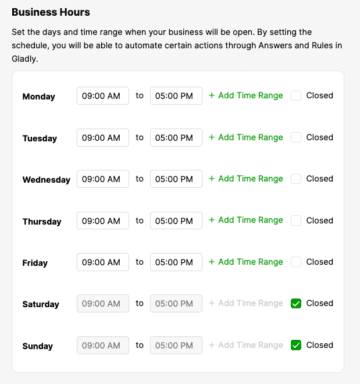
- The Business Hours section lists the days of the week where you can enter your operating hours or mark the day as Closed. The pre-configured times are 09:00 AM to 5:00 PM, with Saturday and Sunday marked as Closed.

- Business Hours – For each day of the week (Monday – Sunday), enter your operating hours (e.g., 9:00 AM to 5:00 PM).
- Add Time Range – To add a different time range for the same day, click + Add Time Range.
- Do this to include breaks in your operating hours (e.g., if you’re closed between 12 PM and 1 PM for lunch)
- To delete a time range, hover over the time range box, then click
.
- Closed – If you’re closed on a particular day, click the Closed box.
- Add Time Range – To add a different time range for the same day, click + Add Time Range.


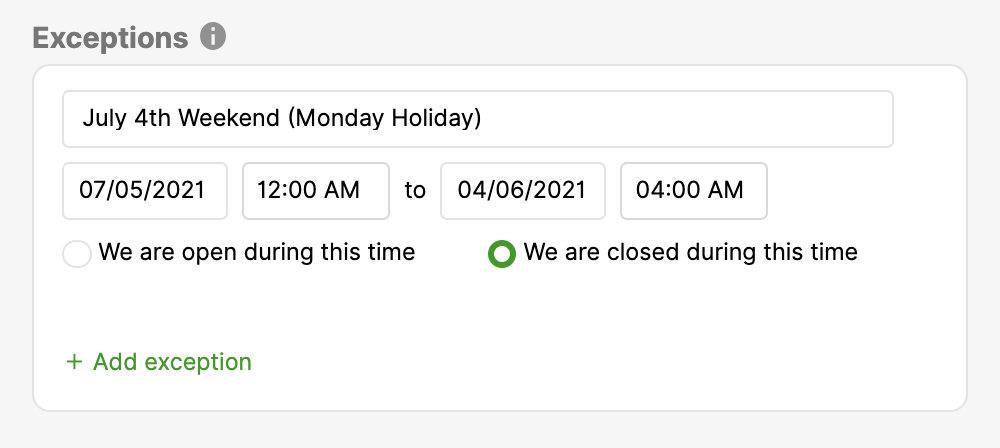
- The Exceptions section is used to deviate from the operating hours configured. For example, you can set operating hours for Monday, July 5th, and indicate if you are open or closed during these hours.


- Enter a name for the exception.
- Enter the Date (MM/DD/YYYY). If this is a recurring exception, you must edit the year as needed.
- Select the Time (HH:MM) range for the exception.
- Click We are open during this time button if you are open during the configured time.
- Click We are closed during this time button if you are closed during the configured time.
- Click + Add Exception to insert another exception.
- To delete an exception, hover over the exception box, then click
- To delete an exception, hover over the exception box, then click
8. Click Save. This will take you back to the settings page. Once saved, the Business Hours schedule is ready to be used in Rules as a Condition.
Rules for Business Hours #
Set up Rules once you’ve configured your Business Hours. Use Rules to create time-based actions in Gladly.
- Back in the Settings page, under the Routing category, click Rules.
- Click Create Rule.
- From the Add Rule page, configure the Rule Trigger, Conditions, and Actions. Don’t forget to click Add Rule when you’re done.


For Trigger, you will always use:
- Communication is received
Conditions


For Conditions, you can use the following options:
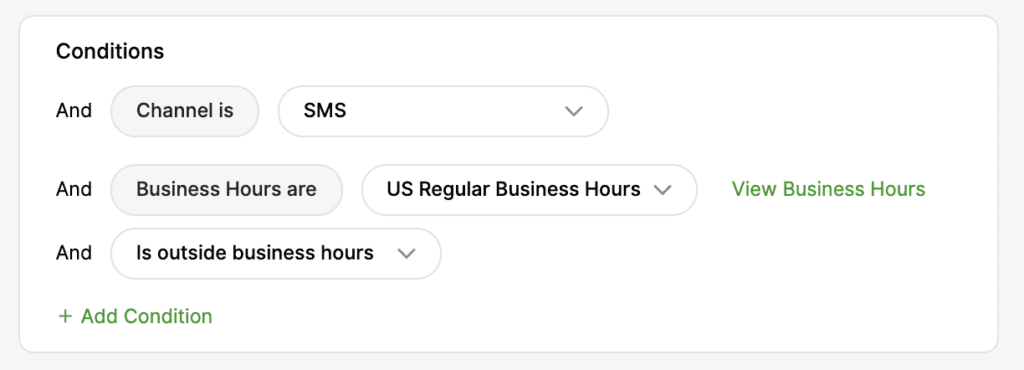
- Channel – Refers to the Channel of the most recent Customer communication. For example, if you select Channel > Email, this Rule will only consider incoming emails from Customers.
- Channel is not required as a Condition unless you want to Rule to apply to a specific Channel (messaging or email).
- Business Hours are – This allows you to pick which Business Hour setting to follow for the Rule. You can click the View Business Hours link to open the setting.
- Is Inside Business Hours – If selected, the Rule will trigger when a Customer reaches out during your operating hours.
- Is Outside Business Hours – If selected, the Rule will trigger when a Customer reaches out during non-operating hours.
Actions


Actions is where you can automate actions based on your Business Hours setting. Review the Actions list to get a sense of what you can automate based on your Business Hours setting. Below are some examples:
- Send Auto-Reply – This allows you to search and pick what auto-reply (via Answers) to send to a Customer. Because an Answer could be in different languages, pick the Answer in the language you’d want to use, then select which Answer type (Email or Messaging) to use.
- Assign to Inbox – Assign a Customer to a particular Inbox based on when their email or SMS is received.
- Close Conversation – Automatically close Customer requests received outside your normal operating hours. Use this alongside Send-Auto Reply to let the Customers know the best time to reach back out.


