| REQUIRED USER ROLE Administrator |
Before you start #
Review the following information before you connect Klaviyo to Gladly.
- Make sure you have Administrator access to your Klaviyo account. You need this to retrieve your Klaviyo Private API key.
Create Klaviyo Private API Key #
From the Klaviyo dashboard:
- Go to the API Keys Admin
page in Klaviyo.
- Click Create Private API Key.

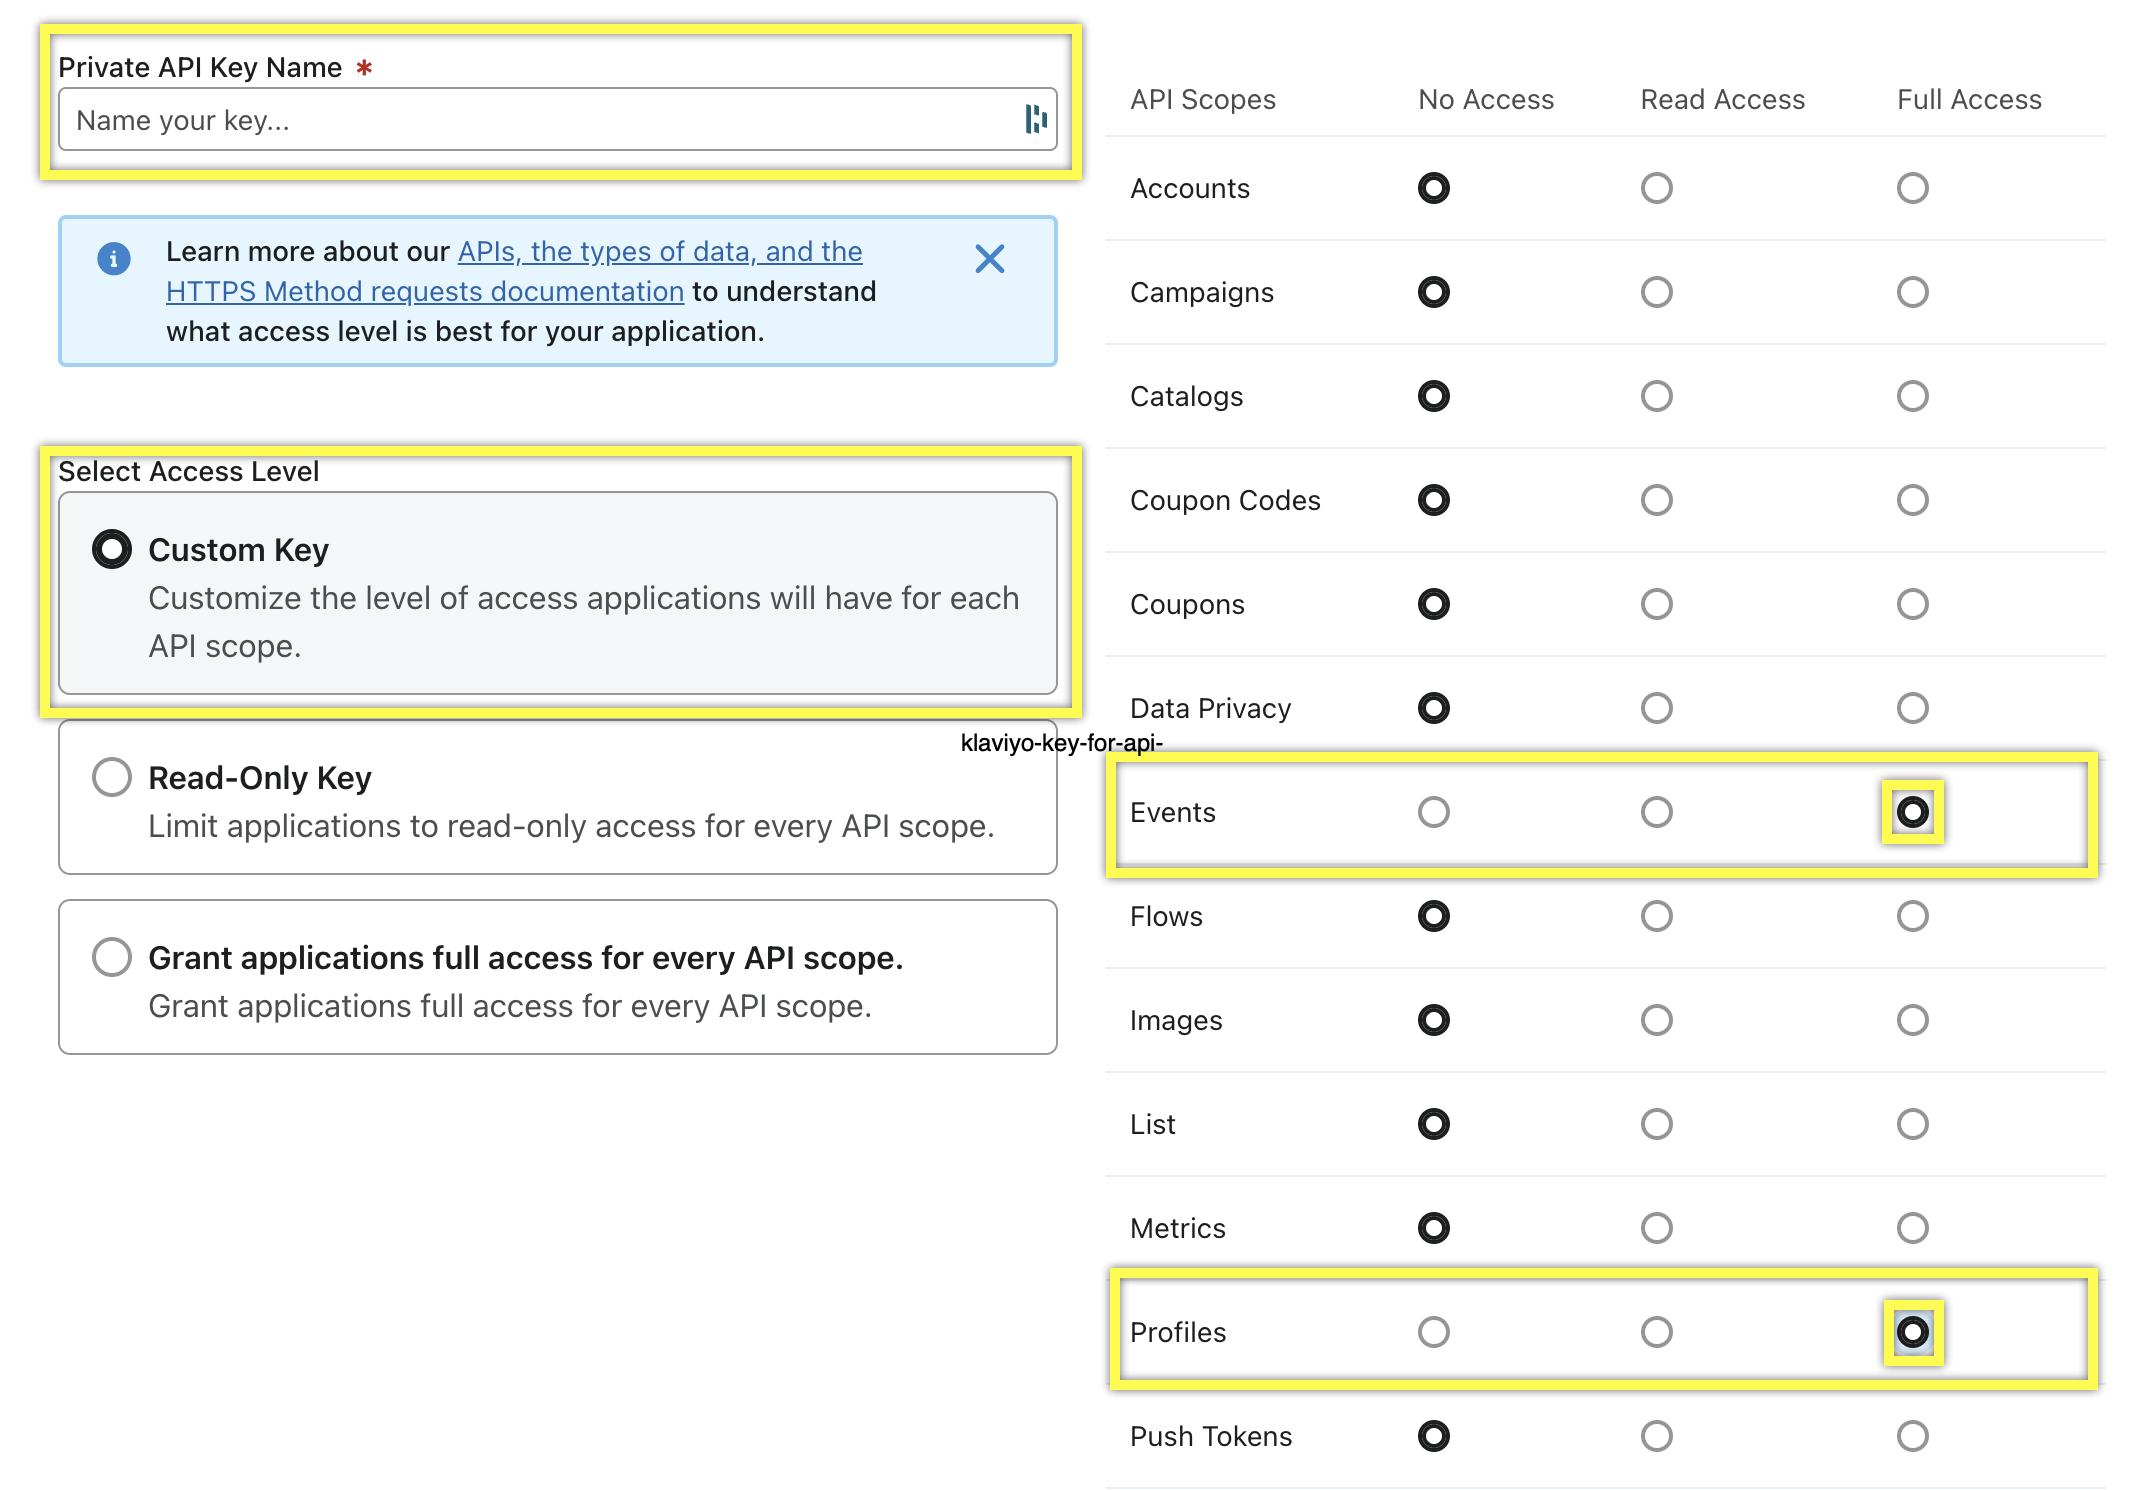
- Select Custom Key for Access Level and select Full Access for “Events” and “Profiles.” Give a memorable name, for example, “Gladly App” for API Key Name.


- Click Create, then click Copy Key.
Once you have the Klaviyo Private API Key, add Klaviyo in Gladly.
Add Klaviyo to Gladly #
From the Apps page, click Add App > Klaviyo.
- From the Add New Klaviyo App page, enter the following information:
- Name – Enter a name that will help you identify the Klaviyo instance.
- Klaviyo Private API Key – Enter the “Private API Key” from Klaviyo. This ensures that Gladly sends data to the correct Klaviyo instance.
- Do Not Create New Klaviyo Customers – This setting is deactivated by default. Activating it stops the creation of new Customers in Klaviyo sent by Gladly, and the app will only update existing Customer data matched in Klaviyo.
- Why activate this setting
- If you have multiple brands in Gladly, of which only some are in Klaviyo.
- If you populate Klaviyo with information outside of Gladly and want to use Gladly only to suppress marketing.
- Note – If you’re activating this setting and Klaviyo was connected to Gladly before October 1, 2023, you must create a new Private API key in Klaviyo with the “Events” and “Profiles” permissions, then replace the key in the Klaviyo Private API Key in the Klaviyo page in Gladly > Settings > Apps > Klaviyo.
- Why keep this setting deactivated
- You will not utilize Gladly Customers for marketing purposes.
- Why activate this setting
- Click Save App.
Set up Segments #
Now that Klaviyo is linked to Gladly, you can begin building segments


