| REQUIRED USER ROLE Administrator |
Before you start #
At a high level, you’ll need to:
- Identify which Gladly Inbox will be used.
- Collect the Customer’s email address in the Contact Us form submission.
- Send the submission to an Entry Point Point on Gladly (e.g., [email protected]).
- Set the reply-to header of the email sent in #2 to the email set in #1.
Configure Gladly for Formstack #
Email entry points allow Agents to receive emails in Gladly from Customers. They’ll also be able to reply to Customers from within Gladly using the email addresses you configure as your email entry points.
Setup Email Entry Points #
See the Email Entry Points for details on how to set up email entry points.
Create Inbox #
You may choose to use an existing Inbox or create a new Inbox. Instructions on creating a new Inbox are below if you choose to go this route.
- Create the Inbox where requests from Customers are queued.
- Name the Inbox.
- Set the Inbox SLA.
- Assign users to the inbox.
Configure Formstack for Gladly #
Sign up for an account #
We highly recommend perusing the Formstack pricing plans to select the right tier for you and ensure you can save Customer submissions.
Configuring your form #
- Login to Formstack, and click the Forms button on the upper toolbar.
- Create a new form, and make sure you click on “Build” to be in Build mode:

- You’ll want to collect at least one vital piece of data: the Customer’s email address. Click on “Email Address” then drag it to the right-hand side form builder:

- Click on the “Email” element in the form builder and check the “Required” box. Then, configure any additional information you’d like (e.g., a placeholder or a label).
- Click on Save Field.
- Repeat the above for other things you’d like to collect. For example, you can collect more details about the Customer’s inquiry using a “Short Answer” field or the Customer’s phone number using the “Phone Number” field.
- Next, go to the Settings tab.
- Click on Emails & Actions.
- Click on Add a Notification Email.
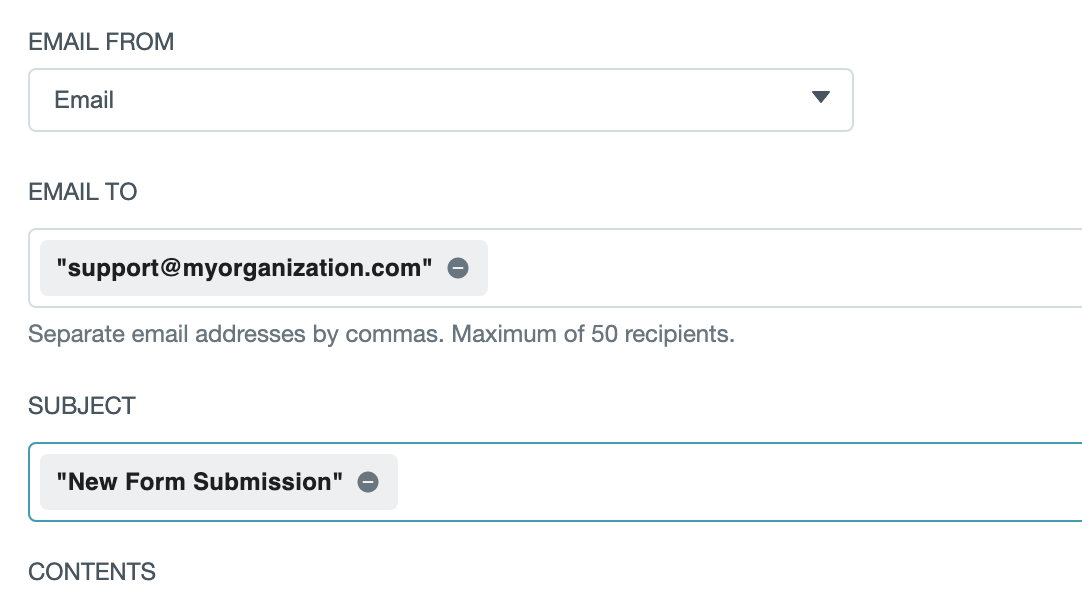
- Set “Email From” to the Email collection field – this will set the email’s reply-to header to the Customer’s email address collected in the form. While Formstack validates that the email address is well-formatted, you should be aware that Customers occasionally typo their email addresses! If agents cannot reply to a Customer’s email, they may need to double-check submission spelling.

- Set “Email To” to an email entry point you’ve configured on Gladly.
- Set the “Subject” to a subject.
- Click on “Save Notification Email” in the upper right-hand corner.
- If you wish to customize the submission message, click on Settings and then navigate to Welcome & Submission Message.
Auto-populating Customer Profile fields
Please note that Gladly can only auto-populate the email address (not the phone number or other details) from your form submission. Additional details, though, may be pulled from your Customer Profile integration if you have any integrations set up.
Embedding your form on your website #
- Click on the Share tab on your form.
- Click on “Quick Start”.
- Copy the JavaScript embed code and add it to a static page on your website to host the Contact Us form; delete the number here.
Testing your form #
You must first set up email forwarding to see submissions make their way into Gladly. Otherwise, your submission will stay in your email Inbox, but not get forwarded to Gladly.
- Navigate to the static page you’ve created on your website to host the Contact Us form.
- Enter a submission.
- Login to Gladly and wait a few minutes.
- Your submission will appear as an email communication in Gladly in whichever inbox you’ve configured via Channels + Rules settings.
- Note that emails will display via plain text and all images/attachments collected will appear as attachments.


