| REQUIRED USER ROLE Administrator |
Before you start #
Review the following information before you connect Ada to Gladly.
- This is a multi-step process where you’ll need to embed Glad App (if you haven’t already) and Ada on your website. You’ll then configure the handoff process from Ada to Gladly along with setting up how Ada creates Conversation items in Gladly.
- You need to have Administrator permission in Ada to configure the integration.
Install Glad App and Ada on your website #
- First, if you haven’t done so already, configure and embed Glad App on your website.
- Note – Ensure “Enable Search and Quick Actions” is checked on the Glad App configuration page.
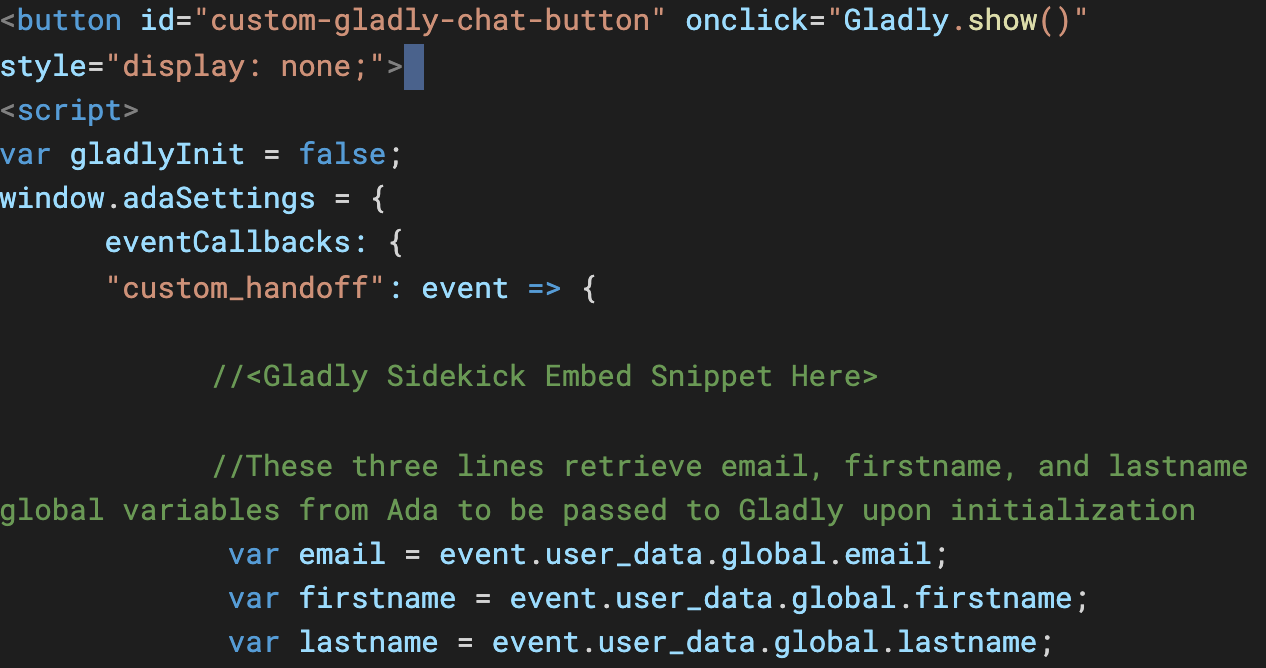
- Once Glad App is configured and embedded on your website, proceed to embed Ada by adding the following HTML to the section of your page, replacing the handle of your Ada bot, and
with the App Id of your Gladly Glad App. - You can also utilize additional methods and events from the Gladly Glad App API within the custom_handoff callback. For more information, see the developer guide
 .
. - Glad App appID is shown in the embed code for Glad App.
- You can also utilize additional methods and events from the Gladly Glad App API within the custom_handoff callback. For more information, see the developer guide
- Replace the below comment with your Javascript snippet from step 1.


At this point, Glad App and Ada are installed on your website. Next, configure the Ada handover process to Gladly.
Configure Ada handoff to Gladly #
This step configures Ada to hand off a Customer to chat using Glad App.
To start, go to the Answer Flow in your Ada bot dashboard, where you’d like to hand off to Gladly. Then, add each of the below blocks in the following order to build out this answer.
- Add any messages about handing the chatter off to an Agent.
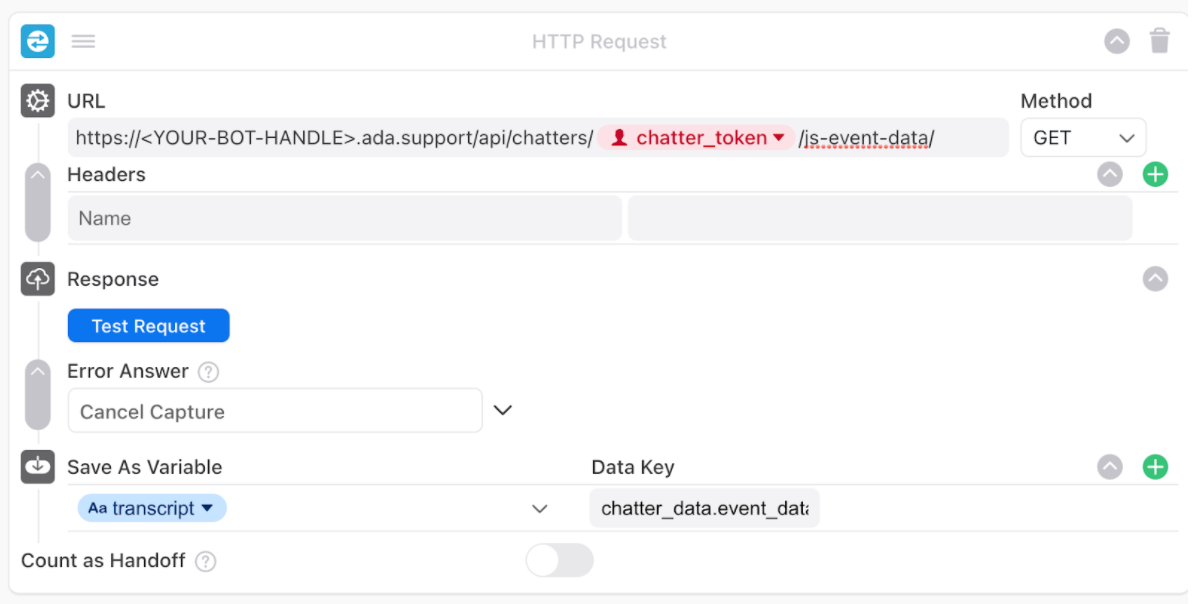
- Add a Request block to retrieve the chatter transcript from Ada and store it in a variable, with the following parameters:NameDescriptionURLhttps://<YOUR-BOT-HANDLE>.ada.support/api/chatters/<CHATTER_TOKEN>/js-event-data/, where <YOUR-BOT-HANDLE> is the handle of your Ada bot, and <CHATTER_TOKEN> is the variable that is auto-populated by Ada containing the unique token value of the current chatterMethodGETHeadersNoneSave as Variablechatter_data.event_data.chatter_transcript
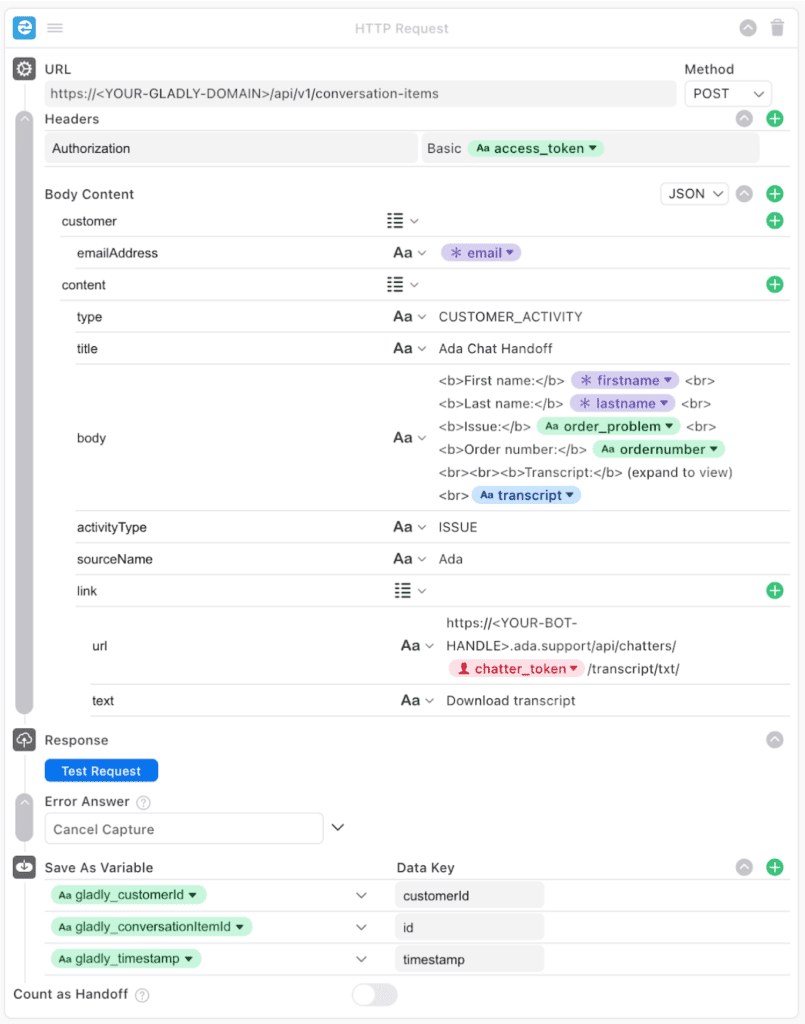
- Following the above Request block, add a second Request block to pass the chatter transcript (and any additional context/variables) as an item in a Customer’s Conversation Timeline in Gladly, with the following parameters:

| URL | Description |
| URL | https://<YOUR-GLADLY-DOMAIN>/api/v1/conversation-items, where <YOUR-GLADLY-DOMAIN> is the domain of your Gladly account. |
| Method | POST |
| Headers | Authorization: Basic <BASE64 ENCODED CREDENTIALS>, where <BASE64 ENCODED CREDENTIALS> is your username and API token that is Base 64 encoded in the following format: username:api_token. See the developer guide |
| Body | 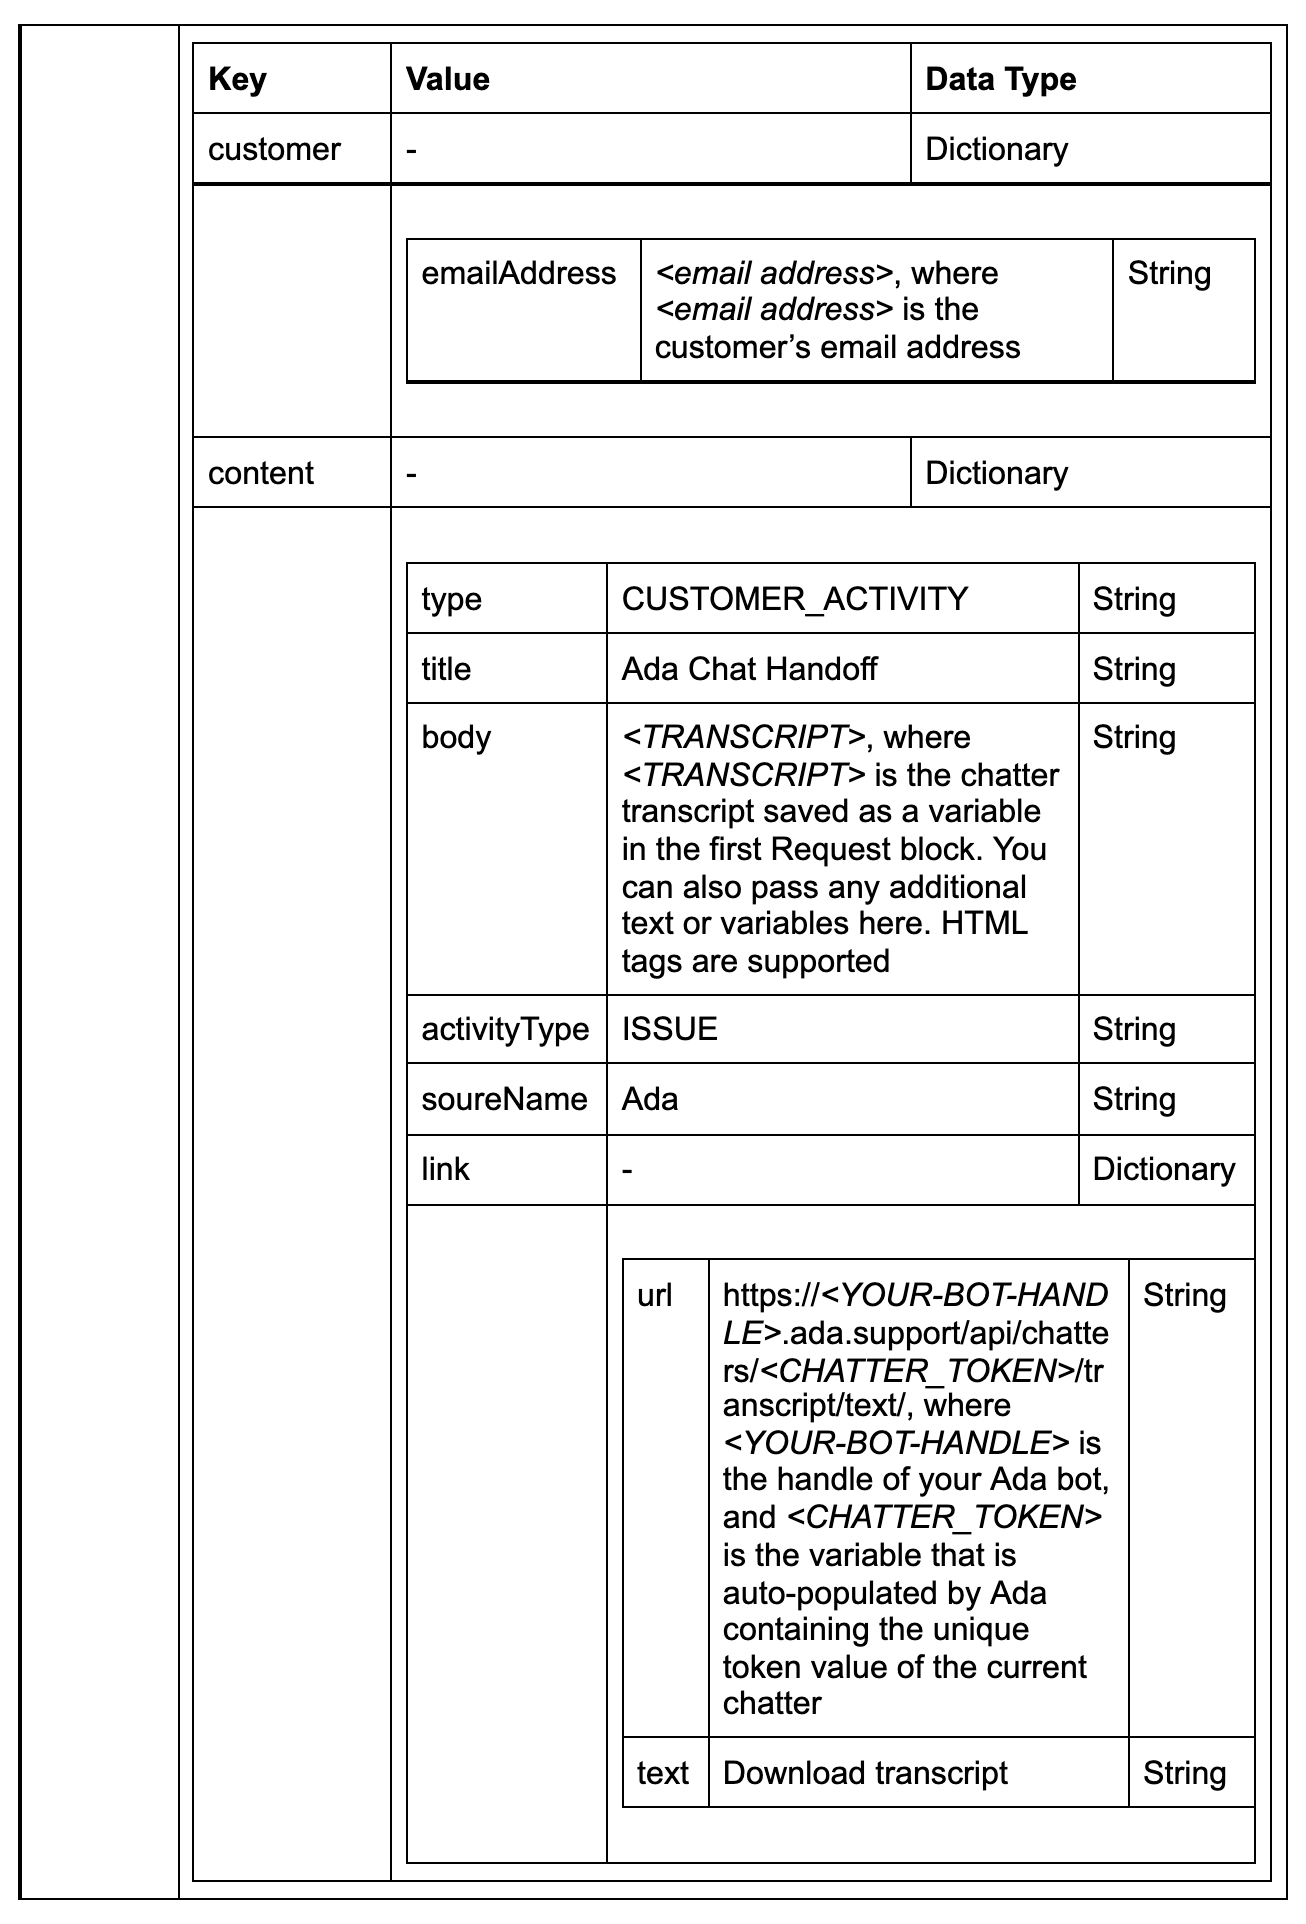 |
| Save as Variable | Optional – customerId, id, timestamp |
- Following these two request blocks, add a Custom Handoff block. This will trigger the custom_handoff event that we added the callback for in the embed script. Note that there are no settings to configure for this block within Ada.
- Add any messages and quick replies welcoming the chatter back after their session with the Agent is complete.


At this point, when a Customer comes to your site, launches Ada, and proceeds to chat, Ada can now hand off to an Agent with Gladly.
Configure Glad App for a seamless Customer handoff #
Here are a couple of tips to make the handoff to Gladly even more seamless. They are not required for handing off to an Agent on Gladly, but just make the experience even slicker! You can find the below configurations on the Glad App configuration page.
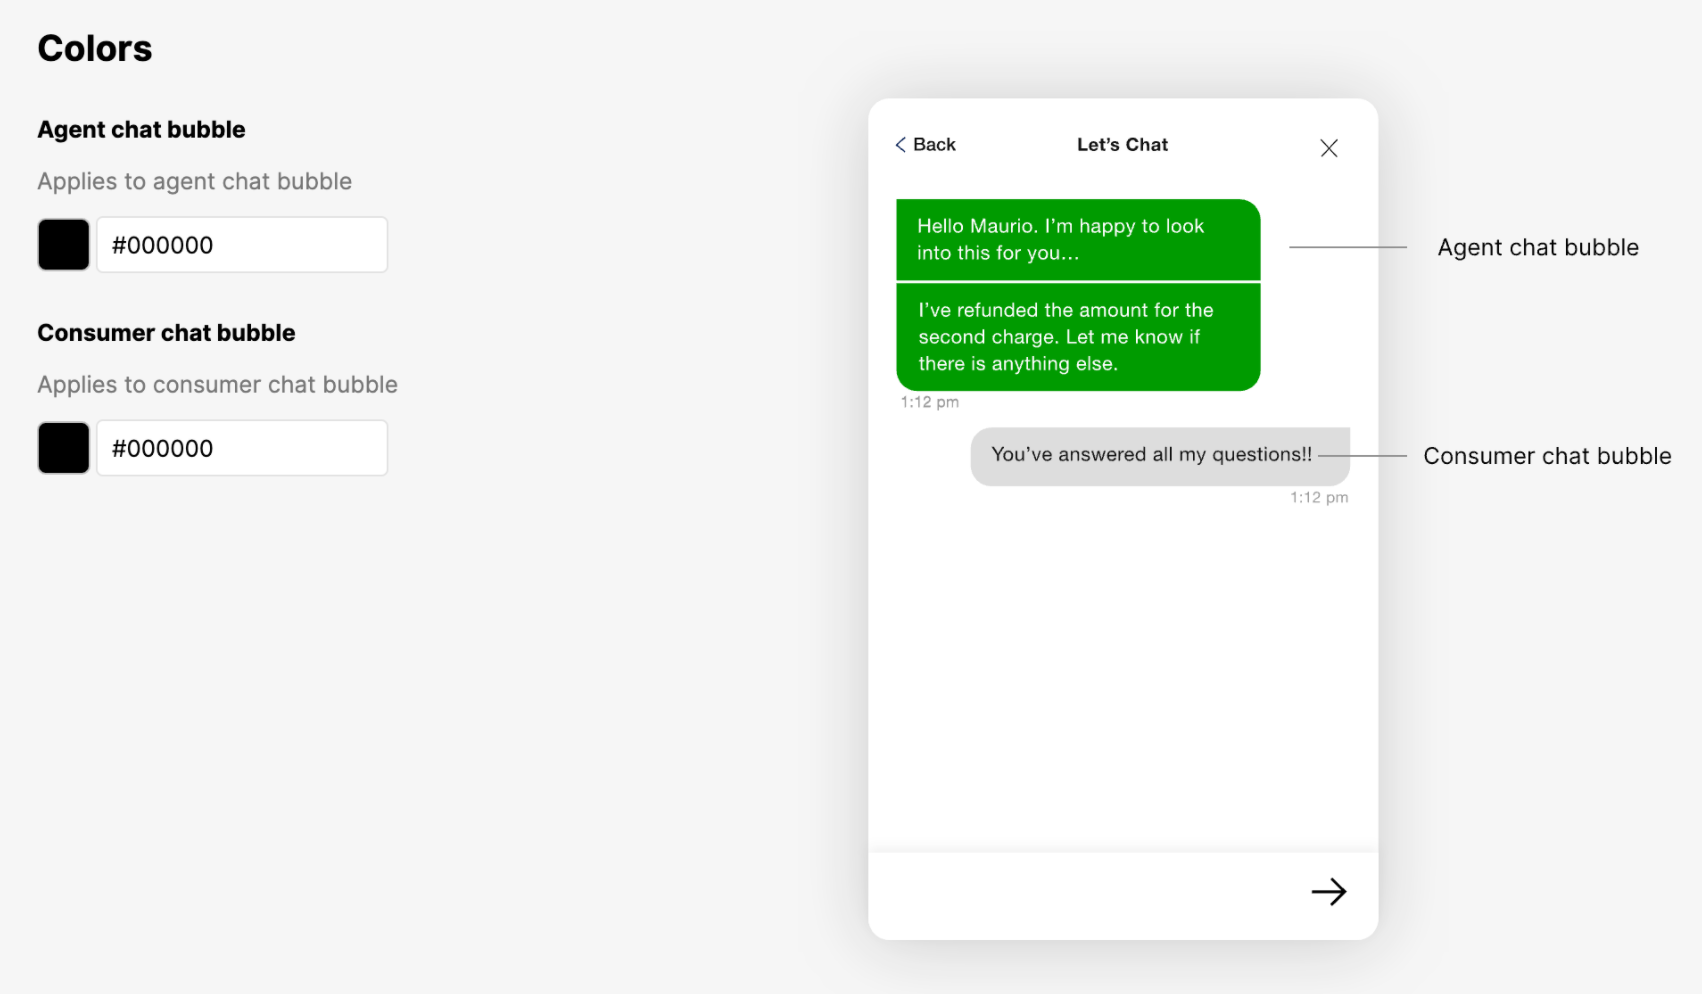
- Match your color scheme in Glad App to the colors you’re using in Ada.
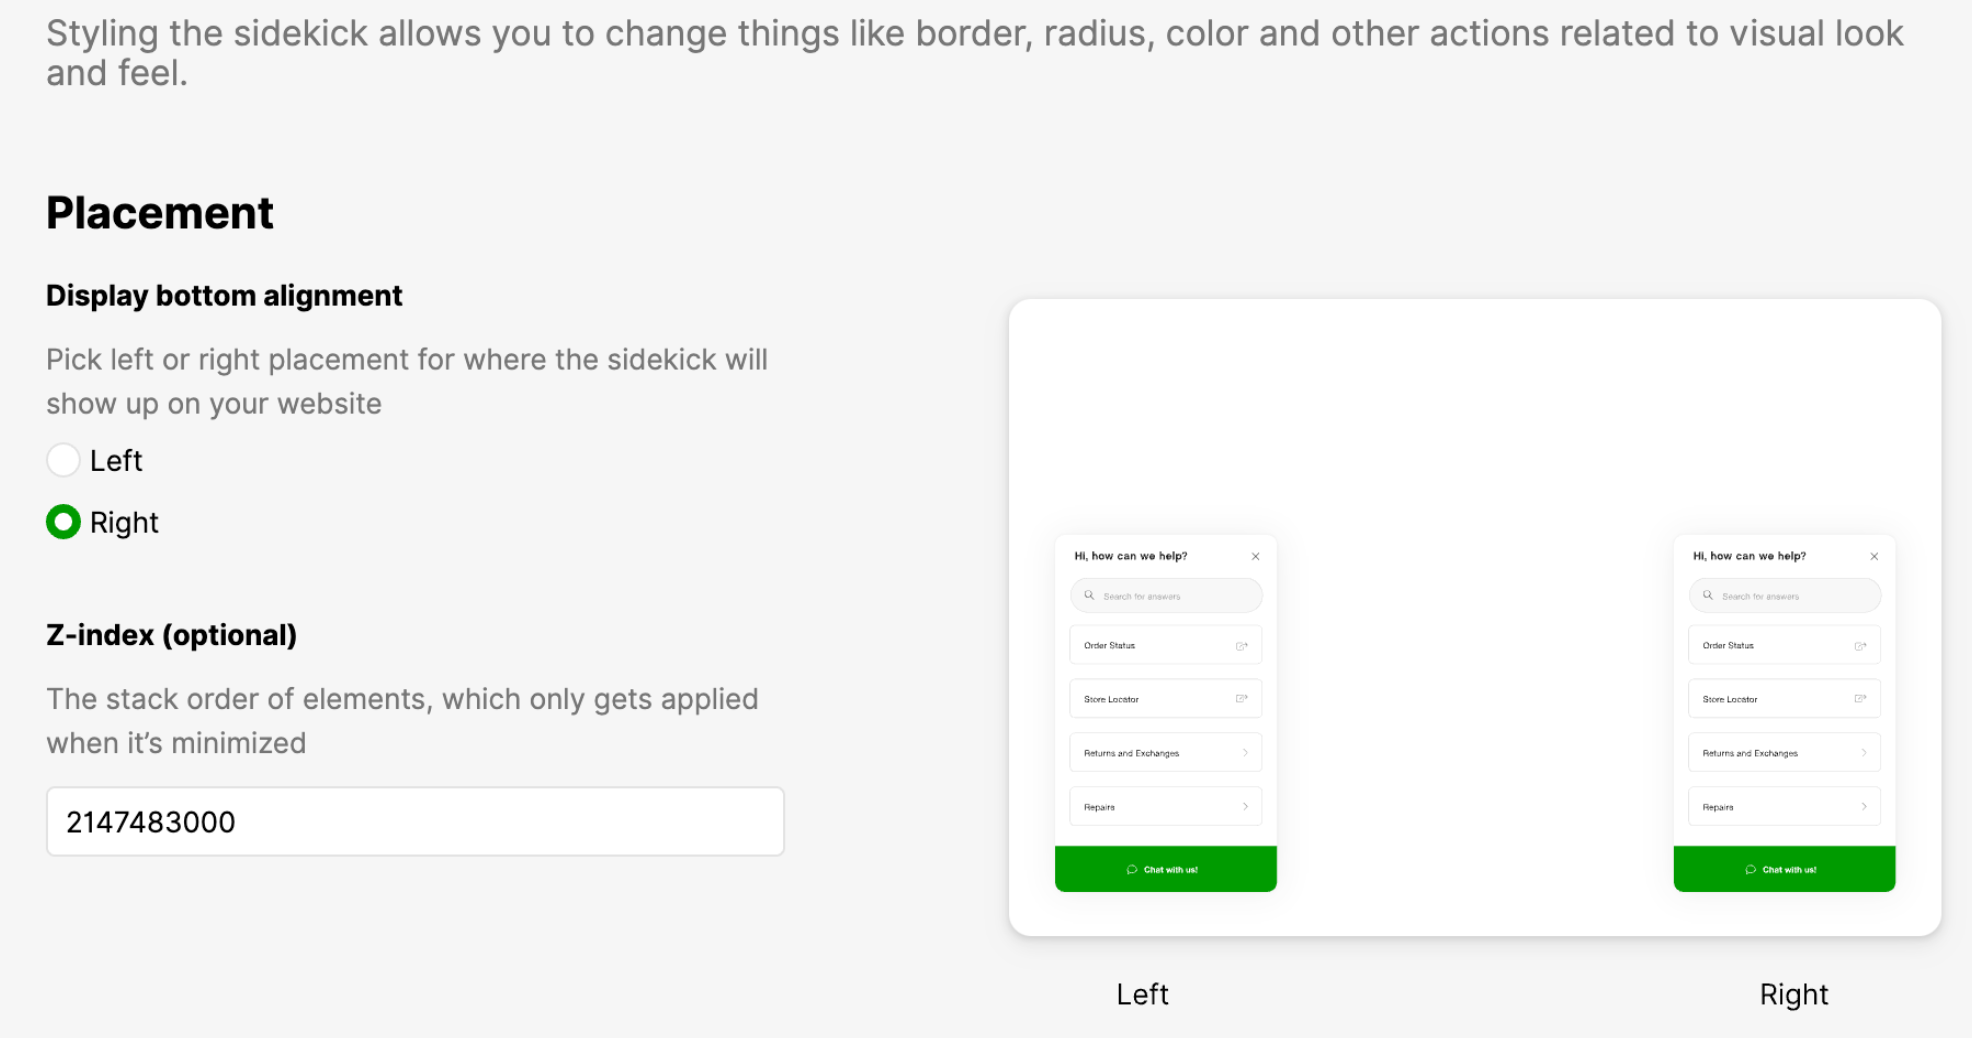
- Configure the placement of your Gladly Glad App to be on the right to match the positioning of Ada.
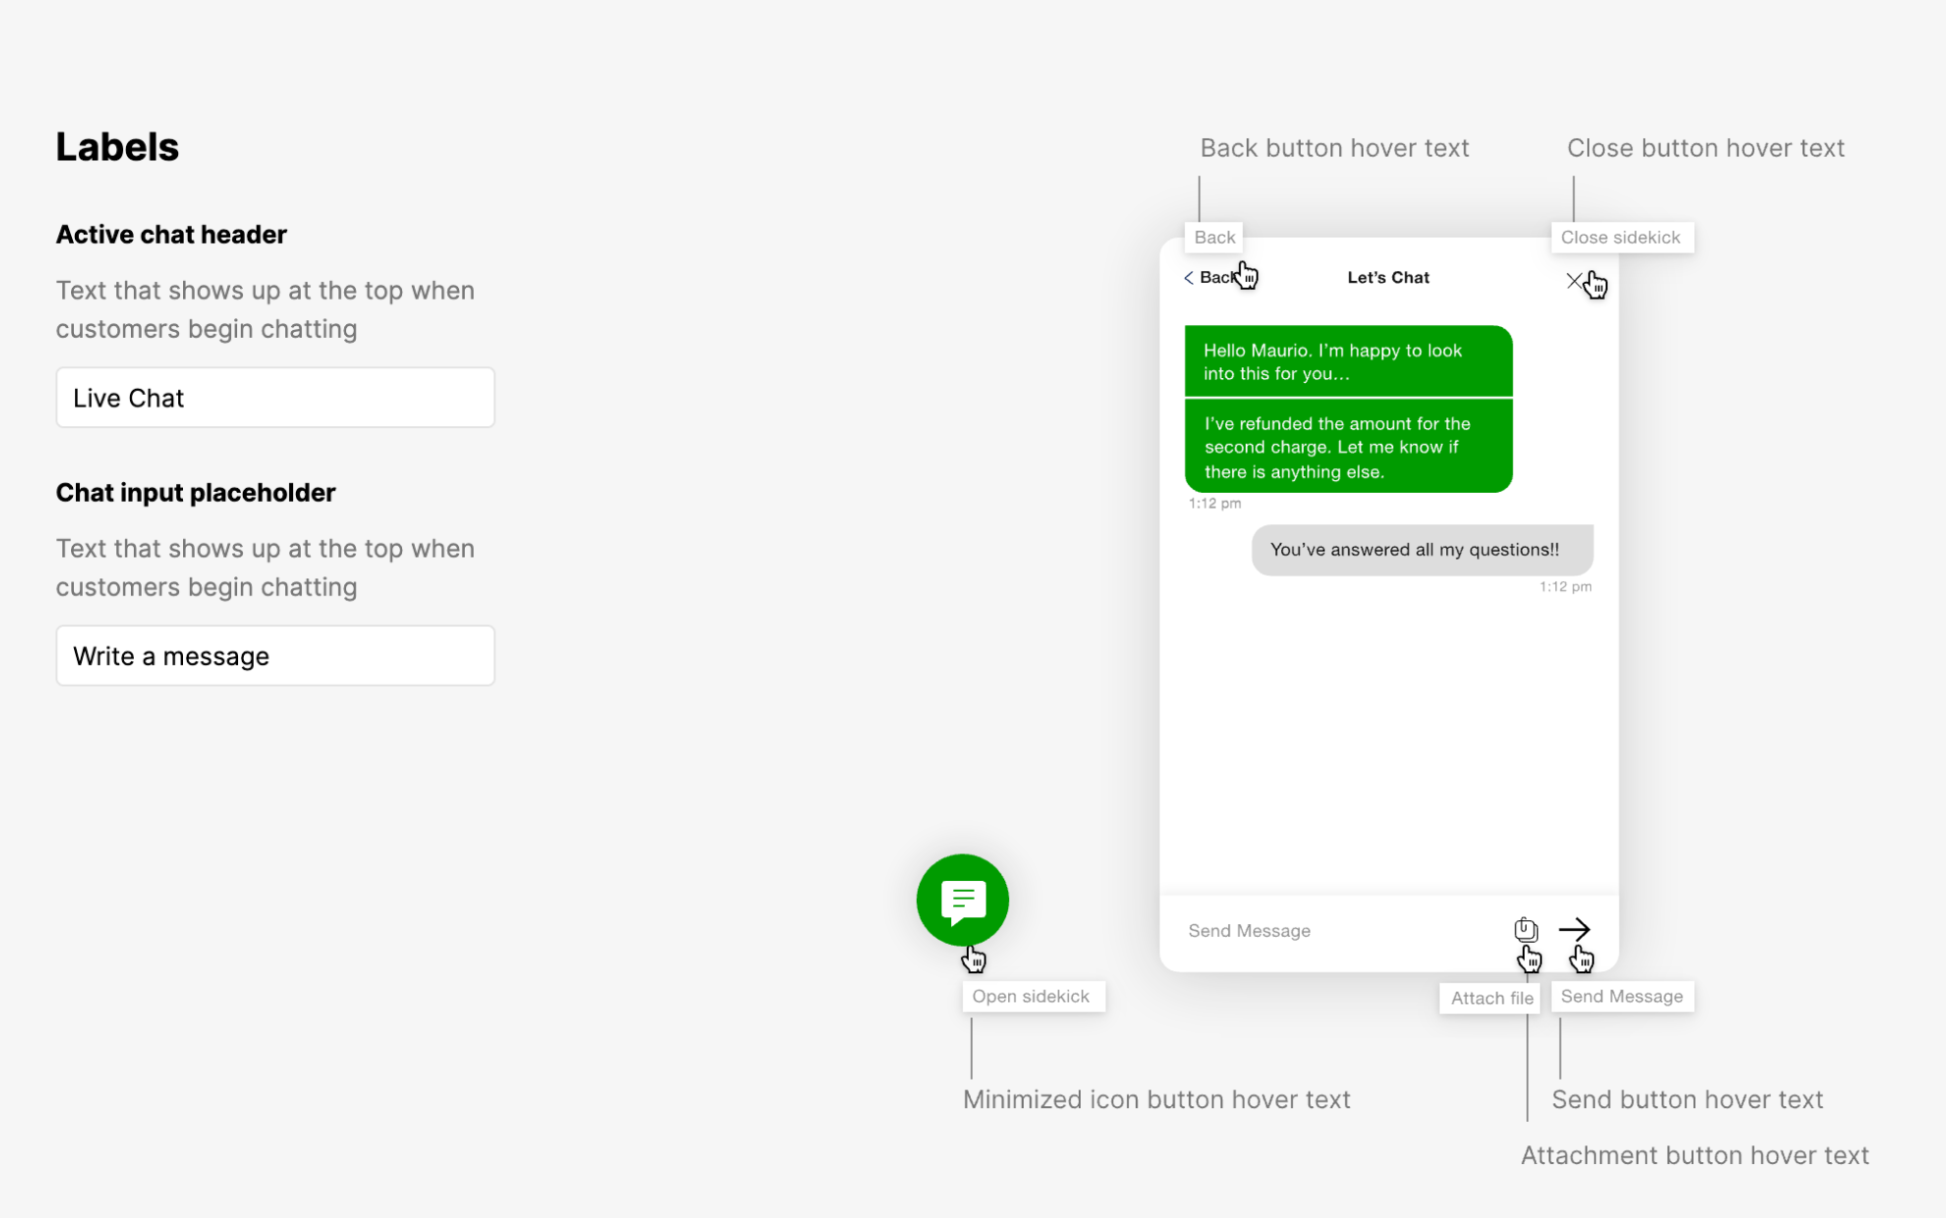
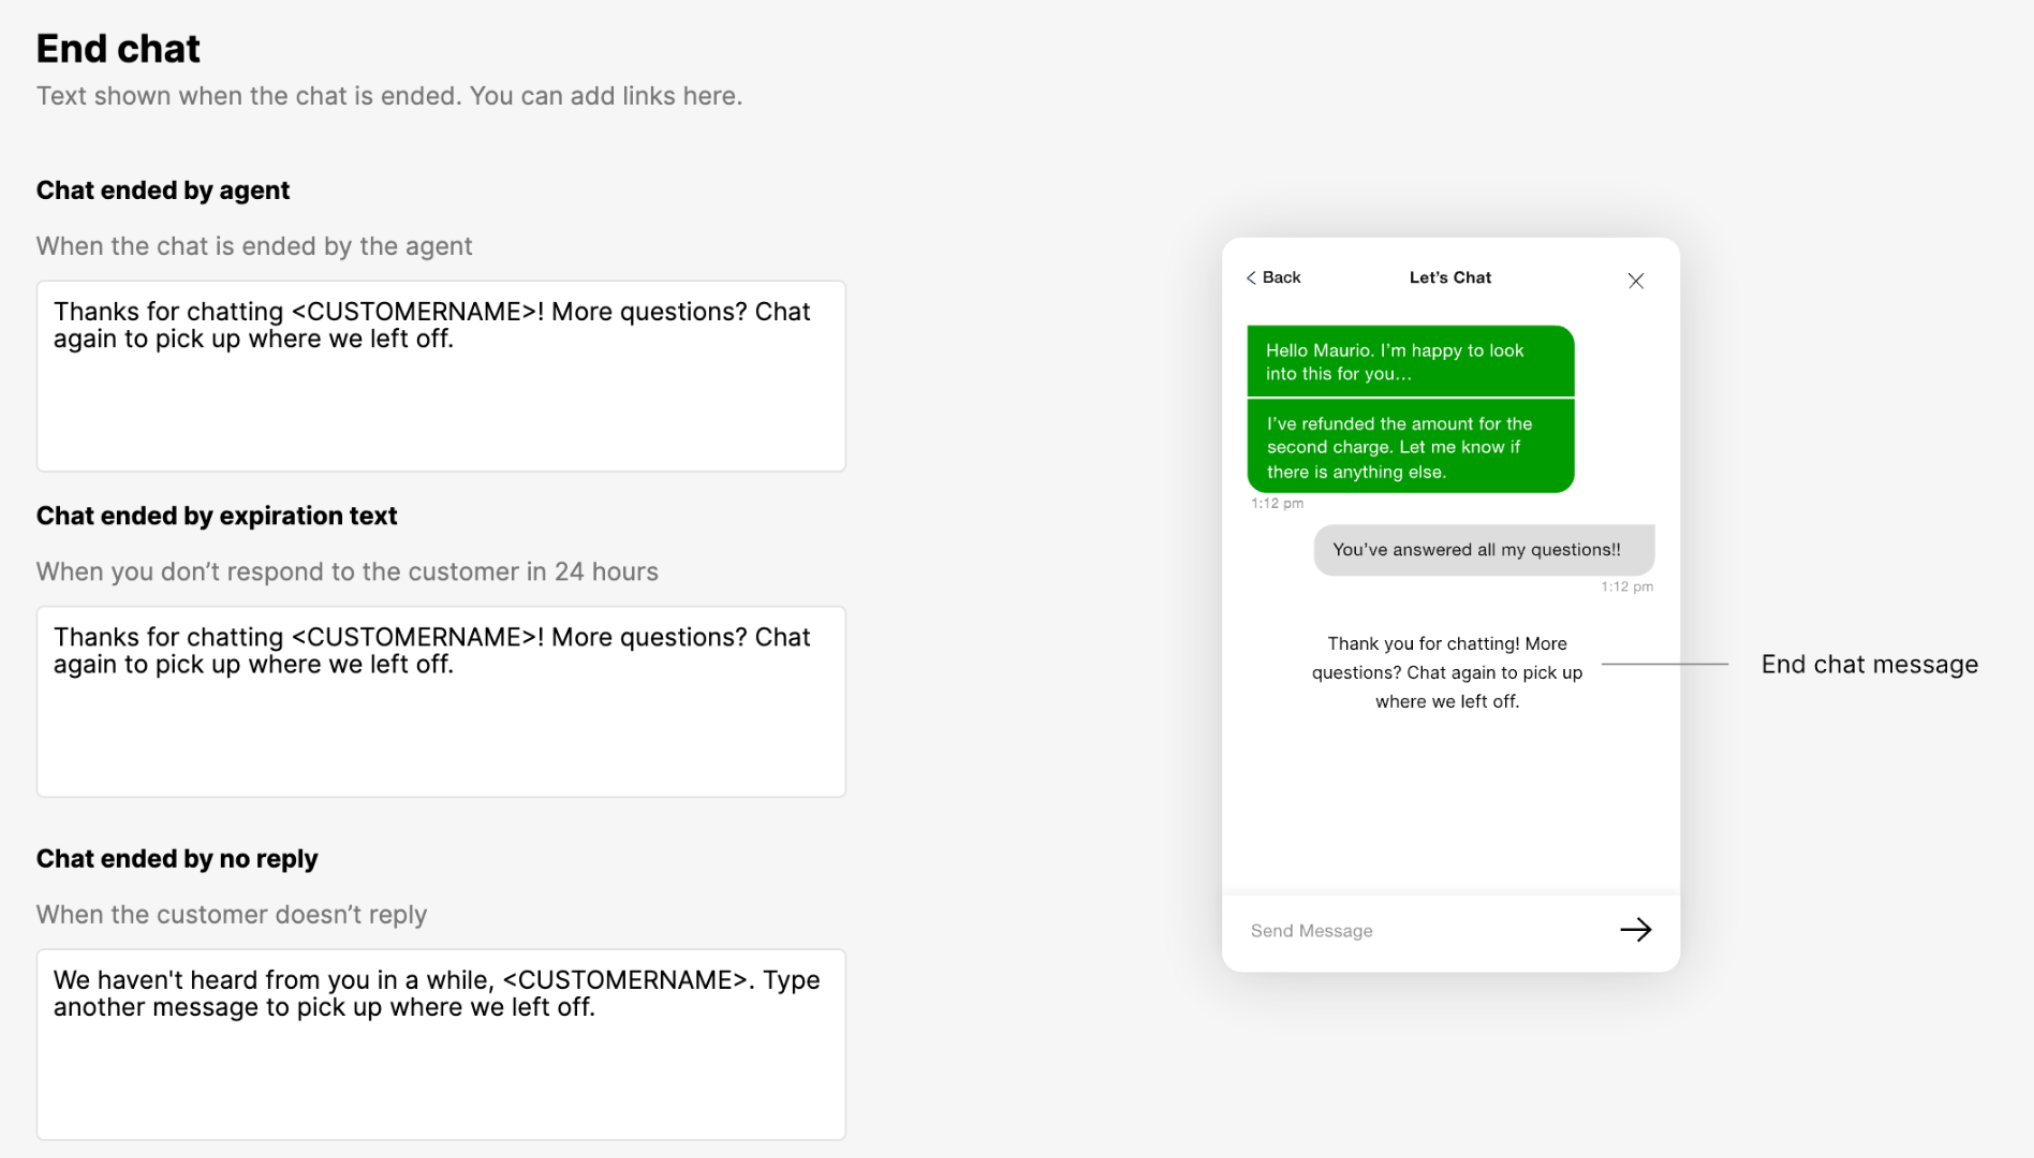
- We recommend configuring the labels, greetings, and messages of your Gladly Glad App to be consistent with the context that the Customer is coming from Ada.
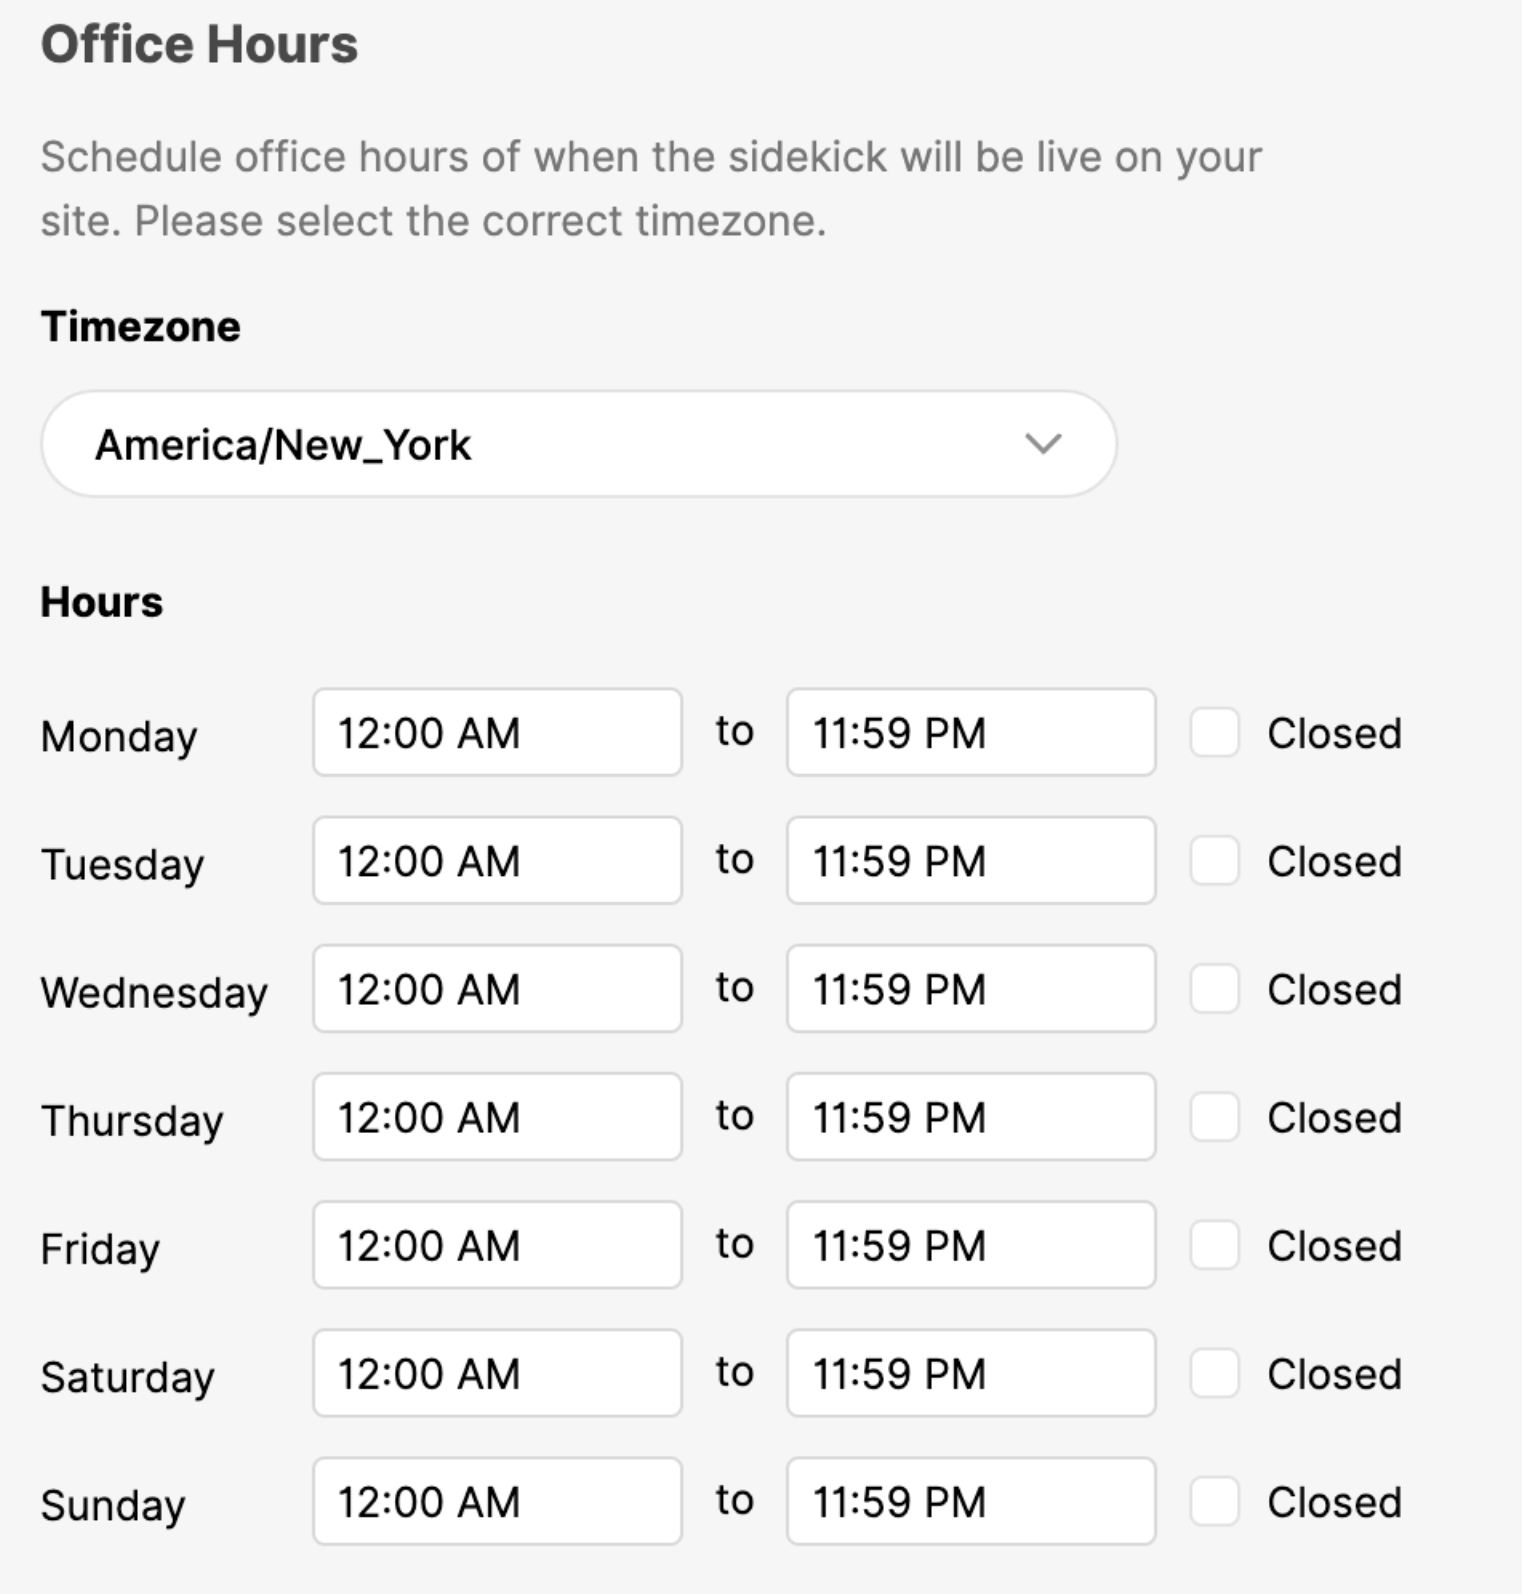
- Configure the Office Hours of your Gladly Glad App to be available 24/7 (aka always live), and instead, configure when Ada should hand off to Gladly within Ada’s builder dashboard.
Create Tasks and other conversation items with Ada #
Ada can create Conversation items in Gladly to pass additional information or allow your support team to follow up with a Customer when they request support outside of your business hours. In the below example, Ada will create a Task in Gladly for a Customer and assign it to an Inbox where it can be routed to an Agent as a Task.
- First, add a Request block to retrieve the customer ID from Gladly using the Customer’s email address.
| Name | Description |
| URL | https://<YOUR-GLADLY-DOMAIN>api/v1/customer-profiles?email=<email address>, where <YOUR-GLADLY-DOMAIN> is the domain of your Gladly account, and <email address> is the Customer’s email address. |
| Method | GET |
| Headers | Authorization: Basic <BASE64 ENCODED CREDENTIALS>, where <BASE64 ENCODED CREDENTIALS> is your username and API token that is Base 64 encoded in the following format: username:api_token. See the Gladly developer guide |
| Save as Variable | customerId – data key: 0.id |
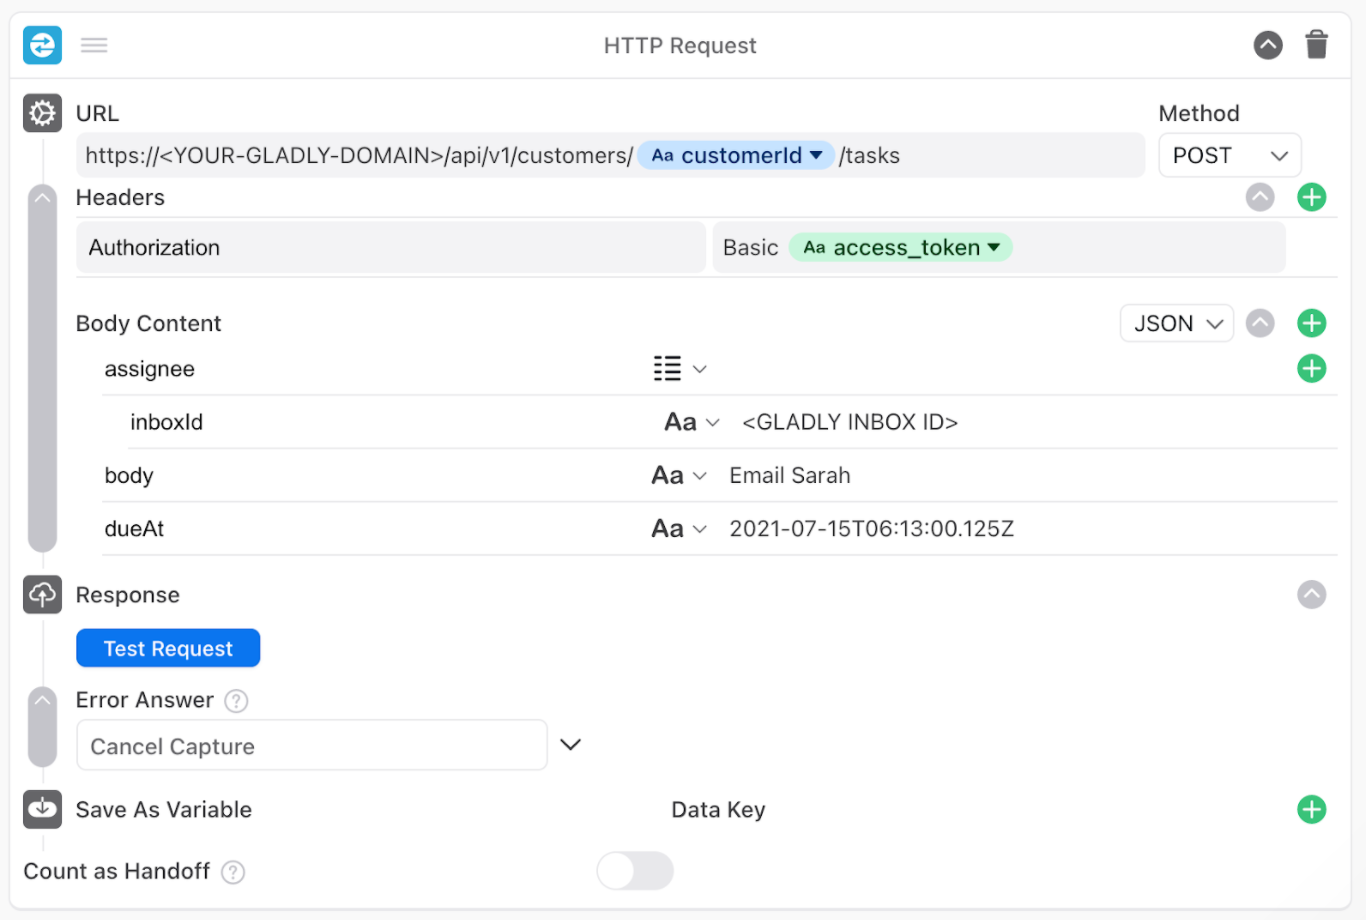
2. Following the above Request block, add a second Request block to create the Task.
| Name | Description |
| URL | https://<YOUR-GLADLY-DOMAIN>api/v1/customers/<customerId>/tasks, where <YOUR-GLADLY-DOMAIN> is the domain of your Gladly account, and <customerId> is the Customer’s email identifier in Gladly that was retrieved in the first request block. |
| Method | POST |
| Headers | Authorization: Basic <BASE64 ENCODED CREDENTIALS>, where <BASE64 ENCODED CREDENTIALS> is your username and API token that is Base 64 encoded in the following format: username:api_token. See the Gladly developer guide |
| Body | 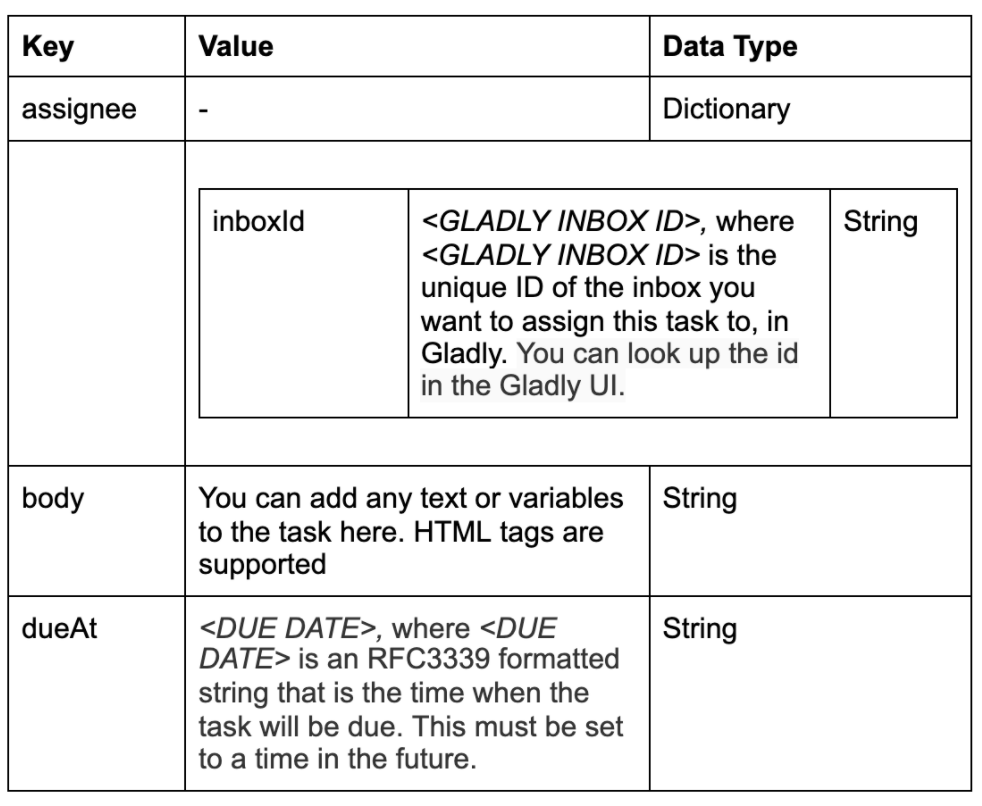 |
That’s it! At this point, a new Task will have been created on the Customer’s Conversation Timeline and assigned to an Inbox for follow-up by your support team.