| REQUIRED USER ROLE Administrator |
| Connect Learning Available in eLearning format in Connect Learning |
Create scenarios that allow you to prioritize matching the right Customers — using boosts — to the next available Agent.
Before you start #
Before you add scenarios, we recommend that you first review the following:
- Remember that the number of scenarios a Customer matches and its boost size score determines who to route first to the next available Agent.
- Review What is People Match.
- Review the types of Conditions you can use as a boost.
- Remember to click Enable Changes to apply any changes you make to a boost.
Prepare to use People Match #
Think through scenarios where you’d want to prioritize Customers. Ask yourself questions like:
- What Customer scenarios do we have today where People Match can create a positive impact?
- Do we have the correct data (e.g., attributes, text detection, etc.) to help identify these Customers and build scenarios around them?
We suggest you review existing custom attributes you have to understand what scenarios you can build off on
Tip – Keep in mind that boost scores are additive
You don’t have to cram every condition on a single boost as all criteria in a boost must be met for a boost to apply. If it makes sense, create separate boosts to make multiple Conditions and apply the appropriate Boost Size. For example, instead of having Channel and Skills Conditions on the same boost, consider creating separate boosts instead to apply a higher Boost Size on one Condition over the other.
Add scenarios as Priority Boosts #
- Click
on the top left corner of the screen.
- Click Settings.
- Under the Orchestration category, click People Match. The People Match page will show you a list of match scenarios you currently have.
- If you’re setting up People Match for the first time, you’ll see a couple of out-of-the-box scenarios already in place. You can edit these scenarios or create your own and enable them when you’re ready.
- Click Add Priority Boost.
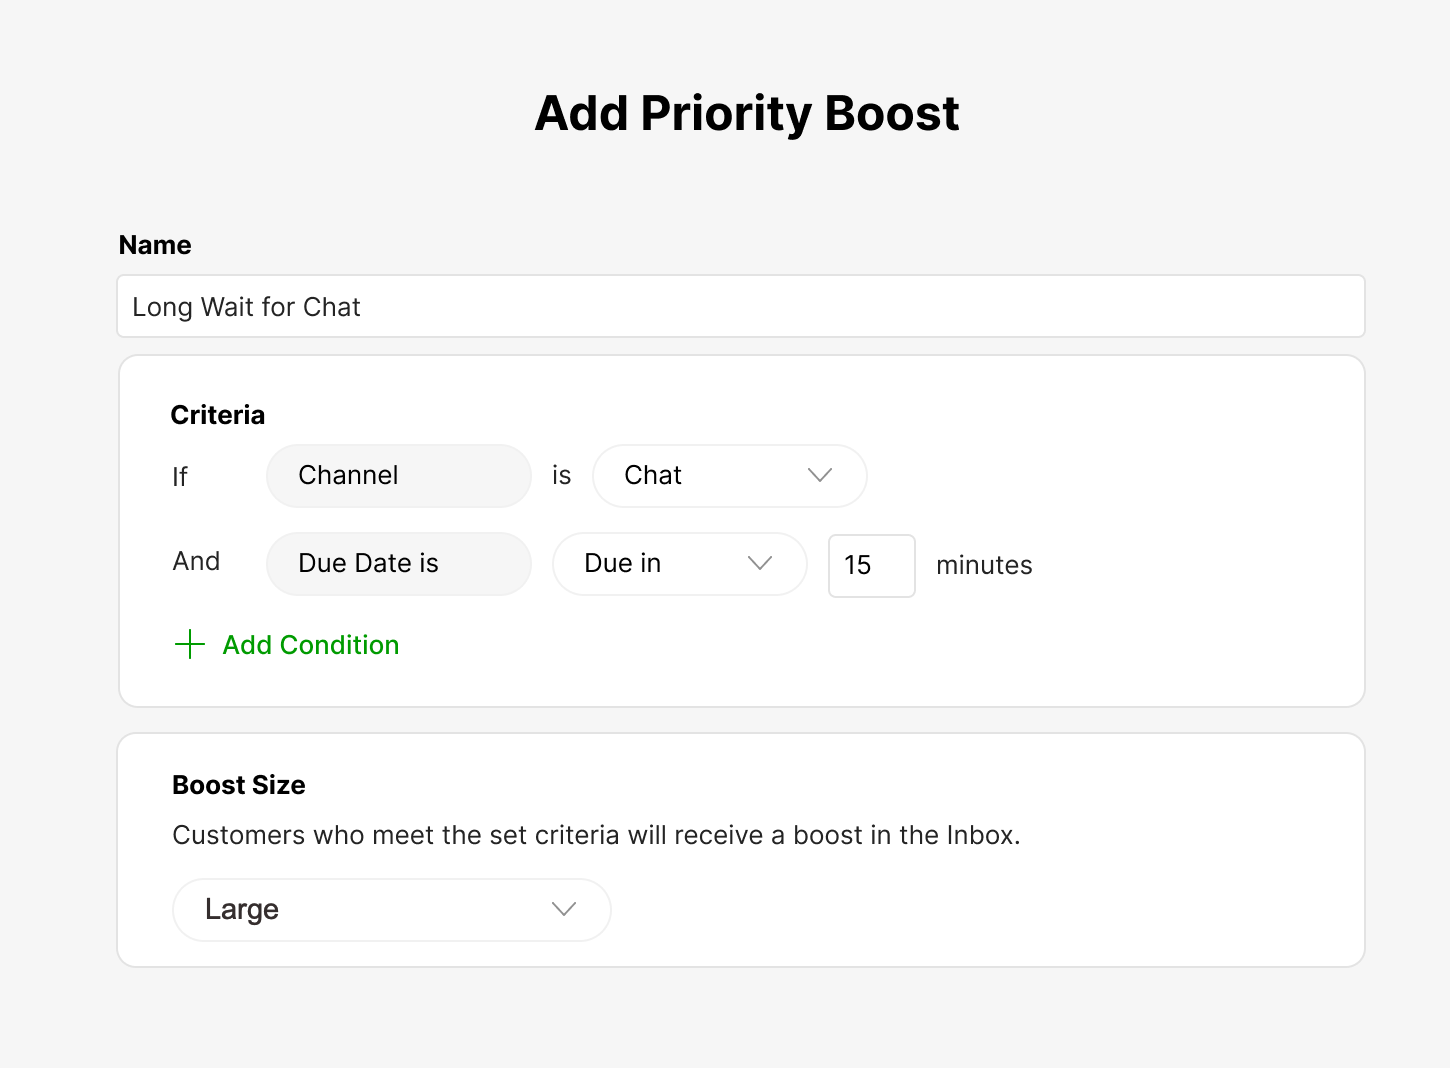
- From the Add Priority Boost screen, enter the following information:
- Name – Enter a name that describes the reason for this boost.
- When matched, this name will be shown to Agents and will also be used in Liveboards and reporting. We recommend a short, clear name that will be understood by Agents and Managers alike.
- Criteria – Select the desired Condition(s) for the scenario. For example, to boost chat Customers that are due in 15 minutes, you can use [Channel] is [Chat] and [Due Date is] [Due in] 15 minutes.

- Click + Add Condition to insert another Condition. Together, Conditions are evaluated as logical and statements.
- See List of Criteria Available for People Match for a list of all available Conditions.
- Boost Size – Select a boost size option for Customers who match the scenario: Small, Medium, Large, Very Large.
- See How Customers are prioritized with People Match to learn about Boost Size priority.
- Name – Enter a name that describes the reason for this boost.
- Click Save Priority Boost, and you’ll be taken back to the People Match page. You’ll notice that your new Priority Boost is displayed in the list along with “Change made” under the Notes column.
- Every time a scenario is added, edited, archived, or unarchived, “Change made” appears in the Notes column, indicating a change was made but hasn’t been applied/enabled.

- Every time a scenario is added, edited, archived, or unarchived, “Change made” appears in the Notes column, indicating a change was made but hasn’t been applied/enabled.
- Important! Click Enable Changes to apply your updates.

- You must always Enable Changes every time a boost is updated.
- Enable Changes is not clickable (gray state) if there are no changes that need to be applied.
Your changes may not apply immediately. Wait at least a minute before making new edits and enabling additional changes.
Note – Don’t forget to click ‘Enable Changes’
Updates to boosts are not applied until you click “Enable Changes.”


