Editing Actions and Sub-Actions within the Thread Builder can be broken down into three primary categories:
- Adding an Action or Sub-Action.
- Deleting an Action or Sub-Action.
- Rearranging an Actions or Sub-Action.
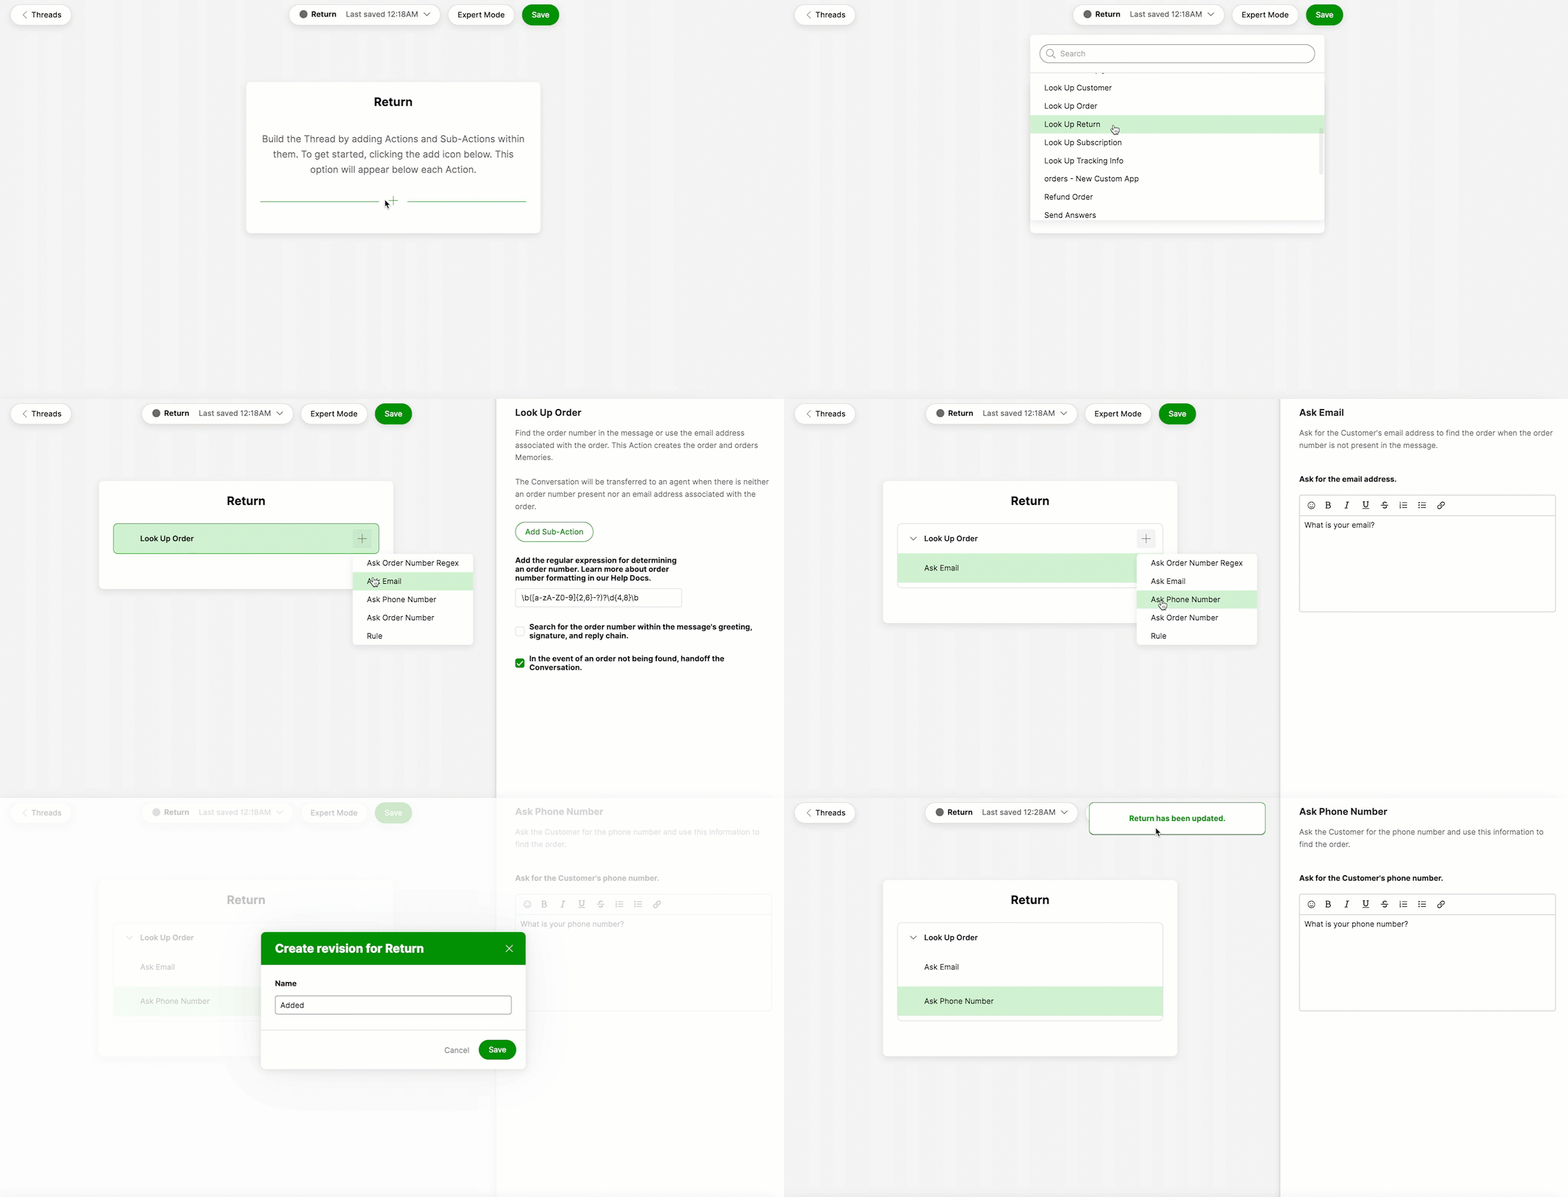
Adding an Action #
- Click + where you would like to add an Action.
- Select or search the Action from the list.
- Click Save.
- Name your revision to the Thread. Click Save.
Adding a Sub-Action #
- Click on the Action within which you want to add the Sub-Action(s).
- Click + next to the Action name. You may also click Add Sub-Action on the Action side panel.
- Select the desired Sub-Action from the list.
- Configure the new Sub-Action accordingly.
- Click Save.
- Name your revision to the Thread. Click Save.

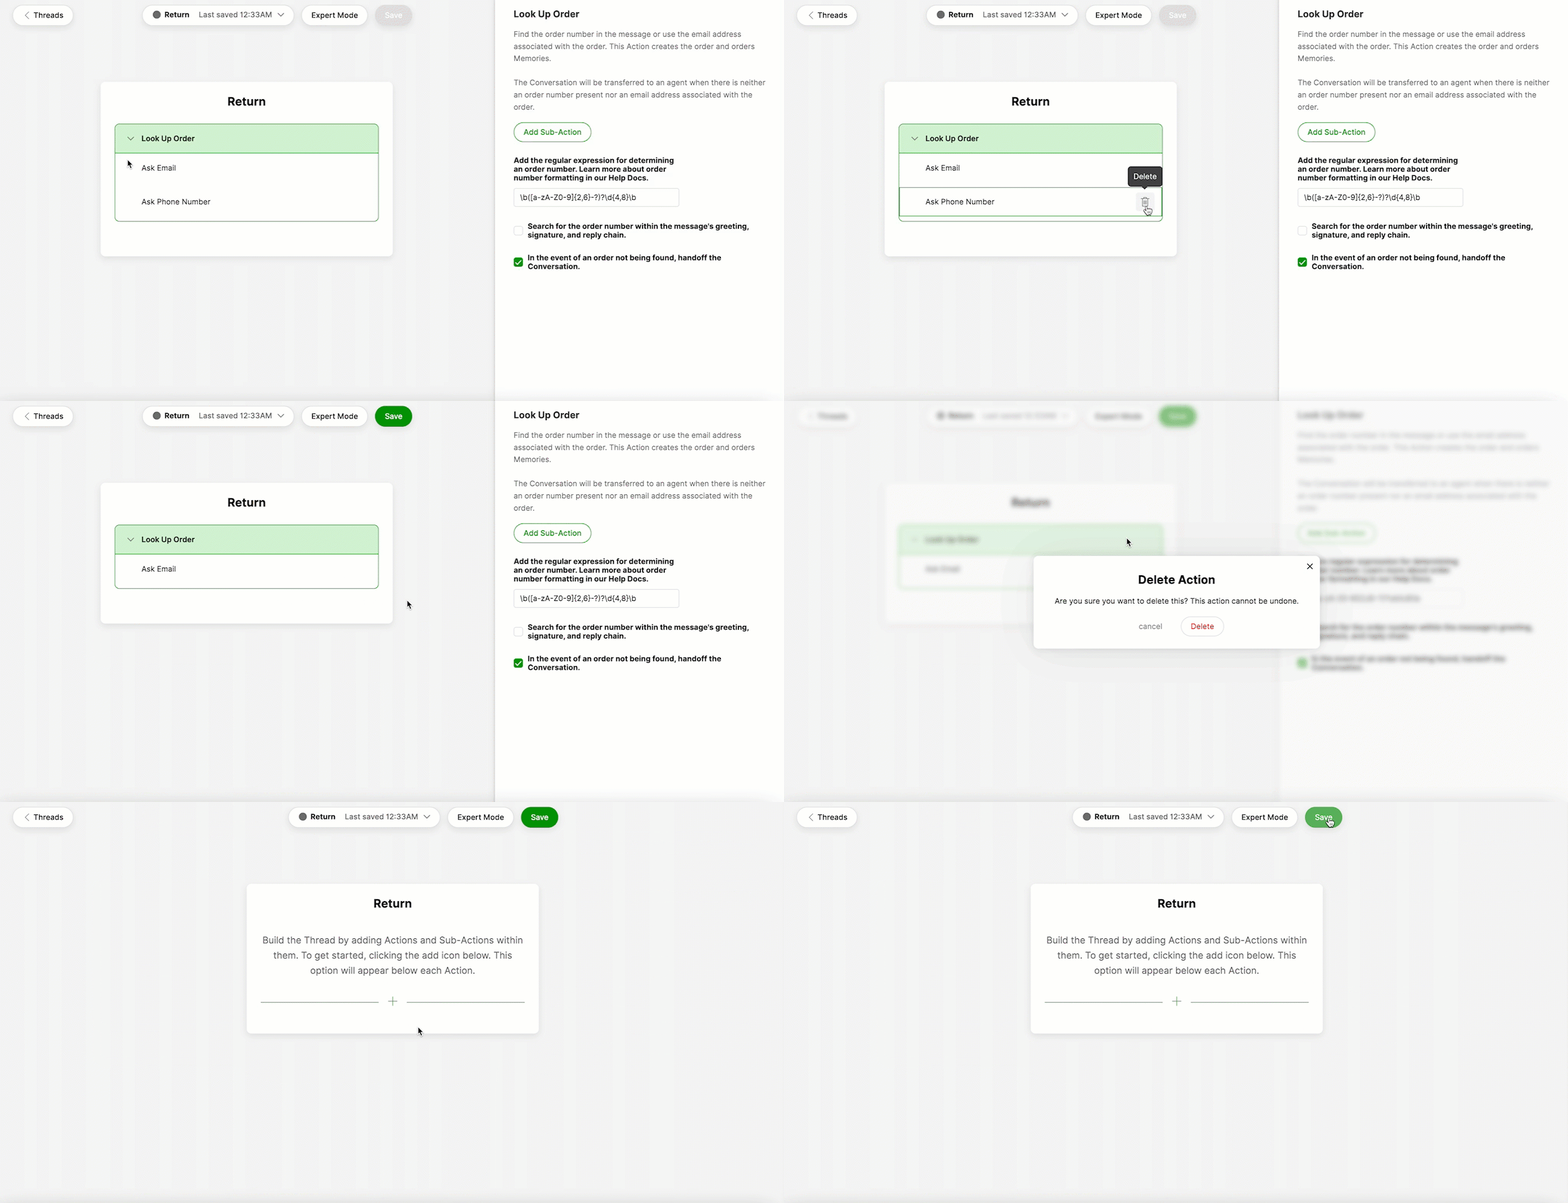
Deleting an Action or Sub-Action #
- Select the Action or Sub-Action that you would like to delete.
- Click the trash icon.
- Click Delete.
- Name your revision to the Thread. Click Save.

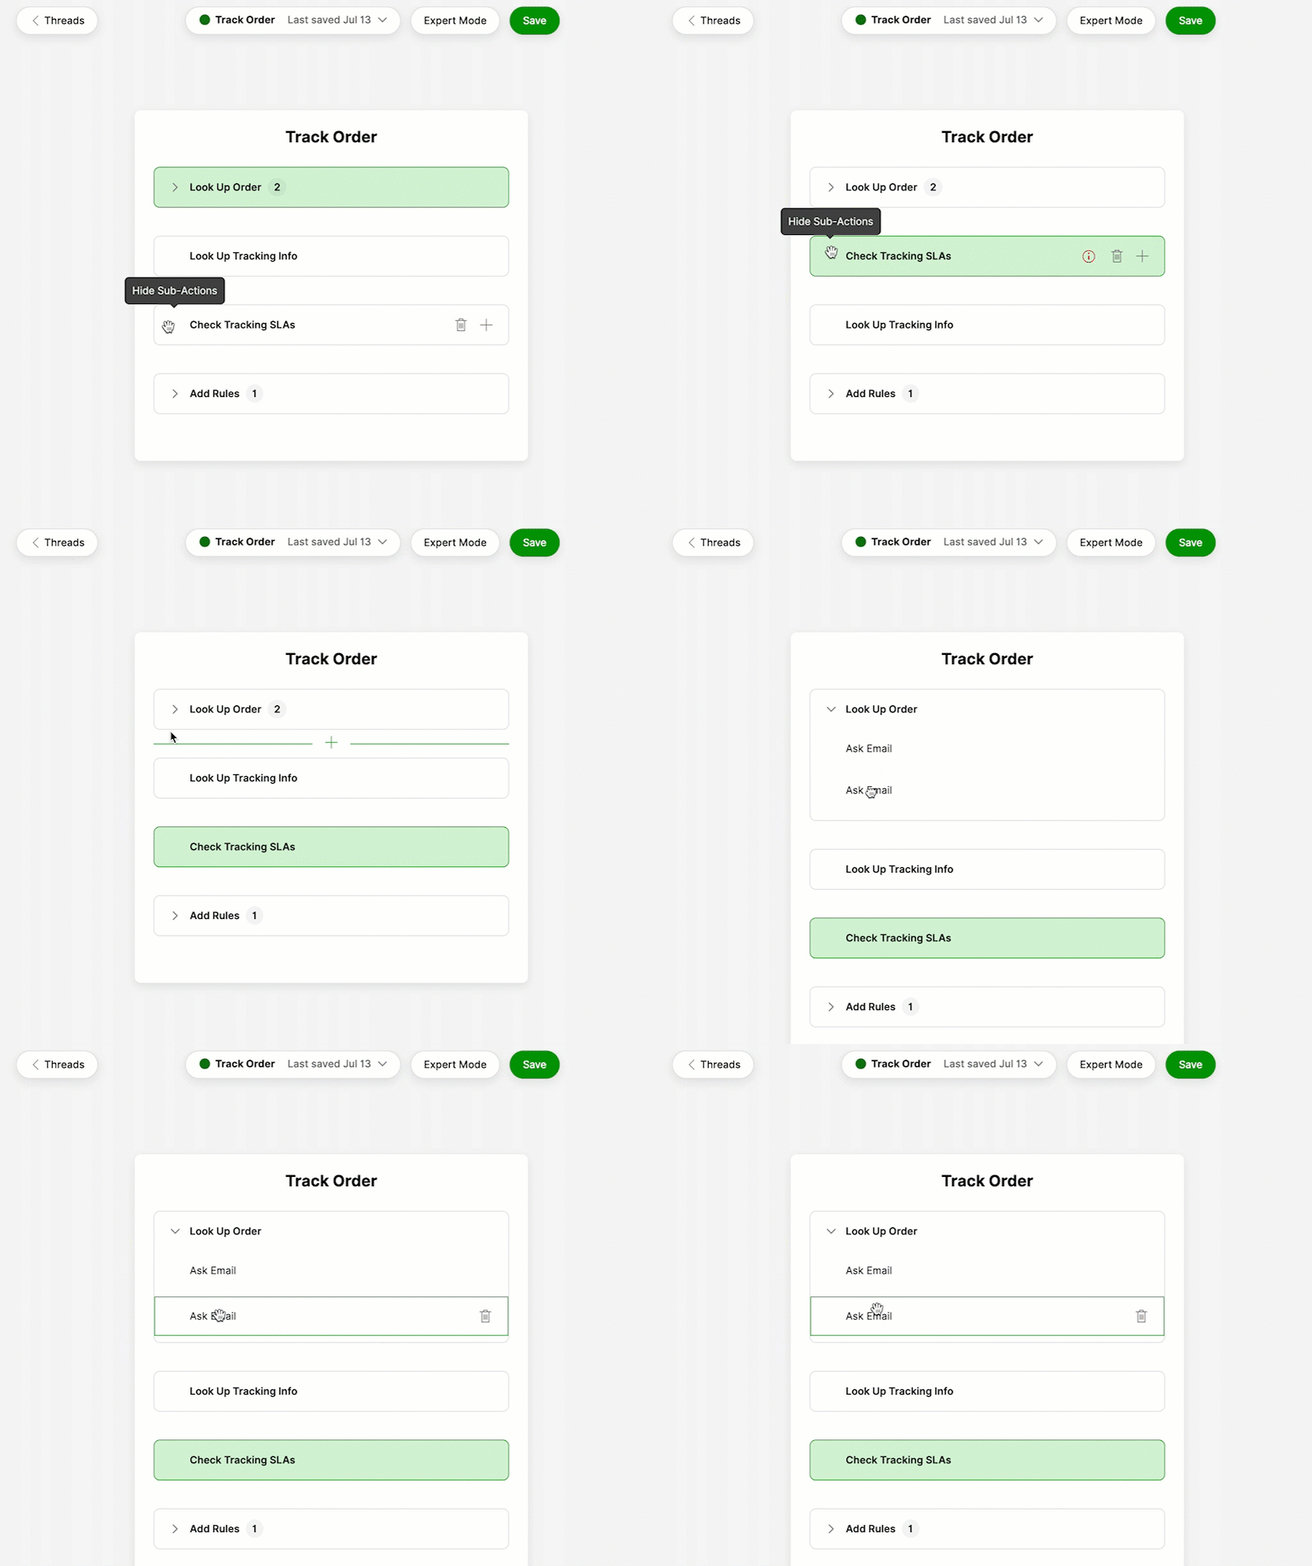
Rearranging Actions #
- Click and hold on the Action you would like to rearrange.
- Drag the Action to the appropriate position within the Thread.
- Click Save.
- Name your revision to the Thread. Click Save.

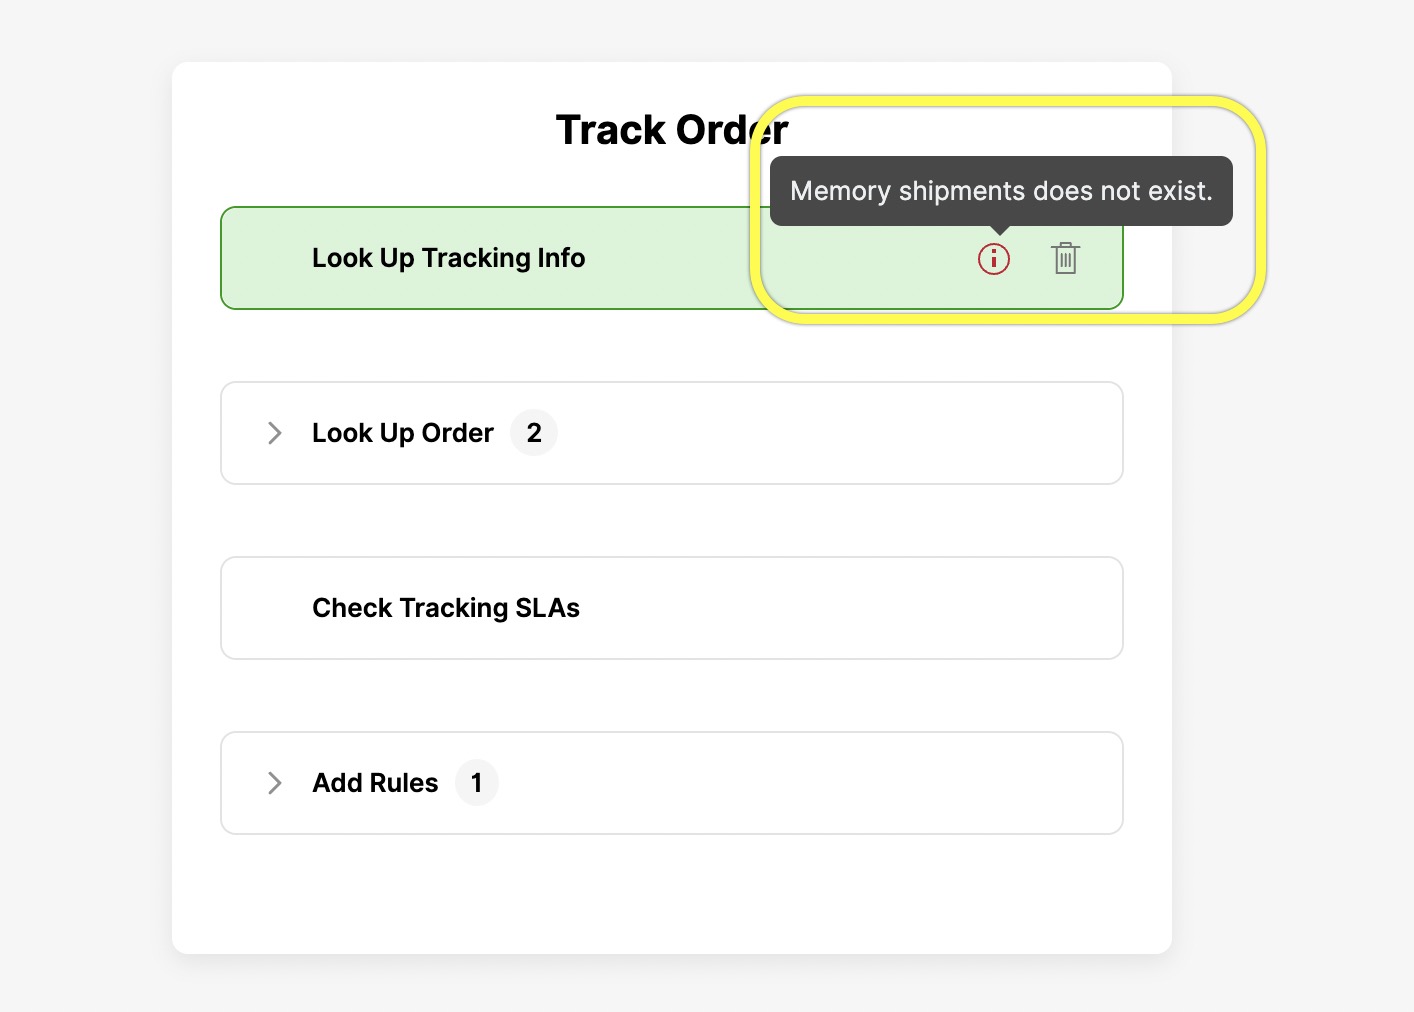
For example, the Look Up Tracking Info Action cannot be added without the Look Up Order Action preceding it. Without order information, Gladly Sidekick cannot locate tracking information. A warning sign will appear on the affected Action if you have moved an Action and disrupted the necessary sequencing.

Rearranging Sub-Actions #
- Click on the Action whose Sub-Actions you would like to rearrange.
- Expand the Action so that all Sub-Actions are visible.
- Click and hold the Sub-Action you would like to move.
- Drag the Sub-Action to the appropriate position.
- Click Save.
- Name your revision to the Thread. Click Save.


