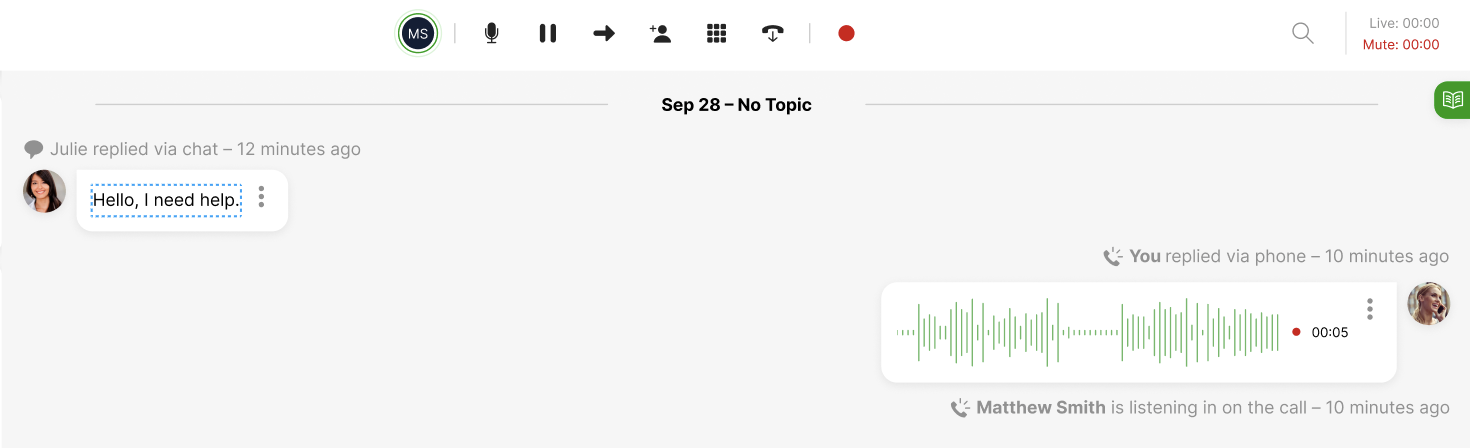
The Voice Control bar appears above the Customer Profile during a phone call.
End a call #
There are two ways a Voice call ends on Gladly:
- When you click
 on the Voice Control Bar.
 - The Customer hangs up.

Once your call ends, you’ll automatically receive another call depending on the length of time lapses based on the current After Call Work settings. Use this time to finalize your call notes before the next call comes in. To stop receiving calls, you must mark yourself Unavailable for Voice.
Note – Clicking ‘Close & Next’ or ‘Next’ routes you to the next call
Clicking Close & Next or Next immediately after a call overrides the After Call Work settings. For example, if your Team Managers allow you 30 seconds after each call before a new call is routed to you, clicking Close & Next or Next before the 30 seconds is up overrides the After Call Work setting, thus routing you the next phone call before the 30 seconds is up.
Tip – Complete your call notes before ending the call
Save a few seconds at the end of your call to finalize your notes before the call ends. Say something to the Customer like, “Please allow me a few seconds to make sure I have everything we did today noted properly just in case we need to reference this call in the future.” Customers are usually happy to wait a few seconds to ensure their calls are properly documented.
Transfer a call #
Transfers a call directly to another Agent, a Team Manager, a different Inbox, or externally to a different person.
Transfer call to another Agent or a Team Manager #
Transfer to an Agent #
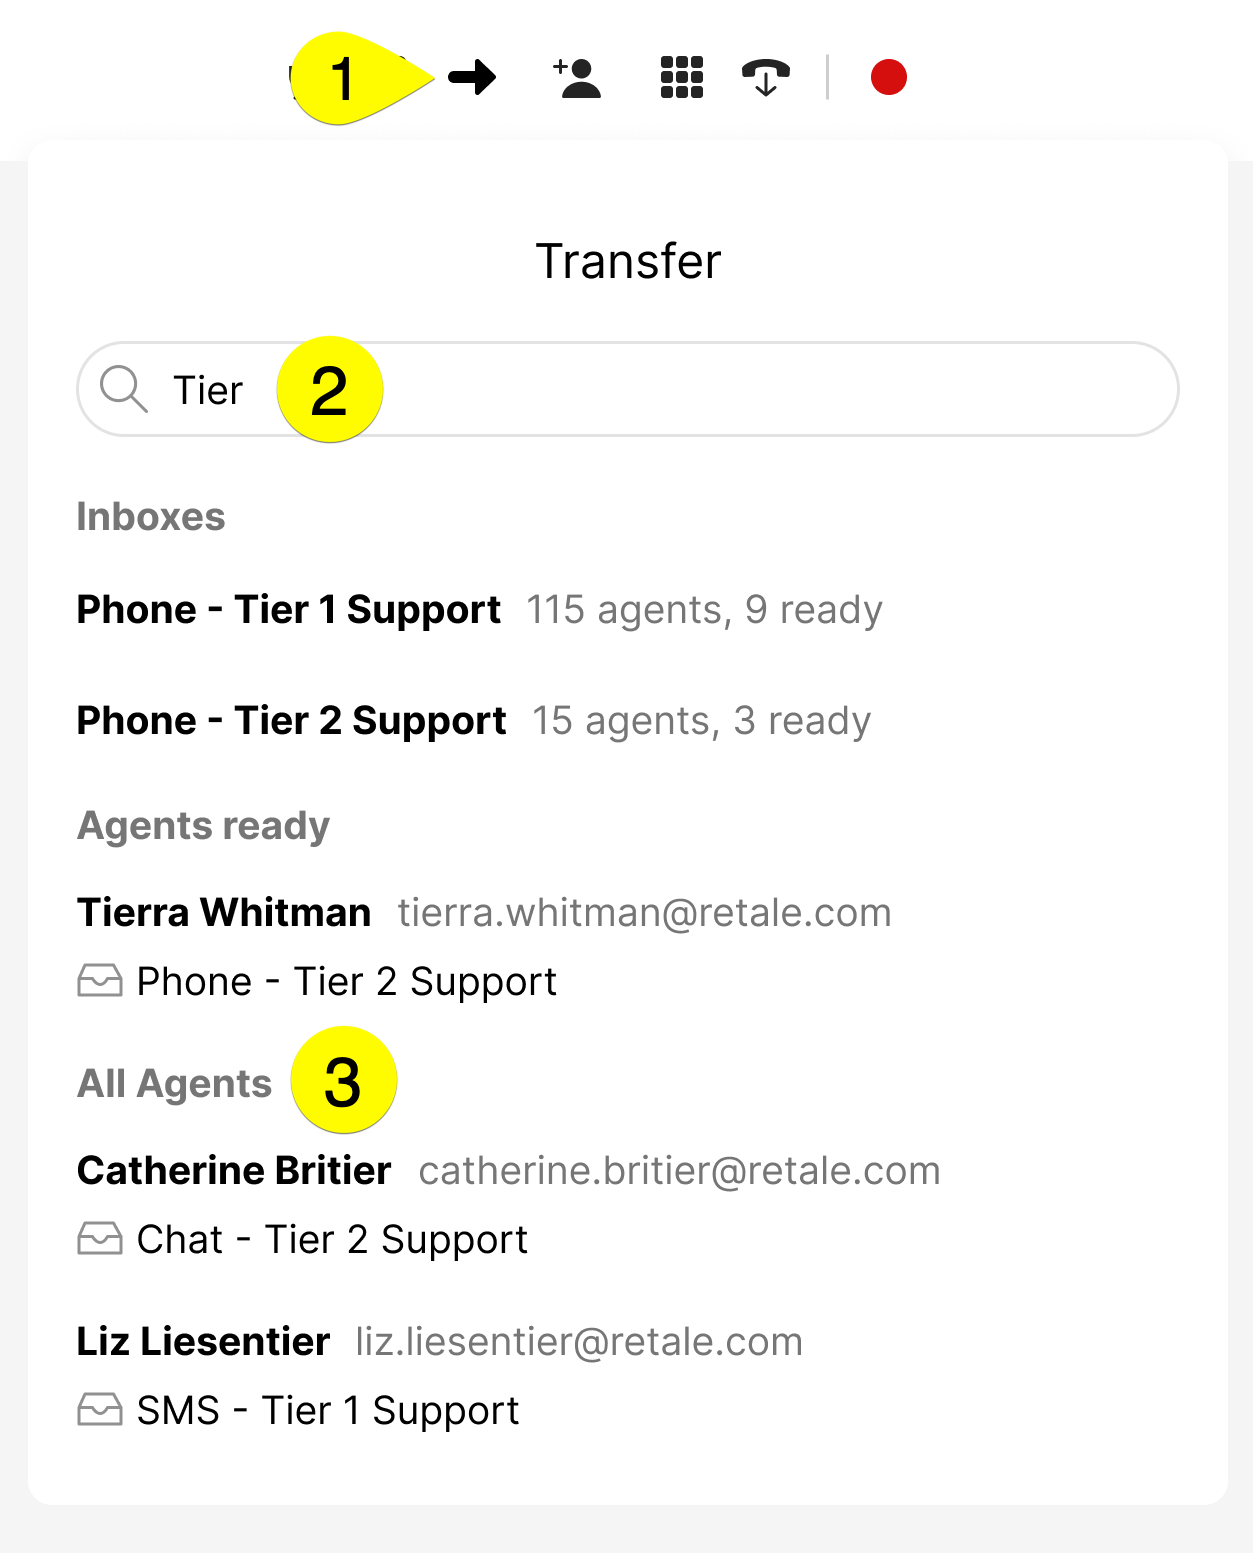
- From the Voice Control bar, click .
- Search for the Agent you want to transfer the Customer to by typing their name in the search box. Agents available to receive call transfers are listed under the Agents Ready section.
- Tip – The Agents Ready section doesn’t appear if no one is available on the Voice Channel.
- Click the Agent’s name to transfer the call.
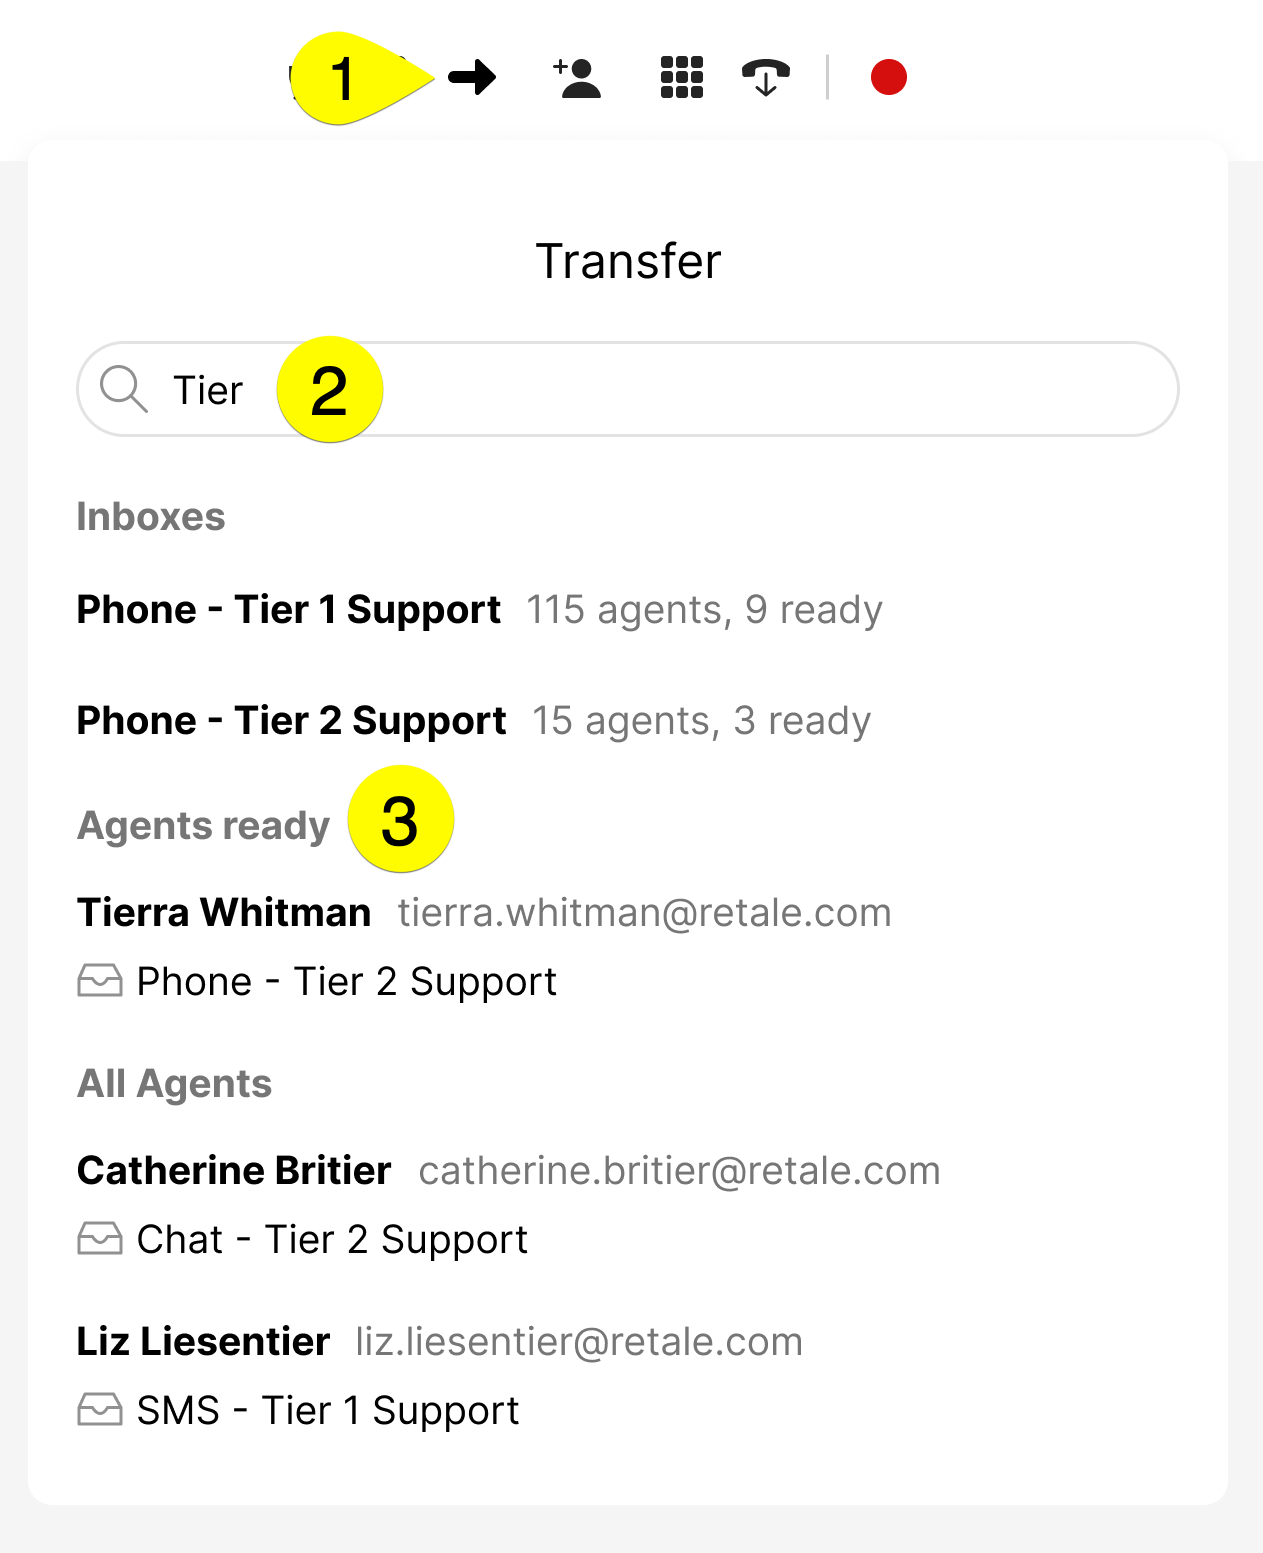
- Tip – Agents not available to receive a phone call (i.e., they are away or unavailable for Voice) will appear under the All Agents section. It will say “Unavailable” if you attempt to transfer the call if they are on another call, away, or not logged into Gladly.
- The receiving Agent will be notified of the call and can Accept or Decline the call.
- Agent picks up the call – Provide them with the context of the Customer’s issue. If the receiving Agent agrees to take the Customer, you can complete the transfer by clicking Complete. The Customer will be transferred to the Receiving Agent.
- Agent doesn’t pick up the call or says they can’t help the Customer – Cancel the transfer by clicking Cancel and then find another person. If you stop the transfer, click to bring the Customer back on the line.
- Agent doesn’t pick up – Click Find Another Agent to find another Agent to transfer the call to.

To learn how to transfer a call to a person who joined to coach or assist you, see Transfer the call to a person participating in the call.
Transfer to a Team Manager #
- From the Voice Control bar, click .
- Search for the Team Manager to whom you want to transfer the Customer by typing their name in the search box. They’ll appear under the All Agents section unless they’re available on the Voice Channel, which they’ll appear under Agents Ready.
- Tip – Team Managers not available to receive a phone call (i.e., they are away or unavailable for Voice) will still appear under the All Agents section. It will say “Unavailable” if you attempt to transfer the call if they are not logged into Gladly.
- The receiving Team Manager will be notified of the call and can Accept or Decline the call.
- Manager picks up the call – Provide them with the context of the Customer’s issue. If the receiving Agent agrees to take the Customer, you can complete the transfer by clicking Complete. The Customer will be transferred to the Receiving Agent.
- Manager doesn’t pick up the call or says they can’t help the Customer – Cancel the transfer by clicking Cancel and then find another person. If you stop the transfer, click to bring the Customer back on the line.
- Manager is unavailable – The Voice transfer list will say “Unavailable” if they’re not logged into Gladly.
To learn how to transfer a call to a person who joined to coach or assist you, see Transfer the call to a person participating in the call.
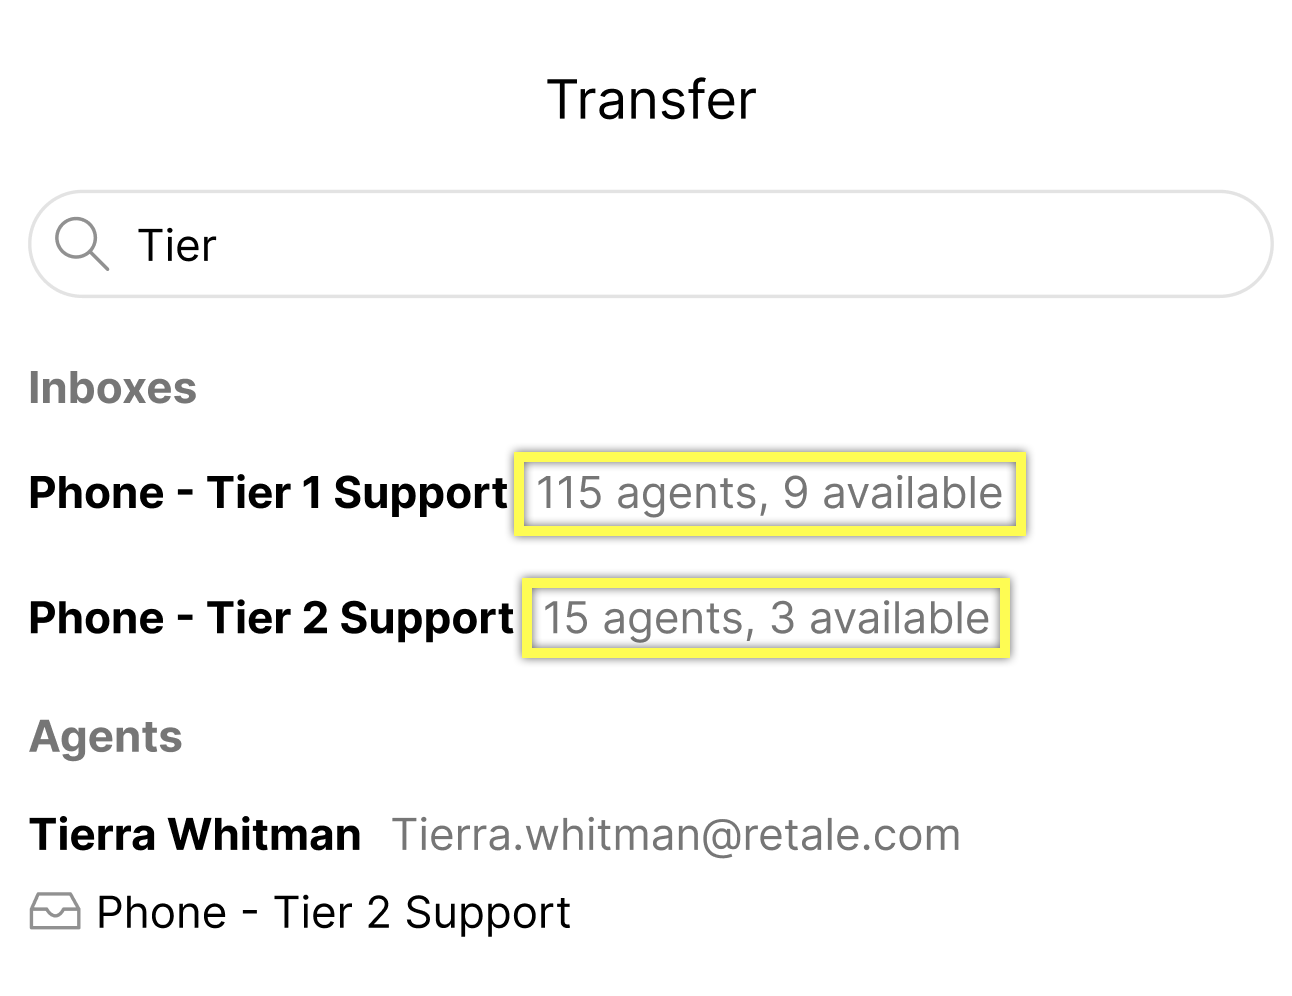
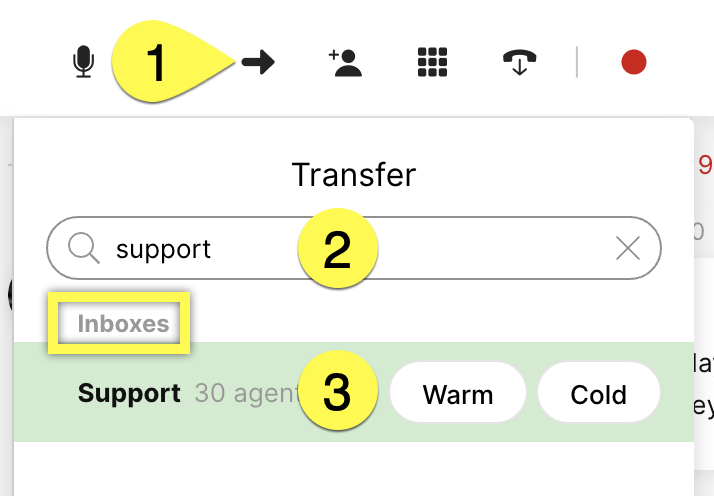
Transfer call to an Inbox #
- From the Voice Control bar, click .
- You can search for the Inbox you want to transfer the Customer to by typing the Inbox name in the search box.
- The number of Agents ready to accept a transfer is displayed. If none are available, the transferred call is put in the queue to wait for the next Agent.
- Note – Contact Gladly Support If the Inbox does not appear in the transfer list. This usually means the Inbox is not linked to a Voice queue.
- As you hover over the Inbox name, you’ll see options on the side to initiate either a Warm or Cold transfer.
- Warm Transfer – Speak to the Agent you’re transferring the Customer to before completing the transfer. This allows you to brief the Agent on the Customer’s issue rather than having the Customer repeat it.
- If no one in the Inbox picks up – The Routing Engine will find the next available Agent to dial. The warm transfer won’t go through if none are available, and no one will be dialed. You’ll be asked to pick another Inbox to transfer to or another transferee.
- Cold Transfer – Transfer the Customer directly to another Inbox and leave the call. The call is routed to another Agent in that Inbox.
- If no one in the Inbox picks up, the call will still be transferred to the Inbox. The Customer will wait in the Inbox until the next available Agent becomes available or until they are moved into the queue IVR (if used) experience.
- Warm Transfer – Speak to the Agent you’re transferring the Customer to before completing the transfer. This allows you to brief the Agent on the Customer’s issue rather than having the Customer repeat it.
- Complete the transfer by clicking the Complete.
Transfer outside of Gladly #
- From the Voice Control bar, click.
- Enter the phone number into the field titled Enter phone number.
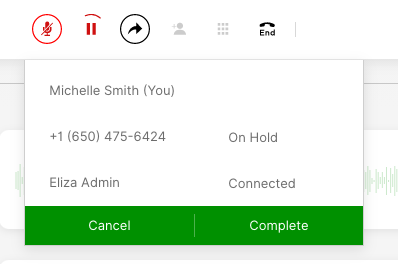
- Press ENTER (for Windows) or RETURN (for Mac), click the field titled ExternalNumber, then click Conference.
- Wait until the other party has connected. You’ll see the bar below say “Connected.”
- Introduce yourself to the other party and explain why you are calling.
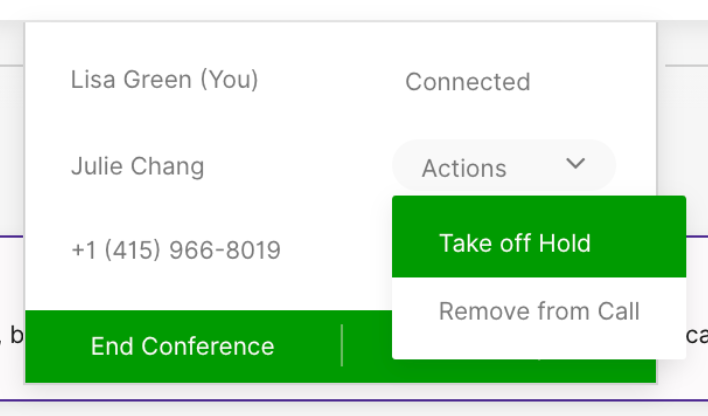
- Take the Customer off hold by clicking Actions, then click Take off Hold. This will create a call.
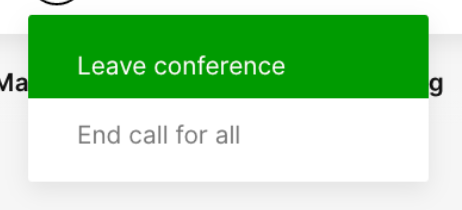
- Complete the transfer by leaving the conference call by clicking , then Leave conference.
 .
.
Start a conference call #
- From the Voice Control bar, click the.
- Enter the phone number into the field titled Enter phone number or SIP address.
- Press ENTER (for Windows) or RETURN (for Mac), click the field titled External, then click Conference.
- Add more participants to the call by clicking Add Participant.
Leave a conference call #
Click ![]() , then Leave conference. This allows you to leave a conference call you started without ending the call.
, then Leave conference. This allows you to leave a conference call you started without ending the call.